What’s Inside
- Plan Your Layout on the Floor First
- Stick to the Two-Inch Gap Rule
- Anchor with a Statement Piece
- Find the 57-Inch Eye Level Marker
- Calculate Furniture Clearance Metrics
- Embrace the Everyday Exhibits Approach
- Mix Frame Finishes and Textures Safely
- Add Non-Art Sculptural Additions
- Use Damage-Free Hanging Systems
- Integrate a Smart Digital Frame
- Establish a Cohesive Visual Thread
- Scale Up to Avoid Visual Clutter
- Utilize Earthy Tones for Cocooning
- Add Layered Lighting Without Wires
- Avoid Sun and Heat Damage
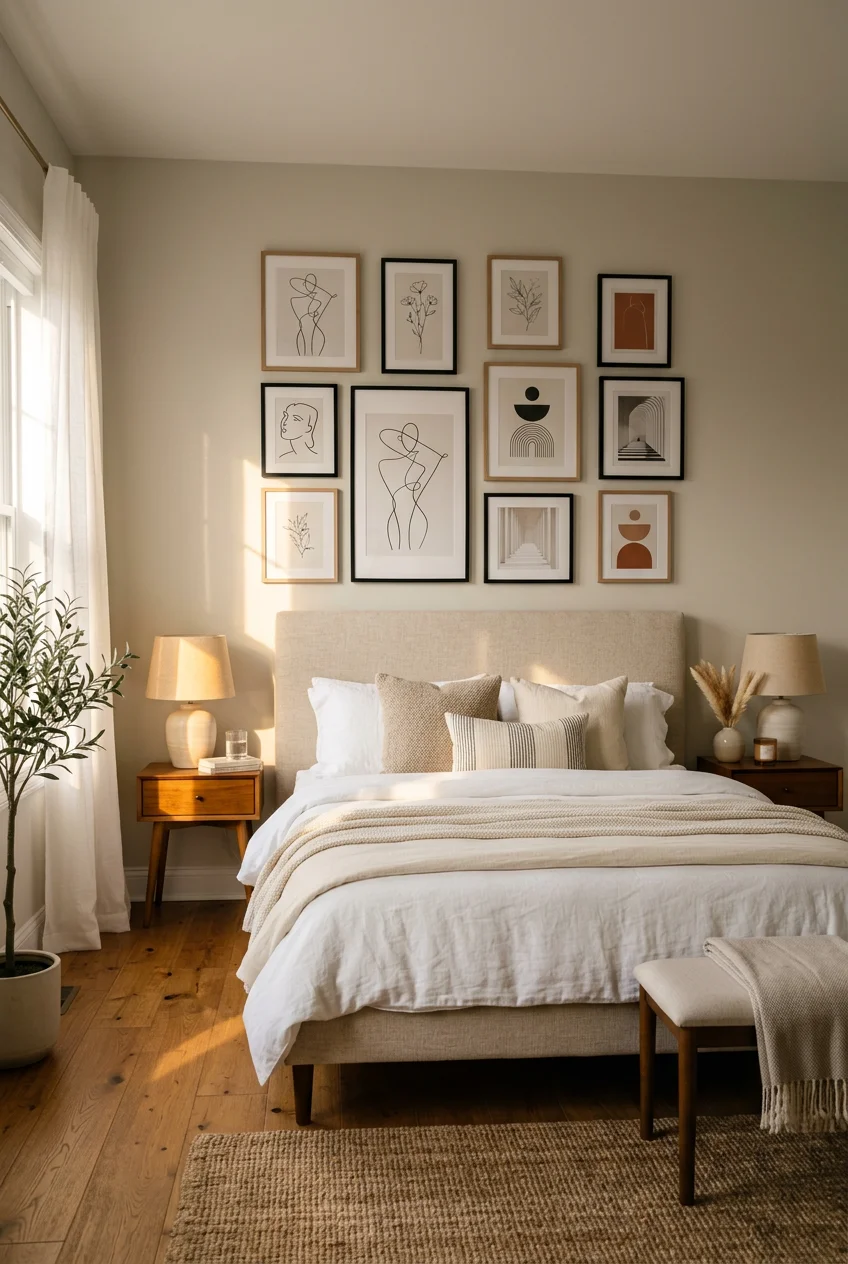
- Try Asymmetrical picture wall ideas bedroom aesthetic
- Incorporate Mirrors to Double the Depth
- Build a Corner Wrap-Around Gallery
- Keep Minimalist picture wall ideas bedroom aesthetic
Last October, I tried hanging a gallery wall above my headboard at 11 PM using nothing but scotch tape and blind confidence. Three framed prints crashed onto my forehead while I slept. I learned that the hard way. Finding the right look for a bedroom requires actual math, not just late-night inspiration. I spent the next six months testing layouts, measuring gaps, and patching drywall holes.
1. Plan Your Layout on the Floor First

Before you put a single hole in your drywall, clear off a 5×5 foot space on your bedroom floor. I skipped this last spring with six $12.99 Target frames. I eyeballed the spacing on the wall, and the result looked like a crooked staircase. Interior designers always warn against this. Lay out your entire arrangement on a rug or hardwood floor first. Cut out pieces of kraft paper to match the exact dimensions of your frames, like 8×10 or 11×14 inches. Arrange them until the composition feels balanced. This lets you step back, swap pieces around, and visualize the final look without committing to nail holes. It takes an extra 20 minutes. But it prevents the specific frustration of staring at a lopsided wall every time you try to fall asleep.
2. Stick to the Two-Inch Gap Rule

The golden rule for spacing is keeping exactly 2 to 3 inches between each frame. I used to randomly space my art, leaving huge 6-inch gaps that made my wall look like a sparsely populated bulletin board. Tight spacing forces the individual frames to read as one cohesive focal point rather than scattered debris. For smaller bedrooms, you can compress this gap to 1.5 inches for a crisp, unified finish. I cut a block of scrap wood to exactly 2 inches wide and use it as a physical spacer between frames while hanging. It’s faster than fumbling with a tape measure. When I bought a set of three 16×20 inch frames from Walmart last Tuesday ($18.50 each), using the spacer block ensured they lined up perfectly above my dresser. Consistent gaps prevent a chaotic mess.
3. Anchor with a Statement Piece

Start your layout with an anchor piece. This should be your largest or most vibrant artwork, typically something at least 18×24 inches. I made the mistake of starting my first gallery wall with a tiny 4×6 inch postcard, and the entire arrangement lost its center of gravity. Position your anchor slightly off-center to avoid a rigid, corporate look. Once that heavy visual weight is placed, arrange your smaller 8×10 and 5×7 frames around it to balance the composition. I currently use a 24×36 inch canvas print of a moody forest as my anchor. I picked it up at a local thrift store for $45. The dark green tones ground the entire wall. Building outward from one large piece prevents the final layout from feeling visually overwhelming. It gives your eye a clear place to land when you walk into the room.

upsimples Floating Shelves for Wall
A dependable everyday pick — upsimples Floating Shelves for Wall pulls in 46 ratings at 4.5 stars. Not flashy, just solid.
4. Find the 57-Inch Eye Level Marker

If you’re hanging a picture wall on an empty wall without furniture underneath, aim to center the entire arrangement at exactly 57 inches from the floor. This specific measurement represents the average human eye level. Galleries and museums use this exact height. I used to hang my art way too high, practically scraping the ceiling, which made my 8-foot bedroom ceilings feel cramped. To do this correctly, calculate the center point of your entire gallery layout, not just the middle frame. Measure 57 inches up from the baseboard and mark it with a pencil. Align the center of your paper template cluster with that mark. I bought a 25-foot Stanley tape measure for $9.98 specifically to stop guessing these heights. Hanging art at the proper level grounds the room and makes the artwork feel connected to the space rather than floating away.
5. Calculate Furniture Clearance Metrics

When placing a gallery wall above a headboard or a dresser, the 57-inch rule goes out the window. Instead, ensure the bottom edge of your lowest frame sits exactly 6 to 10 inches above the top of the furniture. I learned this the hard way after hanging a heavy oak frame 2 inches above my headboard. Every time I propped myself up to read, I smacked my head against the glass. The glass cracked, and I had to replace a $32 frame. Leaving a 6 to 10-inch gap prevents the art from floating awkwardly high while keeping it visually anchored to the furniture below. Last month, I helped my sister hang a grid of nine 8×8 inch square frames above her low-profile IKEA Malm dresser. We measured an 8-inch gap, and the arrangement immediately looked integrated into the bedroom architecture.
6. Embrace the Everyday Exhibits Approach

The trend for 2026 is moving away from perfectly matched grids toward a collected, relaxed style called Everyday Exhibits. This means mixing traditional framed prints with personal, tactile items. I started doing this after getting bored of my uniform black frames. I incorporated a dried eucalyptus bundle I picked up at Whole Foods for $6.99, tying it with twine and hanging it directly on a nail between two oil paintings. You can mix line drawings, oil portraits, textiles, and handwritten notes. The goal is to make the wall look like it evolved naturally over a decade. I have a small 3×5 inch sketch my niece drew on a napkin, framed in a cheap brass frame, sitting right next to a professional nature photograph. This variety creates a layered, lived-in texture that feels deeply personal and far more interesting than a store-bought set.

Fixwal Black Floating Shelves for Wall
Honestly, Fixwal Black Floating Shelves for Wall surprised me — sturdier than it looks in the photos, and over 43 buyers gave it 4.5 stars.
7. Mix Frame Finishes and Textures Safely

Instead of buying a box of identical frames, mix your frame finishes. The current aesthetic favors blending warm timber, matte black, and subtle metallics. I tried the all-matching route once, and my bedroom ended up looking like a hotel hallway. To mix finishes without creating chaos, stick to a formula: 60% one dominant material like light oak, 30% a secondary finish like matte black, and 10% an accent like antique brass. I source a lot of my frames from thrift stores, but I recently bought two 11×14 inch ribbed wood frames from Target for $16 each to break up the metal frames on my east wall. Pairing sleek, modern wood frames with ornate, vintage metallics creates a sophisticated tension. The contrast stops the eye and forces you to actually look at the individual pieces rather than letting them blur into one block. You might also like: 20 Creative Cozy Small Bedroom for Any Style
8. Add Non-Art Sculptural Additions

Go beyond flat paper and canvas. Integrating sculptural pieces adds necessary depth and casts interesting shadows. I rely heavily on flat woven baskets, small mirrors, or ceramic wall planters. Last winter, I bought a set of three shallow seagrass baskets from Costco for $24.99. I hung the smallest one, about 8 inches in diameter, right in the middle of my gallery wall. It breaks up the rigid straight lines of the rectangular frames. I also use small brass sconces that don’t require hardwiring. You can even mount a tiny 4-inch deep floating shelf to hold a trailing pothos plant. Adding three-dimensional items is the fastest way to make the wall feel custom. Just ensure these sculptural pieces don’t protrude more than 3 or 4 inches, or you’ll constantly bump into them when walking past your bed in the dark. You might also like: 20 Aesthetic Comfy Bedroom You Need to See
9. Use Damage-Free Hanging Systems

If you’re renting or paralyzed by the fear of ruining your drywall, Command Strips are the logical choice. I refuse to use nails for anything under 15 pounds now. For heavy frames, I use Command Heavy Duty Picture Hanging Strips. They claim to hold up to 20 lbs and fit 24×36 inch frames. An 8-pair pack costs about $12.48 at Walmart. I made the mistake of using generic foam tape once, and it ripped a 4-inch chunk of paint off my drywall when I tried to remove it. Stick to the name brand. For smaller 5×7 frames, the Command Medium strips work perfectly. The trick is to press them firmly against the wall for a full 30 seconds, then wait an hour before actually clicking the frame onto the wall side. Following that exact timing prevents the midnight frame crash. You might also like: 16 Glam Bedroom Decor for Every Budget

Fixwal Floating Shelves for Wall
A dependable everyday pick — Fixwal Floating Shelves for Wall pulls in 431 ratings at 4.5 stars. Not flashy, just solid.
10. Integrate a Smart Digital Frame

I was highly skeptical of digital frames, assuming they all looked like cheap 2005 tech with glowing, pixelated screens. Then I saw the Aura Carver frame in a friend’s house. I bought one for $149 during a sale. It has a matte finish screen that auto-adjusts to the room’s lighting, making the digital photos look incredibly close to printed matte paper. Integrating a 10.1-inch smart frame into your gallery wall allows you to rotate hundreds of photos without ever opening a frame back. I keep mine loaded with travel photos. It sits on a picture ledge mixed in with traditional static prints. It does require a power cord, so I positioned it directly above an outlet and painted the thin white cord the exact shade of my wall paint to camouflage it. It adds a subtle, dynamic element.
11. Establish a Cohesive Visual Thread

While mixing styles is highly encouraged, you still need a visual thread to tie the chaos together. Without a unifying element, your wall will look like a garage sale. This thread can be a consistent color palette, a common theme, or a shared matting style. I chose to use thick, oversized white mats for every single piece of art, regardless of the frame style. I buy large sheets of mat board from a craft store for $9.99 and cut them myself to save money. Even when I tear a cool editorial page out of a magazine I bought at Kroger, I mount it behind a massive 3-inch white mat. That consistent white border acts as visual negative space, giving the eye a rest and forcing all the mismatched art and frames to relate to one another in a deliberate way.
12. Scale Up to Avoid Visual Clutter

One of the most common mistakes is using too many tiny items. A wall covered in twenty 4×6 inch frames doesn’t look curated; it looks cluttered and anxious. I did this in my first apartment, and it made the room feel incredibly messy, no matter how clean my floors were. You need large-scale pieces to anchor the space. Swap out five small frames for one massive 24×36 inch poster. You can buy inexpensive digital printables on Etsy for $5 and have them printed at a local print shop for $18. I recently printed a large abstract watercolor to replace a cluster of tiny quotes I had above my vanity. The larger scale instantly calmed the room down. Use small pieces, 5×7 and under, only as accents to fill in the awkward gaps between your larger anchor pieces, never as the main event.

YUFLINX 16’’White Floating Shelves for Wall Set of 4
YUFLINX 16’’White Floating Shelves for Wall Set of 4 punches above its price — 645 buyers rated it 4.5 stars. I would buy it again.
13. Utilize Earthy Tones for Cocooning

The current bedroom aesthetic is all about cocooning, creating a warm, grounded space that feels safe and insulated. To achieve this with your art, pull in earthy color palettes. I swapped out my high-contrast black-and-white prints for warm terracotta, muted moss green, and soft clay tones. I found a beautiful 16×20 inch canvas print of a muted desert scene at Sprouts for $24.99. The warm ochre and rust colors completely changed the temperature of the room. Soft abstract canvas prints with heavy brushstroke textures work brilliantly for this. They don’t demand too much mental energy to look at, which is exactly what you want in a space designed for sleeping. Avoid neon colors or high-energy geometric patterns in the bedroom; they stimulate the brain when you’re trying to wind down and disrupt the peaceful environment you need at night.
14. Add Layered Lighting Without Wires

Lighting completely alters how a gallery wall looks at night. I used to rely solely on my overhead ceiling fan light, which cast harsh, flat shadows over my frames. I recently discovered rechargeable LED picture lights. I bought a 16-inch brass picture light on Amazon for $35.99 that mounts directly to the wall with two small screws. It operates on a remote and requires zero hardwiring. I mounted it above my large anchor piece. The warm 3000K light washes down over the art, creating a moody, high-end hotel vibe. Layered lighting highlights specific pieces and adds a massive amount of depth to the arrangement. It makes the artwork pop when the main lights are off. You get the sophisticated look of custom art lighting without having to hire an electrician or tear into your drywall to run cables.
15. Avoid Sun and Heat Damage

Preservation is boring but vital. I ruined a $120 limited-edition screen print by hanging it on a wall that received direct afternoon sunlight. Within 14 months, the vibrant blues faded to a sickly gray. UV rays will destroy paper and ink rapidly. Keep your gallery wall on a shaded wall, or ensure your windows have UV-blocking films. Similarly, never hang original art or delicate photographs directly above a heating vent or a radiator. The constant fluctuation in temperature and humidity will warp the paper and crack the frames. I learned this after a wooden frame above my baseboard heater split at the corner joints. If you must hang art in a sunny spot, spend the extra money on UV-protective acrylic glazing. It costs about $40 for an 18×24 inch sheet, but it actually saves the art inside from deteriorating.

AMADA HOMEFURNISHING Floating Shelves
Honestly, AMADA HOMEFURNISHING Floating Shelves surprised me — sturdier than it looks in the photos, and over 116 buyers gave it 4.5 stars.
16. Try Asymmetrical picture wall ideas bedroom aesthetic

If you hate rigid math, an asymmetrical layout is highly forgiving. When searching for picture wall ideas for a bedroom aesthetic, asymmetrical designs often look the most organic. Start with your anchor piece off to the lower left or right, and let the other pieces organically grow outward in a staggered formation. I used this method in my guest bedroom. I didn’t even use a paper template. I just started with a 16×20 inch frame on the left, then added a 12×12 inch square frame slightly higher on the right, maintaining that strict 2-inch gap between them. It looks like a cloud of art rather than a rigid box. This style is incredibly easy to add to over time. If I find a new 5×7 inch painting at a flea market, I just tack it onto the outer edge of the cluster.
17. Incorporate Mirrors to Double the Depth

Bedrooms can feel claustrophobic, especially if you have dark walls. Adding mirrors to your gallery wall bounces light around and creates the illusion of more space. I don’t mean a massive floor mirror; I mean small, uniquely shaped mirrors treated as art pieces. I bought a pack of three small brass-rimmed mirrors from Costco for $19.99. I mixed them into my photo wall on the dark wall opposite my window. When the morning sun hits them, it reflects light into the darkest corners of the room. I specifically look for mirrors with convex glass or antiqued, smoky finishes so they don’t look like bathroom mirrors glued to the wall. A 10-inch round mirror breaks up the sharp corners of square frames and adds a necessary reflective texture among all the matte paper and canvas hanging in your room.
18. Build a Corner Wrap-Around Gallery

Don’t restrict your gallery to a single flat plane. Wrapping a picture wall around an inward corner is a fantastic way to utilize dead space. I had an awkward empty corner between my closet door and the window. I started hanging small frames on one wall and intentionally carried the arrangement right across the 90-degree corner onto the adjacent wall. I used a mix of cheap 4×6 frames and beautiful greeting cards I bought at Trader Joe’s for $0.99 each. I framed the cards in floating glass frames. The trick to a corner gallery is keeping the pieces relatively small and ensuring the spacing remains consistent as it rounds the corner. It creates an immersive, wrap-around effect that draws you into that specific part of the bedroom, turning an awkward architectural quirk into a deliberate and highly custom design feature.
19. Keep Minimalist picture wall ideas bedroom aesthetic

Sometimes less is genuinely more. If a sprawling gallery stresses you out, focus on minimalist picture wall ideas for a bedroom aesthetic. Instead of 15 mismatched frames, use exactly three identical, oversized frames hung in a strict horizontal row. I did this above my king-size bed using three 24×36 inch thin black metal frames. I filled them with simple, single-line charcoal drawings on bright white paper. I bought the frames online for $42 each. The symmetry is incredibly calming. When executing a minimalist grid, your measurements must be flawless. A quarter-inch mistake will be glaringly obvious. I used a laser level to ensure the top edges were perfectly aligned. This approach provides maximum visual impact with minimal visual noise, which is ideal if your bedroom already has patterned wallpaper or highly textured bedding that commands attention.
Building a gallery wall requires patience and a tape measure. I spent years patching holes from failed layouts before I finally adopted the floor-template method. It took me years to figure out. Take your time, mix your textures, and don’t be afraid to hang a woven basket next to a formal oil painting. If you found these tips helpful, pin this article to your bedroom decor board for future reference.
Frequently Asked Questions
How far apart should I space frames on a bedroom picture wall?
The golden rule is to maintain exactly 2 to 3 inches between each frame. This tight spacing forces the individual pieces to read as one cohesive unit rather than scattered clutter.
How high should I hang my gallery wall?
If hanging on an empty wall, center the entire arrangement at 57 inches from the floor, which is average eye level. If hanging above furniture, leave a 6 to 10-inch gap above the piece.
Can I hang a picture wall without using nails?
Yes, Command Heavy Duty Picture Hanging Strips are highly effective. They can hold frames up to 20 lbs and 24×36 inches without damaging your drywall, making them perfect for renters.
What is the Everyday Exhibits trend for gallery walls?
This trend moves away from perfectly matched grids and instead mixes traditional framed art with tactile, personal items like dried flowers, small mirrors, woven baskets, and handwritten notes for a collected, lived-in look.
