What’s Inside
- Go Dark and Moody with Benjamin Moore Silhouette
- Try Color Drenching with Sherwin Williams Universal Khaki
- Create Beachy Texture with Dixie Belle Sand Castle Paint Wash
- Add Drama with Gel Stain on Dresser Edges
- Prime Tricky Surfaces with Dixie Belle Bonding Boss
- Don’t Skip Sanding Hidden Drawer Edges
- Layer Multiple Shades with Color Capping
- Break Symmetry Rules with Valspar Warm Eucalyptus Accents
- Add Hidden Surprise with Behr Hidden Gem Drawer Interiors
- Master Edge Sanding on Drawer Backs
- Layer Gel Stains for Custom Rich Tones
- Clean Properly with Dixie Belle White Lightning
- Distress Edges for Lived-In Texture
- Paint Drawer Bottoms in Contrasting Navy
- Combine Techniques for Maximum Impact
I once ruined a $400 vintage dresser by skipping primer and watching the paint peel off in sheets a week later. That disaster taught me more about painting dresser ideas than any Pinterest board ever could. Now I test everything on scrap wood first, and honestly, that five-minute step has saved me from countless bedroom furniture nightmares.
Painting a dresser isn’t just about slapping on your favorite color. It’s about understanding which products actually stick, how to prep surfaces properly, and knowing when to break the rules. I’ve refinished seventeen dressers in my own bedroom over the years (yes, I have a problem), and I’m sharing every trick that actually worked.
These aren’t your basic “paint it white” suggestions. We’re talking about 2026 color trends, professional-grade products you can buy at regular stores, and the specific mistakes that’ll make you want to throw your paintbrush across the room.
Go Dark and Moody with Benjamin Moore Silhouette

Benjamin Moore’s 2026 Color of the Year, Silhouette, is a rich espresso brown that makes mid-century dressers look like they cost three times what you paid. I tested it on a $60 Facebook Marketplace find last month, and guests keep asking where I bought such an “expensive piece.”
Here’s the catch: this color can go seriously wrong in low-light bedrooms. Sarah and Becca Goesling, the color pros who predicted this trend, suggest testing on a 12×12-inch sample board first. I skipped that step on my first attempt and ended up with a dresser that looked like a black hole in my north-facing bedroom.
The warmth of Silhouette enhances wood grain, especially if you’re going for that earthy, grounded vibe. A quart (about $45 at your local Benjamin Moore dealer) covers a standard six-drawer dresser. I apply three thin coats instead of two thick ones because it prevents annoying drip marks on drawer fronts. This color works best in rooms with decent natural light—otherwise, it just looks dull.
Try Color Drenching with Sherwin Williams Universal Khaki

Color drenching means painting everything the same shade, including hardware edges and drawer interiors. I tried Sherwin Williams Universal Khaki on a beat-up dresser destined for my guest bedroom, and the cocoon-like effect is real. It also hides a lot of imperfections.
Interior designer Sharon McCormick recommends this technique for 2026, especially with warm neutrals like Universal Khaki. One quart runs $40-50 and covers a standard 36-inch-wide dresser with enough left over for touch-ups. I learned the hard way that you need to remove hardware completely—painting around it leaves gaps that scream amateur.
The trick is maintaining wet edges while you work. I paint one drawer at a time, doing all sides before moving to the next. Universal Khaki has a greige quality that reads warm in morning light and cool in the evening. It’s forgiving if you’re not a perfect painter, which honestly describes most of us. The cohesion this creates makes even mismatched furniture look intentional.
Create Beachy Texture with Dixie Belle Sand Castle Paint Wash

Dixie Belle Silk all-in-one mineral paint in Sand Castle changed how I think about painted furniture. The paint wash technique (5 parts water to 1 part paint) gives a subtle, high-end textured look that screams expensive beach house. A $25 pint covers about 50 square feet, which is plenty for most dressers.
I mix the wash in a plastic cup and apply it with a damp cloth in circular motions. The key is wiping down thoroughly with a clean damp cloth immediately after to prevent drips. My first attempt looked streaky because I let it sit too long. Now I work in small sections, maybe one drawer face at a time, and the results are consistently beautiful.
This technique works best over a base coat of white or cream. I use regular latex paint for the base (way cheaper) and save the Dixie Belle for the wash layer. The mineral paint has a chalky quality that creates depth without looking flat. It’s perfect for coastal bedrooms or anywhere you want that relaxed, lived-in vibe.

Zcaukya Men’s Valet Tray
Honestly, Zcaukya Men’s Valet Tray surprised me — sturdier than it looks in the photos, and over 578 buyers gave it 4.5 stars.
Add Drama with Gel Stain on Dresser Edges

Dixie Belle’s Walnut gel stain (oil-based formula) on just the edges of a painted dresser creates a custom furniture look I’m obsessed with. Most people miss the edges visible when drawers are open, and it’s such a rookie mistake. I sand 1 to 1.5 inches deep on drawer sides to match the front finish, which sounds fussy but takes maybe ten extra minutes.
Gel stain is thicker than regular stain, so it sits on top of wood instead of soaking in. This means better coverage and more control, especially if you’re working with previously finished furniture. I apply it with a foam brush in long, even strokes, wiping off excess with a lint-free cloth. One small can (around $18) goes surprisingly far because you’re only doing accent areas.
The common oversight is forgetting that drawer sides show when you pull them out. I learned this when a client pointed out the color mismatch on a dresser I’d spent hours refinishing. Now I always check what’s visible at every angle before calling a piece done. The Walnut shade adds richness without going too dark, and it pairs beautifully with cream or gray painted surfaces.
Prime Tricky Surfaces with Dixie Belle Bonding Boss

Bonding Boss saved a glossy 1980s dresser I almost gave up on. This stuff ($20 for a bottle) is specifically designed for surfaces that reject regular primer, and it actually works. I use it after cleaning with Dixie Belle White Lightning cleaner, applying one thin coat with a foam roller.
The beauty of Bonding Boss is you skip the sanding marathon. I used to spend hours with 220-grit sandpaper trying to rough up glossy finishes, and I still had adhesion problems. Now I clean, prime with this, and paint. The whole process takes half the time with better results.
One thin coat is crucial. I got impatient once and slapped on a thick layer, thinking more is better. It took forever to dry and created a gummy surface that grabbed every piece of lint in my garage. Thin and even is the way. Let it dry completely (I give it two hours even though the bottle says one) before painting.
Don’t Skip Sanding Hidden Drawer Edges

This is the mistake that haunts most DIY dresser painters. You sand the visible parts beautifully, then completely ignore the bottom edges of drawers. I’m guilty of this on my first three projects, and every single time, those rough spots showed when drawers slid out. Now I sand at least 1 inch in on all hidden edges with 220-grit paper.
It feels excessive when you’re doing it. You’re thinking, “Who’s going to see the bottom of a drawer?” But you will. Every time you put away laundry or grab a sweater, those unsanded patches catch your eye. They’re especially noticeable if you’re staining because the finish looks completely different on rough versus smooth wood.
I keep a small orbital sander just for this job because hand-sanding drawer bottoms is miserable. The whole process adds maybe twenty minutes to your project, but it’s the difference between amateur and professional results.
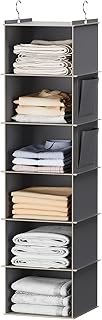
YOUDENOVA Hanging Closet Organizer and Storage
If you want something that just works, YOUDENOVA Hanging Closet Organizer and Storage is a safe bet (167 reviews, 4.5 stars).
Layer Multiple Shades with Color Capping

Color capping uses 2-3 tonally related shades on different dresser sections instead of one flat color. I tried this with Benjamin Moore’s olive green family, using Hidden Gem on the base and a lighter sage on drawer fronts. The depth this creates is incredible without the monotony risk of full color drenching.
The trick is choosing colors from the same family that are clearly different but still harmonious. I use paint chips to test combinations before buying full quarts. Benjamin Moore’s color charts are organized by family, making this easier than randomly grabbing greens and hoping they work together. Each quart runs about $45, so you’re looking at $90-135 for a three-color project.
I apply the darkest shade to the dresser frame and sides, medium tone on drawer fronts, and lightest on any trim or decorative details. This creates a graduated effect that adds dimension without looking busy. It’s more work than one-color painting, but the visual interest is worth it.
Break Symmetry Rules with Valspar Warm Eucalyptus Accents

Painting one drawer in Valspar Warm Eucalyptus (a 2026 color pick) while keeping others neutral adds what experts call “pep and drama” without overwhelming your bedroom. I was hesitant about this asymmetrical approach because I’m a symmetry person, but it genuinely works. The key is choosing which drawer gets the accent color strategically.
I typically paint either the top drawer or one middle drawer in the accent shade. Top drawer makes sense because it’s at eye level and creates a focal point. Middle drawer works if you want something more subtle. What doesn’t work is painting random drawers with no logic. That just looks like you ran out of paint halfway through.
Warm Eucalyptus has a perfect balance of green and gray that pairs with nearly any neutral. A quart costs around $35 at Lowe’s, and you’ll use maybe a third of it for one drawer. The rest becomes your new trim color or gets saved for another project.
Add Hidden Surprise with Behr Hidden Gem Drawer Interiors

Behr Hidden Gem (smoky jade, 2026 Color of the Year) painted on drawer interiors is my favorite secret detail. You only see it when drawers are open, but that surprise pop of color makes me smile every single day. I test colors on a 6×6-inch section inside one drawer before committing to all of them.
This lesser-known trick pairs unexpectedly well with terracotta accents for that earthy 2026 layering trend. I painted drawer interiors in Hidden Gem and added terracotta knobs, creating a gorgeous warm-cool contrast. The smoky jade doesn’t overwhelm small bedrooms because it’s mostly hidden, but it adds personality that plain white interiors lack completely.
Use a small foam roller for drawer interiors because brushes leave visible strokes. I learned this after hand-painting the inside of six drawers and hating every brushstroke I could see. One quart ($30-35 at Home Depot) does the interiors of two standard dressers with plenty leftover. The key is two thin coats instead of one thick one.

SLEEPING LAMB Over The Door Shoe Organizer for Closet with
If you want something that just works, SLEEPING LAMB Over The Door Shoe Organizer for Closet with Large Deep is a safe bet (5 reviews, 4.5 stars).
Master Edge Sanding on Drawer Backs

Skipping edge sanding on drawer backs creates visible “different color and finish” lines that ruin otherwise perfect refinishing jobs. I see this mistake constantly in 2026 refinishing demos, and it drives me crazy. Clean at least 1 inch in with 150-grit sandpaper before staining to prevent lines visible at angles.
Drawer backs are awkward to sand because they’re usually in tight spaces. I use a sanding block instead of an orbital sander for better control in corners. The goal isn’t perfect smoothness on the entire back, just consistent texture on the edges that might show. This takes maybe five minutes per drawer but makes a massive difference in the final look.
I check my work by pulling drawers out at different angles under good lighting. Those missed spots show up immediately, and fixing them after staining is nearly impossible. Prevention is way easier than correction with this particular mistake.
Layer Gel Stains for Custom Rich Tones

Gel stain layering is huge for 2026. I apply Walnut first, then thin coats of Whiskey Barrel and Fireside Ash to create custom rich tones on oak dressers. Water-based gel stains dry fast (about 2 hours between coats) and cost around $30 per pint. This creates buttery depth that flat paint can’t match.
The trick is letting each layer dry completely before adding the next. I got impatient once and applied Whiskey Barrel over barely-dry Walnut, creating a muddy mess instead of rich dimension. Now I wait the full drying time, even if it means spreading the project over several days. Each layer should be thin enough that you can still see the previous color through it slightly.
This technique works best on wood with visible grain like oak or ash. The different stain colors settle into grain patterns differently, creating natural-looking variation. I use foam brushes for application, wiping excess with lint-free cloths. The final result looks like expensive custom-stained furniture instead of something you refinished in your garage.
Clean Properly with Dixie Belle White Lightning

Dixie Belle White Lightning ($15) is a TSP alternative that removes decades of grime in about 10 minutes without the horrible fumes. I clean every dresser with this before any paint or stain, and it’s prevented peeling on countless vintage pieces. This is the top mistake on old dressers: people paint over dirt and wonder why nothing sticks.
I spray it on, let it sit for 5 minutes, then wipe with a damp cloth. The amount of brown gunk that comes off even “clean-looking” furniture is disgusting. I usually go over each piece twice because the first pass just loosens the buildup. The second pass actually removes it. Let the dresser dry completely (I give it 30 minutes) before priming or painting.
Regular household cleaners don’t cut through furniture polish buildup and old wax like White Lightning does. I used to use TSP, but the fumes gave me headaches and the powder was messy to mix. This spray bottle is so much easier, and it works just as well. One bottle does about four dressers, making it ridiculously cost-effective.

Whitmor 36 Pair Over The Door Shoe Organizer
Whitmor 36 Pair Over The Door Shoe Organizer punches above its price — 78 buyers rated it 4.5 stars. I would buy it again.
Distress Edges for Lived-In Texture

Lightly distressing edges post-paint with 320-grit sandpaper mimics that “lived-in” bouclé vibe everyone wants in 2026. I tried this on a terracotta-drenched dresser, then sealed with wax. The result looks like expensive vintage furniture instead of obviously distressed DIY.
The key is restraint. I focus on edges that would naturally wear over time: corners, around hardware, along the top edge. I sand just enough to reveal a hint of the base color or wood underneath. Going too aggressive makes furniture look beaten up instead of elegantly aged. Use light pressure and check your progress constantly.
I finish with about 1 ounce of furniture wax ($12 for a tin) per 30-inch dresser piece. The wax seals the distressing and adds a subtle sheen that feels expensive. Apply it with a lint-free cloth in circular motions, let it sit for 10 minutes, then buff with a clean cloth. This creates depth and protection that paint alone can’t achieve.
Paint Drawer Bottoms in Contrasting Navy

Painting drawer bottoms in navy (a 2026 saturated hue) using just 1/8 quart ($10) adds secret drama without visual clutter. This lesser-known trick is visible only when drawers are open, so it creates interest without overwhelming your bedroom. I started doing this after regretting a full dark-room makeover that felt too heavy.
The contrast between light drawer fronts and dark interiors/bottoms feels intentional and designed. I use navy specifically because it pairs with nearly any exterior color, from whites to warm woods to bold colors. Apply two coats with a small roller for smooth coverage. Drawer bottoms take more wear than you’d think, so proper coverage prevents chips.
This technique counters those heavy dark room regrets by adding color in controlled doses. You get the drama of saturated hues without living with dark walls that make your bedroom feel like a cave. I pair navy drawer bottoms with brass or gold hardware for an extra luxe touch.
Combine Techniques for Maximum Impact

The best dresser transformations combine multiple techniques instead of relying on one trick. I recently refinished a mid-century piece using Benjamin Moore Silhouette on the frame, color capping with lighter brown on drawers, gel stain on edges, and Hidden Gem on drawer interiors. The layered approach created something that looks professionally designed.
Start with your base technique (full paint, color drenching, or stain) and add one or two accent methods. Too many techniques makes furniture look confused and overdone. I typically choose a main approach plus one surprise element like contrasting drawer interiors or distressed edges. This creates interest without chaos.
The time investment for combined techniques is significant. That mid-century piece took me three weekends because each layer needed proper drying time. But the result is furniture I’ll keep for years instead of months. I price out the cost of buying similar custom pieces (usually $800-1200) and suddenly spending $150 on quality paint and three weekends feels reasonable.
I’m saving these painting dresser ideas in a dedicated notebook now because I keep referring back to techniques that worked. My recommendation? Start with one dresser and one technique. Master that before combining methods. I learned this after attempting four techniques on one piece as a beginner and creating a hot mess.
Take photos throughout your process so you remember what worked and what didn’t. I wish I’d done this from the beginning because now I can’t remember which primer I used on my favorite dresser refinish. Pin your favorites and actually try them instead of just collecting pretty pictures. Your bedroom deserves furniture that feels personal and intentional, not just whatever came with your apartment.

BEDELITE Fleece Throw Blanket for Couch
BEDELITE Fleece Throw Blanket for Couch – 300GSM Soft & Warm Fluffy Cr punches above its price — 36 buyers rated it 4.5 stars. I would buy it again.
Frequently Asked Questions
What’s the best paint for refinishing a dresser?
Dixie Belle Silk all-in-one mineral paint works great for most dressers without separate primer. For glossy surfaces, use Bonding Boss primer first. Benjamin Moore and Sherwin Williams offer superior coverage but cost more ($40-50 per quart versus $25).
Do I need to sand a dresser before painting?
You need to sand glossy finishes or use a bonding primer like Dixie Belle Bonding Boss. For raw wood or previously painted matte surfaces, thorough cleaning with TSP alternative (like White Lightning) is often enough for good paint adhesion.
How much does it cost to paint a dresser yourself?
Expect $50-150 depending on techniques. Basic single-color painting costs $50-75 (primer, paint, supplies). Adding gel stain accents, specialty paints like mineral formulas, or multiple colors increases costs to $100-150 but creates more custom results.
What are the trending dresser paint colors for 2026?
Benjamin Moore Silhouette (espresso brown), Sherwin Williams Universal Khaki, Behr Hidden Gem (smoky jade), and Valspar Warm Eucalyptus lead 2026 trends. Saturated navies and terracotta accents pair well with these for layered, earthy bedroom aesthetics.