What’s Inside
- 1. Install the Double Ring Crystal Flush Mount for Low Ceilings
- 2. Calculate Your Lumens Before You Buy Anything
- 3. Stick to 2700K-3000K Color Temperature
- 4. Go Big with the Triple Ring Floating Ceiling Light
- 5. Start with Your Ceiling, Not Your Furniture
- 6. Layer with Dimmable LED Panels
- 7. Diffuse LED Strips in Ceiling Coves
- 8. Command Attention with Oversized Statement Chandeliers
- 9. Incorporate Biophilic Tunable White Technology
- 10. Avoid Recessed Downlights with Visible LEDs
- 11. Position Linear Brass Chandeliers Horizontally
- 12. Add Depth with Triple-Tier Modern Chandeliers
- 13. Install Canopy-Less Oversized Pendants
- 14. Combine Curved Brass Elements for Moody Spaces
- 15. Mix Metals with Confidence
- 16. Consider Fixture Weight Before Installation
- 17. Use Smart Bulbs for Instant Flexibility
- 18. Pay Attention to Shade Direction
- 19. Match Your Fixture to Your Ceiling Height
- 20. Don’t Forget About Bulb Accessibility
I spent three months staring at my boring bedroom ceiling before realizing that bedroom ceiling lighting was the missing piece to my entire design. Not the throw pillows, not the accent wall, but that massive expanse of white above my head that I’d completely ignored. Once I swapped my builder-grade flush mount for something with actual personality, the whole room felt different. Like I’d checked into a boutique hotel instead of collapsing into the same tired space.
Most people treat ceiling fixtures as an afterthought, grabbing whatever matches at the hardware store. That’s backwards. Your ceiling light sets the mood for everything else, and in 2026, designers are finally giving overhead fixtures the attention they deserve. I’m sharing twenty specific options that actually work, with real measurements and price points, because vague inspiration boards never helped anyone.
1. Install the Double Ring Crystal Flush Mount for Low Ceilings

If you’ve got ceilings under 8 feet, you know the struggle of finding bedroom ceiling lighting that doesn’t make you feel like you’re sleeping in a cave. I discovered the Double Ring Crystal Flush Mount from 7Pandas after a disastrous attempt with a chandelier that hung so low my husband kept walking into it. This fixture drops only 6 inches from your ceiling, which is crucial when you’re working with limited vertical space.
The chrome finish with faceted crystals creates this hotel-lobby glow without the bulk. I was skeptical about crystals feeling too formal for a bedroom, but the way light refracts through them at night is honestly magical. It delivers ambient light that fills the room without harsh shadows. The common mistake here is choosing fixtures that hang 12+ inches down, which makes already-low ceilings feel oppressive. This flush mount style gives you elegance without sacrificing headroom, and it works beautifully as a focal point even when you can’t go dramatic with height.
2. Calculate Your Lumens Before You Buy Anything

Here’s something most people get completely wrong: they pick bedroom ceiling lighting based on looks alone, then wonder why their room feels like a dungeon or an interrogation chamber. You need 1,500-2,000 lumens total for optimal bedroom lighting, according to actual lighting experts. This range works for rooms up to 200 square feet, which covers most standard bedrooms.
I learned this the hard way after installing a gorgeous fixture that put out maybe 800 lumens. Finding clothes in my closet every morning became an actual workout for my eyes. The sweet spot depends on your room size, but don’t go below 1,500 unless you enjoy stumbling around in dim light. Pro tip: check the lumens rating on the bulbs or integrated LEDs before you commit to a fixture. Many decorative options look stunning but deliver pathetic light output. If the product listing doesn’t mention lumens at all, that’s usually a red flag. You can always dim bright lights down, but you can’t magically brighten a weak fixture without swapping the whole thing.
3. Stick to 2700K-3000K Color Temperature

Color temperature is where I see people sabotage their bedroom comfort constantly. You want 2700K-3000K for bedroom ceiling lighting, which gives you that warm white glow. Anything above 4000K ventures into cool, bluish territory that absolutely murders your ability to wind down at night. I once installed 4500K bulbs because they looked “crisp” in the store, and I swear my sleep quality tanked within days.
The science backs this up. Cool tones suppress melatonin production, which is great for your kitchen at 6 AM but terrible for your bedroom at 10 PM. When you’re shopping for LED flush mounts or any ceiling fixture, the color temperature is usually listed on the box or in the specs. Look for “warm white” or “soft white” descriptions. Most quality LED options let you choose your color temp, so don’t settle for whatever comes default. This is especially important in multi-use bedrooms where you might work during the day. I actually keep my ceiling light at 3000K and use warmer task lighting at night to layer the ambiance.

TJOY 100ft Smart Led Strip Lights for Bedroom
TJOY 100ft Smart Led Strip Lights for Bedroom has been one of the most consistently praised picks in this category. 54 reviewers averaged 4.5/5.
4. Go Big with the Triple Ring Floating Ceiling Light

Master bedrooms over 150 square feet need bedroom ceiling lighting with serious presence, and the Triple Ring Floating Ceiling Light from 7Pandas delivers exactly that. I installed the black finish version in my primary bedroom last year, and it completely changed how the space feels. The interlocking rings create this contemporary, almost sculptural look that works whether your style leans modern or transitional.
At $150-250, it’s priced right in that sweet spot where you’re getting quality without the boutique markup. The balanced glow from multiple rings means no dark corners or weird shadows. What I love most is how it ties the whole room together without overwhelming everything else. Common mistake: people size down their ceiling fixtures in large rooms, thinking they’ll feel less intrusive. Wrong. An undersized light in a spacious bedroom just looks lost and fails to anchor the design. This triple ring style gives you enough visual weight to define the space while the open design keeps it from feeling heavy. It works especially well in open-layout bedrooms where you need something substantial.
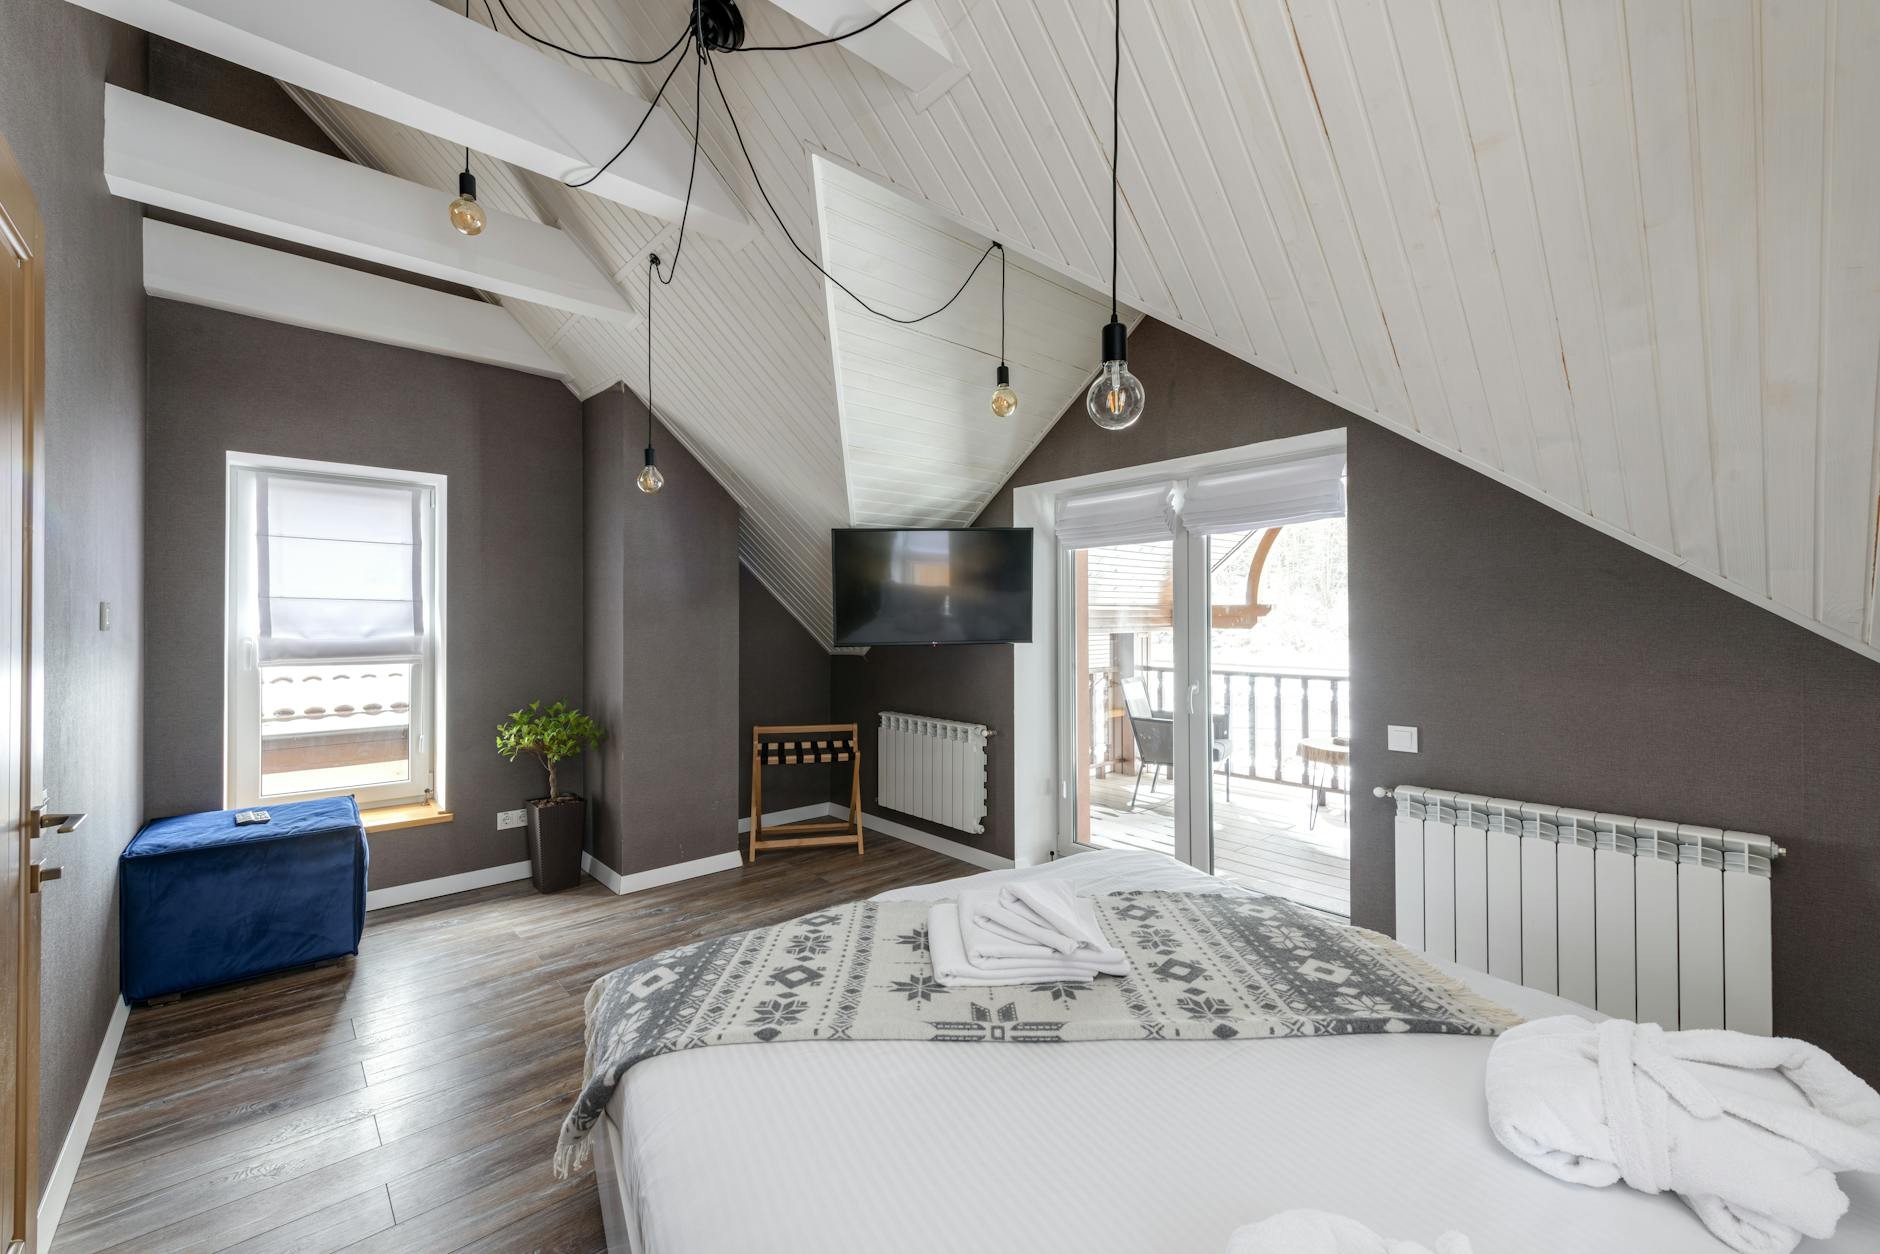
5. Start with Your Ceiling, Not Your Furniture

This flips conventional design advice completely, but designers at Homed-it are pushing a “ceiling first” approach for 2026. Instead of arranging furniture and then adding bedroom ceiling lighting as an afterthought, you choose a statement fixture first and let it dictate your layout. I tried this in my guest room with a linear brass chandelier, and it honestly made decorating so much easier.
Large chandeliers define your bed placement and establish room scale before you commit to anything else. Think about it: your ceiling fixture is visible from every angle, but you can’t see your nightstand from across the room. The old background-lighting approach treated ceilings like blank space to ignore. Now we’re using them as the fifth wall, which sounds cheesy but makes total sense once you experience it. This works especially well if you’re starting from scratch or doing a complete bedroom refresh. Pick your showstopper ceiling piece, center it where you want your bed, then build outward. It structures the entire room in a way that feels intentional instead of haphazard.
6. Layer with Dimmable LED Panels

Single overhead fixtures are officially outdated, according to Veranda experts who actually know what they’re talking about. You need layers, and dimmable LED panels are the secret weapon for bedroom ceiling lighting that adapts to your mood. I’m talking about CCT adjustable panels that shift from 3000K to 6500K, outputting around 2,000 lumens, priced between $50-100.
The beauty here is mixing ceiling sources at different heights and intensities. Your main fixture provides general illumination, but these panels let you create functional task lighting or dial everything down for a flattering, relaxed glow. I installed two slim LED panels flanking my main chandelier, and now I can adjust the room from “getting ready for work” brightness to “reading in bed” softness without switching fixtures. The common pitfall is relying on one harsh overhead light that either blinds you or leaves you squinting. Layering gives you control. Pro tip: make sure whatever panels you choose are actually dimmable. Some cheap LEDs claim dimming capability but flicker or hum when you lower them. Spend the extra $20 for quality drivers.

MYPLUS Under Cabinet Led Lighting
MYPLUS Under Cabinet Led Lighting has been one of the most consistently praised picks in this category. 45 reviewers averaged 4.5/5.
7. Diffuse LED Strips in Ceiling Coves

If you want to eliminate glare hotspots completely, LED strips in ceiling coves with frosted aluminum channels are your answer. This is a 2026 trend from Flexfire that I’ve become obsessed with. The indirect lighting method softens everything, creating this gentle wash on your walls without any visible LED dots or harsh reflections.
I added strips to the tray ceiling in my bedroom, and the difference is dramatic. Instead of light blasting down directly, it bounces off the ceiling first, which naturally diffuses it. The frosted channels are critical because bare LED strips create uneven lighting with visible diodes. That looks cheap and unfinished. This approach works beautifully for ambient bedroom ceiling lighting when you don’t want any fixture to be the focus. It’s also surprisingly affordable. Quality LED strips with proper channels and a decent controller run $80-150 for an average bedroom. The installation takes some patience if you’re DIYing it, but the result is that high-end hotel effect where you can’t quite figure out where the light is coming from. Just make sure your cove is deep enough to hide the strips completely.
8. Command Attention with Oversized Statement Chandeliers

Zoë Feldman of Zoë Feldman Design calls oversized chandeliers “interior architecture,” and I’m completely on board with this philosophy. We’re talking 36+ inch diameters that work in bedrooms with 12-15 foot ceilings. These aren’t just bedroom ceiling lighting fixtures; they’re sculptural elements that define your entire space.
I visited a friend’s loft bedroom with a 42-inch brass chandelier, and it was the only decor the room needed. Everything else could stay minimal because the ceiling made such a bold statement. These pieces typically run $300-800 depending on materials and complexity. The key is proportion. An oversized chandelier in a room with adequate ceiling height creates drama and balance. In a standard 8-foot ceiling room, it’s a disaster. Common mistake: people get scared of “too big” and size down, which makes the fixture look apologetic and small. If you have the vertical space, use it. These statement pieces reduce your need for excess decor everywhere else, which actually simplifies your design process. Just make sure your ceiling box is rated for the weight.
9. Incorporate Biophilic Tunable White Technology

This sounds incredibly fancy, but biophilic tunable white tech in smart LED ceiling panels is becoming accessible for regular bedrooms in 2026. These systems mimic natural daylight shifts throughout the day, which genuinely impacts your relaxation and sleep quality. I was skeptical until I installed one and noticed I was falling asleep faster.
The panels feature nature-inspired patterns and adjust color temperature automatically based on time of day. They’re rated for 50,000-hour lifespans while using only 20-30W, which is impressively efficient. The circadian rhythm benefits are real, not marketing hype. Your body responds to light cues, and bedroom ceiling lighting that gradually cools down in the evening supports your natural wind-down process. Most people completely overlook this when choosing fixtures, focusing purely on aesthetics. I get it; I did too. But after experiencing the difference, I can’t go back to static lighting. These systems typically cost $150-300 for bedroom-sized panels, which is reasonable considering you’re essentially getting multiple fixtures in one. Pro tip: look for systems that integrate with your existing smart home setup so you’re not juggling another separate app.

KSIPZE 100ft Led Strip Lights RGB Music Sync Color Changing
Honestly, KSIPZE 100ft Led Strip Lights RGB Music Sync Color Changing Led Lights surprised me — sturdier than it looks in the photos, and over 375 buyers gave it 4.5 stars.
10. Avoid Recessed Downlights with Visible LEDs

Here’s a 2026 no-go straight from Flexfire experts: recessed downlights with visible LED arrays. They create harsh ceiling grids that make bedrooms feel like office spaces. I see this mistake constantly in new construction where builders install six or eight recessed cans in a grid pattern. It’s functional but completely kills any cozy bedroom ceiling lighting vibe.
The visible LEDs create glare and hot spots, especially when you’re lying in bed looking up. Instead, choose surface-mount options or recessed alternatives with proper diffusers that output 600-800 lumens at 3000K. These prevent the harsh shadows and uncomfortable brightness that make you want to avoid looking at your ceiling entirely. I actually had recessed lights in my previous bedroom, and I ended up leaving them off most of the time because they felt so clinical. When I switched to a flush mount with warm diffused light, the room instantly felt more inviting. If you already have recessed lighting, consider retrofit kits with better diffusion or simply replace them with more thoughtful fixtures. Your bedroom should feel like a retreat, not a conference room.
11. Position Linear Brass Chandeliers Horizontally

Linear brass chandeliers positioned horizontally to echo your room’s width create stunning visual flow in bright, open bedrooms. Homed-it designers note this as a major 2026 trend, especially for asymmetric layouts. I’m talking about fixtures spanning 10-12 feet that reinforce the room’s proportions instead of fighting them.
This works particularly well when positioned over the bed area, drawing your eyes upward and creating depth without competing with natural light from windows. The horizontal orientation emphasizes width, which makes rooms feel more spacious and balanced. I installed a 10-foot linear brass piece in my bedroom that has large windows on one wall, and it perfectly counterbalances all that vertical window height. Common mistake: hanging linear fixtures perpendicular to the room’s natural flow, which creates visual tension instead of harmony. Pay attention to your room’s dominant lines. If your space is wider than it is long, a horizontal linear fixture emphasizes that openness. These typically run $250-600 depending on finish and length. The brass finish adds warmth that works beautifully with both cool and warm color schemes.
12. Add Depth with Triple-Tier Modern Chandeliers

Triple-tier modern chandeliers that align with ceiling beams work beautifully in minimal bedroom setups where you want bedroom ceiling lighting with architectural interest. This layered approach adds depth through simple, clean-lined shades rather than ornate decoration. I’ve seen these priced in the $200-400 range, which is accessible for the impact they deliver.
The three-tier design creates visual movement and dimension in rooms where furniture stays understated. If your bedroom style leans minimal or Scandinavian, this type of fixture provides the personality that sparse furniture can’t. I love how the tiers cast subtle shadows on the ceiling, creating texture without clutter. Pro tip: align the fixture with any existing ceiling beams or architectural elements to emphasize the room’s structure. This creates cohesion instead of the fixture feeling randomly placed. The geometry of three distinct levels works especially well in bedrooms with simple rectangular layouts. It breaks up the monotony without overwhelming the space. Look for designs with adjustable cable lengths so you can customize the tier spacing to your ceiling height.

Ultra Soft Cozy Faux Fur Throw Blanket
Ultra Soft Cozy Faux Fur Throw Blanket punches above its price — 967 buyers rated it 4.5 stars. I would buy it again.
13. Install Canopy-Less Oversized Pendants

Canopy-less oversized pendants are Laura Jenkins’s prediction for organic 2026 bedroom ceiling lighting forms, and I’m here for it. These imperfect, hand-crafted silhouettes in materials like alabaster create custom placement options without traditional mounting hardware showing. The drops typically measure 12-18 inches, which works in bedrooms with 9+ foot ceilings.
What I love about this trend is the personality it adds. Instead of perfectly symmetrical, mass-produced fixtures, you get pieces that feel one-of-a-kind. I installed an alabaster pendant with a canopy-less mount in my reading nook area, and the organic shape contrasts beautifully with the room’s straight lines. The alabaster diffuses light in this soft, glowing way that’s completely different from glass or metal shades. These fixtures surprise people because they expect to see ceiling hardware, but the clean connection point keeps the focus on the pendant itself. They typically cost $200-500 depending on size and material. Common mistake: trying to install these without proper electrical box support. The canopy-less look is clean, but you still need a secure mounting system hidden behind the connection point.
14. Combine Curved Brass Elements for Moody Spaces

Curved brass elements in bedroom ceiling lighting fixtures create moody, sophisticated vibes in pastel bedrooms, according to Elle Decor’s 2026 forecast. I’m not talking about ring designs here, but rather organic curves and verdigris finishes that add depth to layered color schemes. This trend favors asymmetry over perfectly balanced designs.
The curved brass catches light differently throughout the day, creating subtle shifts in how the fixture appears. I have a curved brass semi-flush mount in my daughter’s sage-green bedroom, and the way it complements the soft wall color is perfect. Experts warn against relying on a single central lamp in these layered spaces because it flattens the carefully built ambiance. You need the brass curves to create visual interest that moves your eye around the room. These fixtures work especially well when you’ve invested time in a specific color palette and want your lighting to enhance rather than dominate. Prices range from $150-400 for quality brass pieces. Pro tip: look for unlacquered brass if you want the finish to develop a natural patina over time, which adds even more character to moody bedroom designs.
15. Mix Metals with Confidence

Mixing metals in your bedroom ceiling lighting is no longer a design crime, it’s expected in 2026. I spent years thinking everything had to match perfectly, which limited my options and made rooms feel too coordinated. Now I intentionally combine brass ceiling fixtures with nickel lamps or black pendants with chrome accents.
The key is repetition. If your ceiling fixture is brass, echo that finish somewhere else in the room like drawer pulls or a mirror frame. This creates intentional mixing rather than looking like you couldn’t decide. I have a brass flush mount ceiling fixture paired with black metal nightstand lamps, and the contrast actually makes both finishes stand out more. Common mistake: mixing too many metal finishes without any repetition, which reads as chaotic rather than curated. Stick to two or three finishes maximum and repeat each one at least twice in the space. This works particularly well in eclectic or transitional bedrooms where strict matching feels too formal. Don’t be afraid to combine warm and cool metals either. Brass and chrome can absolutely coexist if you balance them properly throughout the room.

upsimples Floating Shelves for Wall
upsimples Floating Shelves for Wall punches above its price — 4 buyers rated it 4.5 stars. I would buy it again.
16. Consider Fixture Weight Before Installation

Nobody talks about fixture weight until their beautiful new chandelier comes crashing down, and I’m shocked this isn’t discussed more. Standard ceiling boxes are rated for fixtures up to 50 pounds, but many statement bedroom ceiling lighting pieces exceed that. I learned this when my electrician refused to install my dream chandelier without reinforcing the ceiling box first.
Before you buy any substantial fixture, check the weight specification and verify your ceiling box can handle it. Chandeliers with crystal elements, multiple tiers, or solid brass construction often weigh 40-70 pounds. You might need a fan-rated box or additional bracing installed between ceiling joists. This adds $100-200 to your installation cost, but it’s absolutely necessary for safety. I’ve heard horror stories of fixtures falling in the middle of the night, which is terrifying and completely avoidable. Pro tip: if you’re replacing an existing fixture, don’t assume the old box is adequate for something heavier. Have an electrician verify before you commit to a purchase. This is especially important for rental situations where you might not know the ceiling box specifications. Some landlords allow fixture swaps but require professional installation for liability reasons.
17. Use Smart Bulbs for Instant Flexibility

Smart bulbs transformed how I use bedroom ceiling lighting without requiring any fixture changes. I was hesitant about the technology at first, worried about connectivity issues and complicated apps. But modern smart bulbs are genuinely plug-and-play, and they give you color temperature control, dimming, and scheduling from your phone.
I installed Philips Hue bulbs in my existing ceiling fixture, and now I can shift from 2700K warm light for evening to 3500K for morning routines. The scheduling feature gradually brightens the room as a wake-up alarm, which is so much gentler than a blaring phone. These bulbs cost $15-25 each, which adds up if your fixture takes multiple bulbs, but the functionality is worth it. You can also create scenes for different activities like reading, getting dressed, or winding down. Common mistake: buying cheap smart bulbs that disconnect constantly or don’t integrate with your home system. Stick with established brands like Philips, LIFX, or Wyze. The reliability difference is massive. This approach works especially well if you love your current fixture but want more lighting control without rewiring or installing dimmer switches.
18. Pay Attention to Shade Direction

Shade direction completely changes how bedroom ceiling lighting functions, and most people never think about it. Downward-facing shades concentrate light below the fixture, creating pools of brightness. Upward-facing shades bounce light off the ceiling for diffused, ambient glow. I prefer upward or multi-directional shades in bedrooms because they create softer, more flattering light.
Downward-only fixtures can create harsh shadows under your eyes when you’re looking in a mirror, which is not the vibe you want when getting ready. I made this mistake with a beautiful pendant that directed all its light straight down, and I looked exhausted every time I checked my appearance. Multi-directional fixtures that send light both up and down offer the best flexibility. They provide enough direct light for functionality while bouncing ambient light off the ceiling to fill the space. This is particularly important if your ceiling fixture is your primary light source. Look at product photos carefully to see which direction the shades face. Some fixtures have adjustable shades, which gives you even more control. Pro tip: if you have a dark ceiling, upward-facing shades won’t be as effective because the dark surface absorbs light instead of reflecting it.
19. Match Your Fixture to Your Ceiling Height

Ceiling height dictates which bedroom ceiling lighting styles will actually work in your space, and ignoring this leads to expensive mistakes. Standard 8-foot ceilings need flush or semi-flush mounts that sit close to the ceiling. Anything that hangs more than 8-10 inches becomes a head-bumping hazard. I have 9-foot ceilings, which opens up more options but still limits how dramatic I can go.
For ceilings 10 feet and above, you can explore chandeliers and pendants with real presence. The general rule is your fixture can drop about 3 inches for every foot of ceiling height above 8 feet. So a 10-foot ceiling can handle a 6-inch drop comfortably, while a 12-foot ceiling accommodates 12-inch drops. I see people violate this constantly, either hanging fixtures too low in standard-height rooms or choosing tiny fixtures in tall spaces. Both look wrong. Measure your ceiling height accurately before shopping, and pay attention to the fixture’s overall height specification including any adjustable cables or chains. Common mistake: measuring only the fixture body and forgetting about the canopy and mounting hardware, which adds several inches. If you’re between sizes, go slightly smaller in standard-height rooms to avoid that claustrophobic feeling.
20. Don’t Forget About Bulb Accessibility

Here’s something I wish I’d considered before installing an elaborate bedroom ceiling lighting fixture: how easy is it to change the bulbs? I have a beautiful multi-arm chandelier that requires a ladder, two people, and genuine acrobatics to replace bulbs. It’s gorgeous, but I dread maintenance.
Think about bulb accessibility during the selection process, especially for high ceilings or complex fixtures. Integrated LED fixtures solve this problem by lasting 20,000-50,000 hours, which is years of use before replacement. However, when they do die, you’re replacing the entire fixture rather than just a bulb. Traditional socket fixtures give you flexibility but require regular bulb changes. I now prioritize fixtures with easily accessible sockets or integrated LEDs with exceptional longevity ratings. Pro tip: keep spare bulbs on hand that match your fixture’s specifications exactly. Nothing is worse than having a bulb burn out and realizing you need a specific size or base type that requires ordering online. Test your bulb-changing process when you first install the fixture while you have the ladder out anyway. If it’s ridiculously difficult, consider returning it before the window closes. Your future self will thank you.
Choosing bedroom ceiling lighting that actually enhances your space instead of just existing requires more thought than most people invest. I’ve made plenty of mistakes over the years, from fixtures that were too dim to styles that clashed with everything else. But getting it right transforms your bedroom from a place you sleep into a space you genuinely love spending time in. Start with one of these twenty approaches that matches your ceiling height, room size, and personal style, then build your lighting layers from there.
Save this guide for when you’re ready to upgrade your bedroom ceiling lighting. Trust me, you’ll reference these specific details when you’re standing in the lighting aisle feeling overwhelmed by options.
Frequently Asked Questions
What is the best lumens for bedroom ceiling lighting?
Aim for 1,500-2,000 lumens total for bedrooms up to 200 square feet. This provides adequate brightness for tasks like getting dressed without creating harsh glare that disrupts relaxation. You can always dim bright lights, but weak fixtures leave you struggling with insufficient illumination.
What color temperature should bedroom ceiling lights be?
Choose 2700K-3000K color temperature for bedroom ceiling lighting. This warm white range creates a cozy atmosphere that supports sleep, unlike cool 4000K+ tones that suppress melatonin production and make winding down difficult. Look for ‘warm white’ or ‘soft white’ labels when shopping.
How low should bedroom ceiling lights hang?
For standard 8-foot ceilings, choose flush or semi-flush mounts dropping no more than 6-8 inches. Allow approximately 3 inches of drop per foot of ceiling height above 8 feet. A 10-foot ceiling can handle 6-inch drops, while 12-foot ceilings accommodate 12-inch pendant drops comfortably.
Can I mix metal finishes in bedroom lighting?
Absolutely. Mixing metals like brass ceiling fixtures with chrome or black accents is a current design trend. The key is repetition: use each metal finish at least twice throughout the room to create intentional coordination rather than accidental chaos. Limit yourself to two or three finishes maximum.