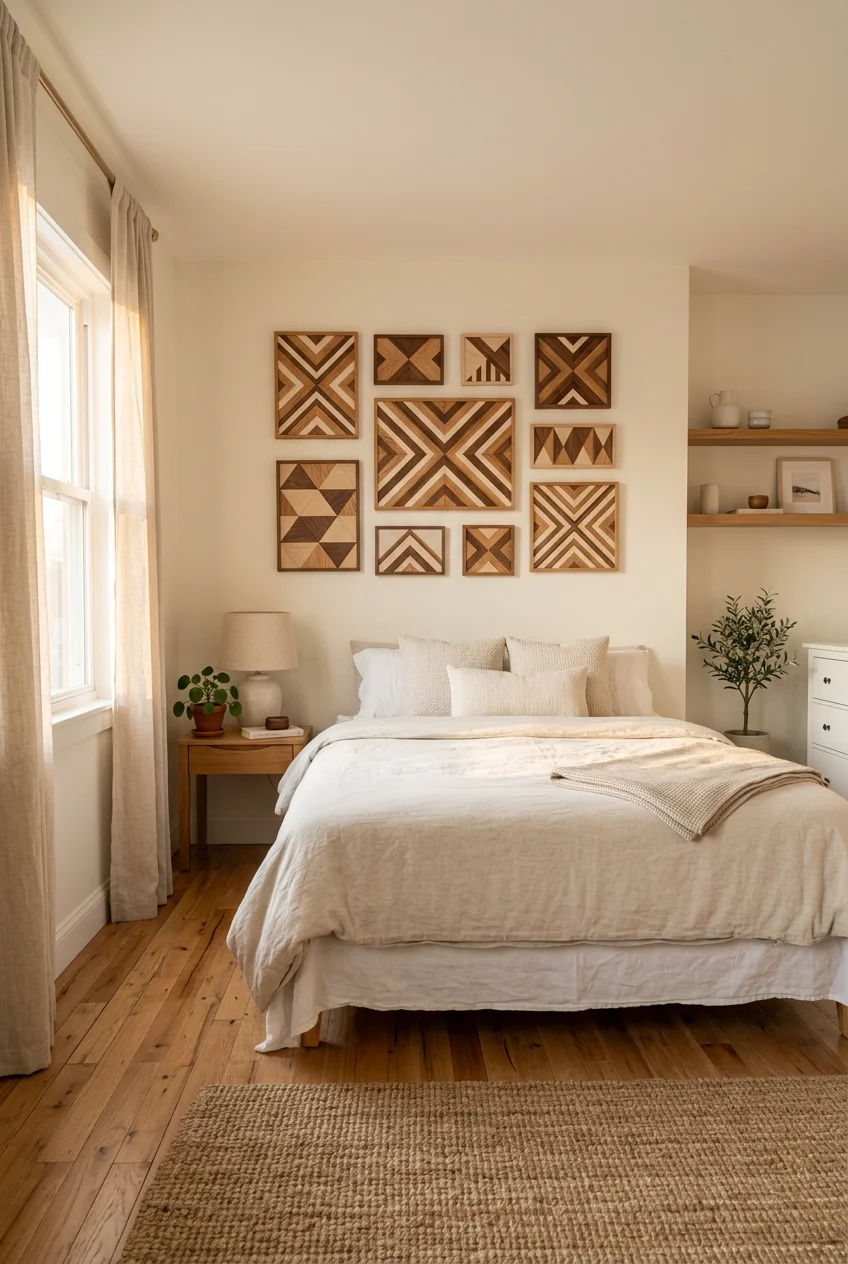
What’s Inside
- Embrace the Cocoon Bedroom with Upholstered Panels
- Go Bold with Oversized Statement Art
- Experiment with Wallpaper Box Ceilings
- Create a Curated Gallery Wall with Precise Spacing
- Incorporate Textured Macrame Wall Hangings
- Design a Moody Mirror Wall
- Floating Wood Shelves for Trailing Plants
- Painted Arch Headboard Alternative
- Slat Wood Acoustic Wall Panels
- Plaster Art Canvas Hacks
- Minimalist Wire Grid Memo Boards
- Pressed Botanical Floating Frames
- Woven Basket Wall Arrangements
- DIY Wall Decor For Bedroom Using Vintage Scarf Framing
- Abstract Color Block Murals
- Faux Brass Wall Sconce Lighting
- Thrifted Frame Chalkboard Paint Makeover
- Removable Washi Tape Geometric Patterns
- Affordable DIY Wall Decor For Bedroom With Pegboards
Last October, I tried hanging a cheap printed fabric sheet over my bed using four flimsy metal thumbtacks. It ripped in the middle of the night and fell directly onto my face while I was sleeping. The fabric smelled faintly of factory chemicals and trapped dust, and the thumbtacks left jagged little holes in my drywall. That was the exact moment my lazy decorating era ended. I realized I needed actual diy wall decor for bedroom spaces that didn’t look like a temporary college dorm setup. I spent the next year testing different materials, adhesives, and paints to figure out what actually sticks to drywall without ruining it. Most of the tutorials online skip the messy parts. I’m going to tell you exactly how much these projects cost, which brands of glue hold up, and why you shouldn’t use cheap painter’s tape. Let’s get into the specifics of building out your room so you aren’t waking up to falling decor.
1. Embrace the Cocoon Bedroom with Upholstered Panels

For a serene atmosphere, interior designers like Zoë Feldman recommend bringing soft, padded fabric panels across the entire wall behind your bed. This absorbs ambient noise and creates a physical buffer against cold exterior walls. I built my own last month using 1/2-inch thick plywood boards cut to 24×48 inches. You wrap them with 1/2-inch polyester batting, then staple your chosen fabric over the top. I bought a heavy washed linen blend for $14.99 a yard. I tried this wrong for months before figuring it out by using thin quilt batting, which made the panels look like wrinkled paper bags. The 1/2-inch polyester batting gives you that firm, high-end hotel look with crisp edges. You mount these to the wall using heavy-duty French cleats. A pack of 12-inch Hangman cleats costs $13.48 at Home Depot. The metal cleats lock together, meaning the panels won’t shift when you lean against them. Trust me on this.
2. Go Bold with Oversized Statement Art

Replacing twelve tiny, mismatched frames with one massive piece of artwork creates a quiet visual anchor. The rule of thumb is that your art needs to span approximately two-thirds the width of your headboard. If you’ve got a standard 60-inch queen bed, you want a canvas around 40 inches wide. I bought a 40×60 inch abstract print from Giant Art for $42.50. The canvas comes rolled in a tube, and you build the stretcher bars yourself using their plastic corner brackets. The tensioning process takes about forty minutes and requires strong hands to stretch the thick canvas tight. I hung mine using four of the 16-pound Command Picture Hanging Strips, which cost $14.99 at Target. The thick 1.5-inch depth of the frame casts a distinct shadow on the wall, making the piece look substantial. It’s a straightforward install if you use a 24-inch bubble level to keep it straight.
3. Experiment with Wallpaper Box Ceilings

Extending peel-and-stick wallpaper from your accent wall directly onto the ceiling creates a continuous wallpaper box effect. This closes the visual gap in tall rooms and makes the space feel like a strategically designed cocoon. I ordered a dark botanical print from Love vs. Design for $45 per panel. Their smooth vinyl option is thick enough that it won’t tear when you inevitably have to peel it back to realign a crooked seam. I installed this last Tuesday. Looking straight up while smoothing out air bubbles with a plastic squeegee destroys your neck muscles. I had to take a break and eat half a bag of $3.99 organic gummy bears from Sprouts just to regain my patience. The sugar rush was the only thing that kept me from quitting. You need two people for the ceiling portion. Don’t attempt to hold a 10-foot sticky panel over your head by yourself.

AMADA HOMEFURNISHING Floating Shelves
If you want something that just works, AMADA HOMEFURNISHING Floating Shelves is a safe bet (114 reviews, 4.5 stars).
4. Create a Curated Gallery Wall with Precise Spacing

Treat a gallery wall as one single, massive piece of art rather than a chaotic collection of random items. The math matters here. You need a consistent spacing of exactly 2 to 3 inches between every single frame to prevent a scattered appearance. The center of the entire arrangement should sit at eye level, roughly 57 to 60 inches from the floor. If you’re hanging it over a dresser, leave a 7 to 10-inch gap above the furniture. I used nine of the 11×14 inch Ikea Ribba frames, which run $9.99 each. I initially tried eyeballing the gaps and ended up with a crooked mess that looked terrible under the harsh morning light. Now, I cut a block of scrap wood to exactly 2.5 inches and use it as a physical spacer between every frame. This guarantees the grid looks professionally installed without doing complex math.
5. Incorporate Textured Macrame Wall Hangings

Macrame with oversized knots and multi-tone fibers adds heavy, tactile texture to flat drywall. For a large piece over a dresser, you need 5mm cotton cord. The thinner 3mm cord is fine for tiny plant hangers, but it looks stringy and weak on a large empty wall. I buy the 109-yard spools of 5mm single-strand cord for $16.99 on Amazon. The secret to getting those perfectly fluffy, straight fringe ends isn’t a plastic comb. You use a wire slicker dog brush. I bought a basic Hartz dog brush for $6.99 at Kroger specifically for my craft supplies. You lay the fringe flat on a self-healing cutting mat and aggressively brush out the twisted fibers until they turn into soft, straight hair. It sheds a lot of fine cotton dust into the air, so keep a vacuum nearby and wipe down your baseboards afterward.
6. Design a Moody Mirror Wall

Instead of a basic full-length floor mirror, segmented mirror tiles create a fractured, geometric reflection that doubles the light in a dark room. I bought two 12-packs of 12×12 inch frameless mirror tiles for $19.99 each at Walmart. To avoid the 1980s commercial gym aesthetic, I aged them myself before hanging. I sprayed a light, uneven mist of $8.98 Krylon Looking Glass paint mixed with a splash of water and white vinegar on the back of each tile. The vinegar eats away tiny spots of the reflective backing, leaving dark, oxidized patches that look antique. You mount these to the wall using the included double-sided foam tape. I made the mistake of sticking one slightly crooked on my first try. That adhesive won’t budge once it cures. I had to shatter the glass tile with a hammer just to scrape it off the drywall. Learned that the hard way.

Fixwal Black Floating Shelves for Wall
If you want something that just works, Fixwal Black Floating Shelves for Wall is a safe bet (42 reviews, 4.5 stars).
7. Floating Wood Shelves for Trailing Plants

Adding physical depth to a flat wall requires sturdy horizontal surfaces. I build my own floating shelves using 1×6 common pine boards, which cost about $12.48 for an 8-foot length at Home Depot. I cut them down to 36-inch sections and stain them with Minwax Special Walnut ($11.48 for a half-pint). The hardware is the critical part. I use $15.99 heavy-duty blind shelf supports that require drilling a 5-inch deep hole directly into the back of the wood. You’re going to need a drill press or a very steady hand with a spade bit to get the hole perfectly straight. I keep heavy trailing plants on these shelves. I picked up a massive golden pothos in a 6-inch nursery pot for $14.99 at Whole Foods last week. Its waxy green vines drape down past the shelf bracket perfectly, hiding the hardware entirely. You might also like: 15 Stunning Modern Bedroom Lighting to Transform Your Space
8. Painted Arch Headboard Alternative

If you don’t have the floor space for a bulky wooden headboard, painting a solid color arch directly onto the wall provides the same visual anchoring. You only need a $4.98 sample jar of Behr Premium Plus matte paint. I used the shade Dark Truffle. To get a perfect arch, tie a piece of string to a pencil, tack the other end of the string to the exact center of your wall, and draw a giant half-circle. My arch is 64 inches wide to frame a queen bed. I tried freehanding the curved edge with a standard 2-inch brush while drinking a $1.50 Costco fountain soda, which resulted in a jagged, wobbly line that drove me crazy. You have to use a 1-inch angled sash brush ($6.47 by Purdy) and pull the paint in one slow, continuous motion along the pencil line to get a sharp edge. You might also like: 15 Aesthetic Bedroom Inspo You Need to See
9. Slat Wood Acoustic Wall Panels

Vertical wood slats draw the eye upward, making standard 8-foot ceilings look taller. I built a 4-foot wide slat section behind my reading chair using 1×2 inch MDF trim boards. They cost $3.15 per 8-foot piece. I painted the wall black first using $18.99 Glidden flat interior paint, then attached the raw MDF slats over the top. I spaced them exactly 1 inch apart. I used a scrap piece of 1-inch thick wood as a spacer block between every single slat to keep the gaps uniform from top to bottom. You attach them using a brad nailer and a thin bead of $3.48 Liquid Nails adhesive. Don’t skip the adhesive. I relied on just nails for my first three boards, and they started bowing away from the drywall after two weeks of seasonal humidity changes in the house. You might also like: 17 Minimalist Bedroom Ideas Worth Trying
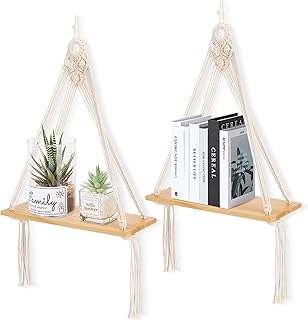
Sunkaioo Macrame Wall Hanging Shelf Set of 2
Honestly, Sunkaioo Macrame Wall Hanging Shelf Set of 2 surprised me — sturdier than it looks in the photos, and over 300 buyers gave it 4.5 stars.
10. Plaster Art Canvas Hacks

Textured white plaster art sells for hundreds of dollars at boutique furniture stores, but the raw materials cost less than twenty bucks. I bought a basic 24×36 inch blank stretched canvas for $14.99 at Michaels. Instead of expensive artist modeling paste, I use DAP Fast ‘N Final lightweight spackling, which is $8.98 for a quart. You scoop thick globs of the spackle onto the canvas and drag a $3.49 plastic putty knife through it to create deep ridges and sweeping arches. The lightweight spackle won’t sag the canvas fabric like heavy joint compound does. I made a huge mess on my hardwood floors doing this because the spackle drops clumps over the edges when you scrape it. Lay down a cheap plastic drop cloth first. It takes a full 48 hours to dry completely hard before you can safely hang it.
11. Minimalist Wire Grid Memo Boards

Standard corkboards look dated and absorb weird smells over time. I replaced mine with a black metal wire grid panel. I bought a commercial 2×4 foot grid panel from Uline for $24.99. It’s technically retail display hardware, which means it’s heavy solid steel, not flimsy craft wire that bends when you touch it. I mounted it to the wall using four $5.99 black metal standoff brackets so it sits an inch away from the drywall. This gap gives you room to clip things on. I use tiny 1-inch wooden clothespins ($3.99 for a pack of 50) to attach polaroids, fabric swatches, and my weekly grocery lists for Trader Joe’s. It keeps paper clutter off my nightstand while acting as an evolving piece of industrial art. Dusting it is annoying, but a damp microfiber cloth run over the metal bars works well enough.
12. Pressed Botanical Floating Frames

Floating frames suspend artwork between two panes of glass, letting your wall color show through the edges. I use these specifically for pressed botanicals. I bought three 11×14 inch brass floating frames from Target for $16.99 each. I forage for large fern fronds and press them inside a heavy textbook lined with parchment paper for three weeks until they are completely flat and dry. When you sandwich the dried leaves between the glass panes, you have to clean the inside of the glass meticulously. I used a cheap paper towel on my first frame and left thousands of tiny white lint particles trapped inside, which I didn’t notice until the afternoon sun hit it. You have to use a lint-free glass cloth and a spray of $3.48 Windex. The brass hinges on these frames are delicate, so handle them carefully when locking them shut.

Mkono Macrame Hanging Shelves Boho Wall Decor Set of 2
A dependable everyday pick — Mkono Macrame Hanging Shelves Boho Wall Decor Set of 2 Rustic Wood Flo pulls in 2 ratings at 4.5 stars. Not flashy, just solid.
13. Woven Basket Wall Arrangements

Shallow woven baskets add warmth and three-dimensional curvature to a flat bedroom wall. I source these exclusively from thrift stores. You can find flat sweetgrass or rattan baskets for $2.99 to $5.99 each. You need odd numbers for the arrangement to look organic. I use a cluster of five overlapping sizes. Because thrifted baskets are usually dusty and smell like old attics, I scrub them with a stiff bristle brush and a mixture of water and $4.29 Dawn dish soap, then let them bake in the direct sun for a day. To hang them without driving huge nails through the tight weave, I thread a loop of clear 20-pound fishing line ($4.99 at any hardware store) through the back of the basket and hook it onto a standard 3M Command hook. They sit perfectly flush against the wall this way.
14. DIY Wall Decor For Bedroom Using Vintage Scarf Framing

If you need a massive block of color but can’t afford a large original painting, frame a vintage silk scarf. This is my favorite diy wall decor for bedroom walls that lack architectural interest. I bought a 35×35 inch geometric silk scarf at an estate sale for $45. You can’t just shove silk into a glass frame. It’ll sag and wrinkle over time. You have to iron it on the absolute lowest silk setting to remove the creases, then mount it to an acid-free foam core board. I use $12.99 stainless steel dressmaker pins to pull the fabric taut around the edges of the foam board, pinning it securely every two inches. I dropped the mounted board into a $34.99 36×36 inch square frame from Michaels. It looks exactly like a $500 piece of modern art for a fraction of the cost.
15. Abstract Color Block Murals

Painting a geometric color block mural directly onto your drywall creates a massive impact for the cost of a few paint samples. I taped off three overlapping rectangles using 1.41-inch FrogTape, which costs $8.49 a roll. I’d highly advise against using cheap blue tape. It bleeds underneath and ruins the crisp lines you need for this to look intentional. I used three quarts of Valspar Signature paint ($22.98 each) in muted terracotta, mustard, and sage green. Here is the crucial mistake I made on my first rectangle. I waited for the paint to completely dry before peeling the tape off. The dried paint formed a thick skin over the tape, and peeling it ripped jagged chunks of color off the wall. You must score the edge with a razor or pull the tape while the second coat is still wet.

ROMGUAR CRAFT Corner Floating Shelves Wall Mounted Set of 4
If you want something that just works, ROMGUAR CRAFT Corner Floating Shelves Wall Mounted Set of 4 is a safe bet (19 reviews, 4.5 stars).
16. Faux Brass Wall Sconce Lighting

Adding wall sconces usually requires hiring an electrician to run wiring behind the drywall, which costs hundreds of dollars. I bypass this completely using the puck light trick. I bought a pair of non-wired, plug-in style black metal wall sconces from Amazon for $29.99. I cut the power cords off completely with wire snips. Instead of lightbulbs, I stuck 3-inch battery-operated LED puck lights ($18.99 for a 3-pack) directly into the bulb sockets using heavy double-sided mounting tape. To make the cheap black metal look like aged brass, I rubbed on a layer of Antique Gold Rub ‘n Buff ($7.49 a tube) using an old rag. The LED pucks come with a remote control, so I can turn off my bedside reading lights without moving from under the covers. It provides the perfect ambient glow.
17. Thrifted Frame Chalkboard Paint Makeover

Ornate, heavily carved wooden frames look incredible when painted matte black and turned into functional chalkboards. I found a massive 24×36 inch gaudy gold plastic frame at Goodwill for $14.99. I threw away the creepy landscape print inside and kept the sturdy cardboard backing. I painted that backing with three coats of Rust-Oleum Chalkboard Paint, which runs $11.98 a quart. You have to wait three days for the paint to cure, and then you must season the board by rubbing the side of a piece of plain white chalk over the entire surface and erasing it. I skipped the seasoning step once, wrote a quote on it, and the letters permanently burned into the fresh paint. I sprayed the ornate frame with $6.48 Rust-Oleum Matte Black spray paint, let it dry, and reassembled the whole piece.
18. Removable Washi Tape Geometric Patterns

If you live in an apartment where you can’t paint or drill holes, washi tape is your only real option for large-scale pattern making. Standard washi tape is made from rice paper and uses a weak adhesive that won’t strip drywall paper when you move out. I bought five rolls of 15mm matte black MT brand washi tape for $12.99. I created a massive floor-to-ceiling geometric mountainscape behind my bed. I used a $9.98 laser level to ensure my 60-degree angles were actually straight. The trick is to overlap the tape at the intersecting corners, then use an X-Acto knife ($6.49) to gently slice through both layers and peel away the excess. It creates a perfectly sharp joint. The tape holds up for about a year before the edges start curling from ambient room humidity.
19. Affordable DIY Wall Decor For Bedroom With Pegboards

Pegboards aren’t just for garage tools. Painted the same color as your wall, they become functional, adaptable display spaces for jewelry, small art prints, and trailing plants. I use this affordable diy wall decor for bedroom organization above my makeup vanity. I bought the 30×22 inch Ikea Skadis pegboard in white for $22.99. Unlike traditional brown masonite pegboards, the Skadis uses elongated capsule-shaped slots that look much more modern. I bought a pack of the specific Skadis hooks for $3.99 and the small white metal shelf attachments for $8.99. I made the mistake of hanging it using standard drywall anchors that pulled out of the wall when I loaded the board with heavy ceramic plant pots. You have to use heavy-duty toggle bolts ($5.48 for a pack) to secure it properly to the drywall.
Building out a bedroom takes time, and you’re going to make mistakes along the way. I’ve ruined plenty of drywall and wasted money on the wrong adhesives. But taking control of your space with your own hands changes how you feel when you wake up in that room. Skip the cheap fabric wall hangings and invest a weekend into building an upholstered panel or framing a vintage scarf. The texture and scale will completely alter the acoustics and mood of your room. If you found these breakdowns helpful, pin this article to your bedroom decor board so you have the exact measurements and paint colors when you’re standing in the hardware store aisle. Took me years to figure out, no exaggeration.
Frequently Asked Questions
What is the cheapest way to decorate a large bedroom wall?
Paint is your most cost-effective option. A $4.98 sample jar of paint is enough to create a large painted arch or geometric color block behind your bed, providing a massive visual anchor without buying expensive frames.
How do I hang heavy wall decor without damaging apartment drywall?
Use heavy-duty Command Picture Hanging Strips. The 16-pound strips cost around $14.99 and hold large framed canvases securely. For heavier wood panels, you’ll need to patch small holes later, but avoiding large toggle bolts preserves the drywall.
What size art should I put above my queen bed?
The artwork should span about two-thirds the width of your headboard. For a standard 60-inch queen bed, look for a piece that is approximately 40 inches wide so it anchors the space without dwarfing the furniture.
Why do my DIY plaster canvas projects crack?
Using heavy joint compound on a stretched fabric canvas causes sagging and cracking. You need to use a lightweight spackling paste, like DAP Fast ‘N Final, which flexes slightly and won’t weigh down the center of the canvas.
