What’s Inside
- The Prep Work For A Wall Stickers Bedroom Aesthetic
- The Torture Of Paint Curing Times
- Why Stucco Is Your Worst Enemy
- Filling Space With 60-Inch Botanicals
- Custom Lettering That Doesn’t Look Cheap
- Faux Brick 3D Textures For 2026
- Framing The Nightstand With Dot Patterns
- The Painter’s Tape Hinge Method
- Smoothing Bubbles With A Plastic Scraper
- Removable Arches For A Wall Stickers Bedroom Aesthetic
- Budgeting For High-End Wallmur Designs
- Wrapping The IKEA Malm Dresser
- Earthy Pigments And Geometric Shapes
- Keeping Humidity Away From Adhesive
- Faux Pendant Light Stickers
- Layering Matte Vinyl Over Glossy Paint
- Creating A Faux Headboard With Half-Moons
- Trimming Baseboard Edges With An X-Acto
- The Ceiling Medallion Sticker Trick
- Removing Them Without Losing Your Deposit
I woke up last Tuesday at 3 AM with a sticky piece of vinyl clinging to my forehead. My first attempt at a wall stickers bedroom aesthetic ended with a $45 floral decal peeling off the wall and attacking me in my sleep. I’m Danica, and I skipped the prep work because I was impatient. Let’s fix that so you don’t repeat my mistake. I learned that the hard way, no exaggeration.
1. The Prep Work For A Wall Stickers Bedroom Aesthetic

If you want your decals to last longer than a single weekend, you can’t just slap them onto dusty drywall. I learned this the hard way with a $24 botanical set I bought at Target. The adhesive picked up every microscopic speck of dust and rolled right off the wall by morning. You need a damp microfiber cloth and exactly two drops of Dawn dish soap. Wipe the exact 4-foot by 4-foot area where the decal will go. Let it dry completely for 24 hours. If the wall feels even slightly cool to the touch, it’s still holding moisture. The vinyl won’t bond to water. I buy a 3-pack of generic microfiber cloths at Walmart for $4.88 specifically for this.
2. The Torture Of Paint Curing Times

I painted my guest room a moody sage green last October and immediately applied a gorgeous $65 Urbanwalls arch decal the next morning. Three days later, the edges lifted. When I pulled it off to reposition it, the vinyl took a 6-inch chunk of fresh paint down to the bare drywall. Paint feels dry in an hour, but it takes 3 to 4 weeks to actually cure. For deep colors, you’re looking at 6 to 8 weeks. The solvents in the paint need to evaporate completely. If you trap those gasses under a vinyl sticker, it creates tiny air bubbles that destroy the adhesive. I know waiting a month sounds terrible when you want to finish a room. Set a reminder on your phone for 30 days after you paint.
3. Why Stucco Is Your Worst Enemy

Wall stickers need 100 percent surface contact to work. If you’ve got heavily textured walls like stucco, heavy orange peel, or exposed brick, vinyl decals are a waste of your money. I tried forcing a $32 minimal line-art face decal onto my sister’s textured apartment wall. I spent an hour pressing it into the grooves with a tennis ball. It looked like a wrinkled mess and fell off two days later. The adhesive just can’t span the gaps between the bumps. You need perfectly smooth painted drywall, flat wood paneling, or glass. If your bedroom has textured walls, apply the decals to a large $15 smooth acrylic sheet from Home Depot instead. Prop that sheet on your dresser or mount it securely with heavy-duty Command strips.

Qukaka Floating Shelves for Wall Decor
A dependable everyday pick — Qukaka Floating Shelves for Wall Decor pulls in 169 ratings at 4.5 stars. Not flashy, just solid.
4. Filling Space With 60-Inch Botanicals

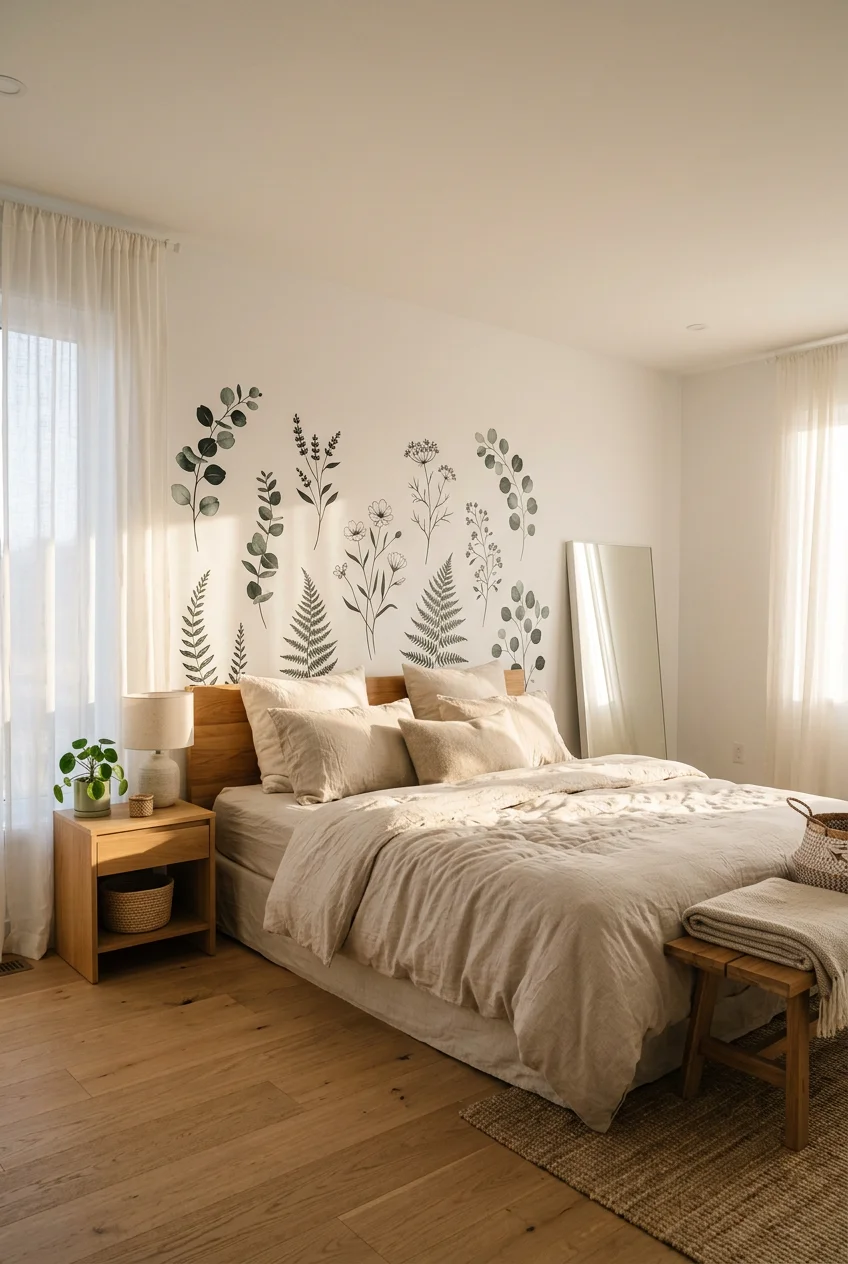
Tiny stickers look cluttered if you don’t map them out perfectly. If you’ve got a massive blank wall opposite your bed, you need scale. I bought a 65-inch oversized trailing eucalyptus decal from Trendy Wall Designs for $89 last spring. It completely filled the empty 8-foot gap between my closet doors and the window. When you use a decal this large, it acts like a custom mural without the $800 price tag of traditional wallpaper. You need a second set of hands to apply something this big. My husband held the top corners while I smoothed the bottom. We worked in 12-inch sections, peeling the backing paper down slowly. It took 45 minutes, but the visual weight anchors the entire room.
5. Custom Lettering That Doesn’t Look Cheap

Generic quote decals usually look like they belong in a 2010 dorm room. If you want text, order custom die-cut vinyl from Canvas Champ or a highly-rated Etsy seller. I paid $34 for a custom 40-inch wide matte black serif font reading our wedding date to go over the headboard. The key is choosing a matte finish. Glossy vinyl reflects the overhead light and instantly looks like a cheap sticker. Matte vinyl absorbs the light and mimics the look of hand-painted stencils. Small custom 3-inch die-cut stickers cost about $1.80 each if you want to create a repeating monogram pattern. Just make sure you measure the exact width of your headboard first. A 40-inch decal looks balanced over a standard 60-inch queen bed.
6. Faux Brick 3D Textures For 2026

Flat vinyl is standard, but 3D wall stickers are a massive trend right now for 2026. I bought a set of textured faux-brick panels from Wallmur for $29 to test behind my reading chair. They’re thick, slightly squishy polyethylene foam panels with a strong adhesive backing. They actually project about half an inch off the wall, catching the natural light from the window to create real shadows. It completely changes the depth of a flat, boring corner. The downside is they’re incredibly sticky. Once they touch the wall, they aren’t moving. I accidentally placed the first 12×12 inch square slightly crooked. I had to rip it off, which destroyed the foam panel entirely. Buy one extra pack for mistakes. The texture is worth the tricky application process. You might also like: 20 Charming Bedroom Ceiling Lighting You Haven’t Thought Of

Fixwal Black Floating Shelves for Wall
A dependable everyday pick — Fixwal Black Floating Shelves for Wall pulls in 42 ratings at 4.5 stars. Not flashy, just solid.
7. Framing The Nightstand With Dot Patterns

You don’t always have to center a decal on a blank wall. I like using small repeating shapes to highlight specific furniture pieces. I bought a pack of 200 matte terracotta 2-inch dot stickers from Amazon for $12.99. Instead of scattering them everywhere, I created a dense cluster right behind my oak nightstand. The dots start tight together near the floor and slowly disperse upward, fading out about four feet up the wall. It visually anchors the small nightstand so it doesn’t look lost on a large wall. It took me 20 minutes to place them. I didn’t measure. I just stepped back every few minutes to check the density. It’s an easy way to add color without committing to a full accent wall. You might also like: 20 Brilliant DIY Bedroom Wall Decor for Every Budget
8. The Painter’s Tape Hinge Method

Don’t just peel the entire backing off a large sticker and lunge at the wall. You will end up with a crumpled ball of vinyl. You need the hinge method. I use a $4.48 roll of blue Scotch painter’s tape from Walmart. Position the full decal on the wall with the backing still on. Tape it securely across the top edge. Flip the decal up like a flap on a hinge. Peel away the top three inches of the backing paper. Fold that paper down, then smooth the exposed sticky part onto the wall. Now your decal is perfectly locked in place. You can reach behind, grab the backing paper, and slowly pull it down while smoothing the front. I failed so many times before someone taught me this. You might also like: 20 Simple Bedroom Wall Design Ideas That Actually Work
9. Smoothing Bubbles With A Plastic Scraper

Your hands aren’t flat enough to push air out from under wide vinyl decals. You need a squeegee. I actually use a $2.99 plastic pan scraper I bought in the kitchen aisle at Kroger. It has a firm, straight edge that won’t scratch the matte finish of the sticker. Start in the absolute dead center of the decal. Press firmly and push outward toward the edges. If you trap a bubble in the middle, don’t try to push it three feet to the edge. You will stretch and warp the vinyl. Instead, take a tiny sewing needle and poke a microscopic hole in the center of the bubble. Press the air out through the hole. The vinyl will lay flat and you won’t even see the puncture.

AMADA HOMEFURNISHING Floating Shelves
AMADA HOMEFURNISHING Floating Shelves has been one of the most consistently praised picks in this category. 114 reviewers averaged 4.5/5.
10. Removable Arches For A Wall Stickers Bedroom Aesthetic

If you rent your apartment or just change your mind constantly, you need true removable vinyl. I bought a 48-inch terracotta arch from WallPops for $45. The adhesive is specifically formulated to release without pulling paint. I’ve moved this exact arch three times in the last two years. First it was behind my floor mirror, then behind a plant stand, and now it’s framing a small bookshelf. It still sticks perfectly. The trick to keeping them reusable is keeping the back clean when you move them. Wash your hands thoroughly before peeling it off. The oils from your fingers will degrade the adhesive on the edges, causing them to curl over time.
11. Budgeting For High-End Wallmur Designs

You can spend $5 on generic stickers or $150 on designer decals. Quality bedroom wall stickers usually sit in the $29 to $65 range. I recently ordered a set of layered botanical stickers from Wallmur for $38. The print quality is where you see the price difference. Cheap stickers have visible pixelation when you get close, and the clear borders are usually shiny and obvious. The Wallmur pieces are die-cut exactly to the edge of the artwork, so there is no weird clear halo around the leaves. If you’re on a strict budget, skip the massive intricate designs. Buy a $15 pack of simple geometric shapes like triangles or half-moons from Sprouts or a local craft store.
12. Wrapping The IKEA Malm Dresser

You don’t have to put wall stickers on the wall. I bought a basic white 3-drawer IKEA Malm dresser for $99. It looked sterile. I took a $22 roll of peel-and-stick floral wallpaper decal and wrapped just the drawer fronts. The smooth laminate surface of IKEA furniture is actually the perfect base for vinyl adhesive. It bonds better than it does to painted drywall. I removed the drawers, wiped them with rubbing alcohol, and applied the vinyl using my plastic scraper. I used a $6 X-Acto knife to trim the edges perfectly flush. It took an hour on a Sunday afternoon, and it completely customized a boring piece of furniture. Just don’t try this on raw, unpainted wood. The adhesive won’t stick to sawdust or rough grain.

Amaoot Floating Shelves Set of 3, Home Wood Wall Shelf
Honestly, Amaoot Floating Shelves Set of 3 surprised me — sturdier than it looks in the photos, and over 893 buyers gave it 4.5 stars.
13. Earthy Pigments And Geometric Shapes

The trend for 2026 is moving away from pastel florals and shifting toward sophisticated, earthy pigments. Think muted terracotta, olive green, and deep mustard. I noticed this color palette heavily while grabbing a reusable canvas bag at Whole Foods last week. I translated that into my bedroom by ordering a $28 set of abstract geometric arches in those exact softened contrasts. I layered a mustard semi-circle over a taller olive arch behind my bedroom door. The clean lines of the geometry balance the warmth of the earthy colors. It feels intentional and architectural. Skip the neon colors or overly complicated mandala patterns. Clean shapes in muddy, natural colors look much more expensive than they actually are.
14. Keeping Humidity Away From Adhesive

Moisture destroys vinyl adhesive. I applied a beautiful $18 trailing vine decal around the mirror in my en-suite bathroom. The steam from my daily showers caused the edges to lift within two weeks. By week three, it’s hanging off the glass. Don’t put standard wall stickers near your bathroom door, near a humidifier, or directly above a baseboard heater where condensation builds up. If you absolutely must decorate a humid space, you have to buy specifically labeled waterproof vinyl decals designed for cars or outdoor use. For the bedroom, keep your humidifier on the opposite side of the room from any large wall decals. If you notice the edges curling, hit them with a hair dryer for ten seconds and press them back down firmly.
15. Faux Pendant Light Stickers

This is my favorite weird design trick. I’ve got a dark corner in my bedroom where a reading chair sits, but there’s no outlet nearby for a lamp. Hardwiring a pendant light would cost $300 for an electrician. Instead, I bought a $16 minimalist black line-art decal shaped like a modern pendant light hanging from a cord. I applied it starting from the ceiling crease, dropping down exactly over the chair. It creates the visual illusion of a light fixture without any cords or electricity. It fills the vertical space perfectly. I added a small, battery-operated puck light to the wall right below the sticker for actual illumination. It’s a clever way to add structural elements to a room for under twenty bucks. Guests always do a double-take.

ROMGUAR CRAFT Corner Floating Shelves Wall Mounted Set of 4
A dependable everyday pick — ROMGUAR CRAFT Corner Floating Shelves Wall Mounted Set of 4 pulls in 19 ratings at 4.5 stars. Not flashy, just solid.
16. Layering Matte Vinyl Over Glossy Paint

Contrast is what makes a room look professionally designed. Most people use matte paint on their walls. I painted my closet doors with a high-gloss black enamel. Then, I applied a large $42 matte black geometric decal from Etsy right over the glossy doors. Because the colors match exactly, you only see the design when the light hits it. The matte vinyl against the shiny paint creates a subtle, high-end texture shift. It looks like custom millwork or expensive embossed paneling. If you try this, let the gloss paint cure for a full four weeks. Gloss enamel takes significantly longer to harden than standard eggshell wall paint.
17. Creating A Faux Headboard With Half-Moons

Beds without headboards look unfinished, but real headboards are expensive. I used a $35 oversized half-moon decal to fake it in my guest room. I ordered a solid rust-colored semi-circle measuring 60 inches wide and 30 inches tall. I applied it perfectly flush with the top of the mattress. It visually anchors the bed to the wall just like a piece of furniture would. The best part is that it takes up zero floor space in a tiny 10×10 room. I did make a mistake on the first try. I didn’t use a level. I just eyeballed the flat bottom edge. It was half an inch crooked, which drove me crazy until I peeled it off and reapplied it correctly. Always use a $10 spirit level from Home Depot.
18. Trimming Baseboard Edges With An X-Acto

When you apply a decal that runs all the way down to the floor, don’t try to bend the vinyl over the top of the baseboard. It will slowly peel back up over time. The tension of the bent vinyl is stronger than the adhesive. I learned this when I ran a $55 tree trunk decal down to my trim. Instead, let the decal drape over the baseboard. Take a fresh, sharp X-Acto knife and run it gently right along the crease where the wall meets the wood. Peel away the excess vinyl. This leaves a perfectly flush, clean edge that won’t lift. Buy a pack of replacement blades for $4 at Costco or any hardware store. A dull blade will tear the vinyl instead of cutting it cleanly.
19. The Ceiling Medallion Sticker Trick

Ceilings are the most ignored surface in a bedroom. I’ve got a basic, ugly flush-mount dome light in my room. I didn’t want to wire a new fixture, so I bought a $24 intricate mandala wall sticker and applied it directly to the ceiling around the light base. It mimics the look of an expensive plaster ceiling medallion. Applying a sticker overhead is exhausting. Your arms will burn. I stood on my bed and used my Kroger plastic scraper to slowly smooth it out while looking straight up. You definitely need two people for this. One person holds the bulk of the sticker so it doesn’t fold back on itself and get stuck together.
20. Removing Them Without Losing Your Deposit

When it’s time to move out, don’t just grab a corner and rip the sticker off like a band-aid. That’s exactly how you tear the drywall paper and lose your $500 security deposit. The adhesive gets stiff and brittle over time. You need to soften it first. I grab my Conair hair dryer, set it to medium heat, and hold it about six inches away from the decal. I sweep it back and forth for 30 seconds until the vinyl feels warm to the touch. The heat melts the glue just enough to release its grip. Then, slowly peel the sticker back at a tight 45-degree angle. If it leaves any sticky residue behind, a little $3 bottle of Goo Gone on a paper towel will wipe it right off.
I’ve spent way too much time fighting with cheap vinyl and ruined paint to let you make the same mistakes. A good aesthetic isn’t about slapping random quotes everywhere. It’s about scale, texture, and proper prep work. I’d highly recommend starting with a small geometric pack from WallPops or a custom matte piece from Etsy just to get a feel for the application process. Pin this post to your bedroom decor board so you have the painter’s tape trick handy when your decals finally arrive.
Frequently Asked Questions
Do wall stickers damage bedroom paint?
They won’t damage your paint if you apply them to a fully cured surface. Paint needs 3 to 4 weeks to cure completely before applying vinyl. Always use a hair dryer to melt the adhesive slightly before peeling them off.
Can I put wall decals on textured walls?
No, standard vinyl decals won’t stick properly to stucco, heavy orange peel, or brick. The adhesive needs a perfectly smooth surface to bond. If you’ve got textured walls, apply the decals to a smooth acrylic board instead.
How long do peel and stick wall decals last?
High-quality vinyl decals can last 5 to 7 years indoors if applied correctly. Keep them away from direct sunlight, high humidity areas like en-suite bathrooms, and baseboard heaters to prevent the edges from curling over time.
Are 3D wall stickers a good idea for bedrooms?
Yes, 3D foam stickers are a massive trend for 2026. They add architectural depth and texture to flat walls. Just be aware that the adhesive’s usually much stronger than standard vinyl, so they aren’t easily repositionable.

2 thoughts on “20 Aesthetic Wall Stickers Bedroom You Need to See”