What’s Inside
- Prioritize Wall Preparation for Flawless Adhesion
- Embrace Botanical Motifs for a Serene Vibe
- Use Geometric Patterns for Modern Sophistication
- Master the Hinge Method for Large Decals
- Avoid Highly Textured Walls
- Create an Optical Illusion with Strategic Placement
- Define a Focal Point with a Full-Wall Mural
- Utilize Decals to Frame Furniture
- Don’t Overwhelm the Space
- Consider Price Ranges for Budget-Friendly Updates
- Use Heat for Easy Removal and Repositioning
- Incorporate LED Strip Lights for a Modern Glow
- Beyond Walls: Personalize Furniture and Appliances
- Address Air Bubbles Immediately
- Plan Your Layout with Painter’s Tape
Last October, I ruined a freshly painted $80 accent wall. I slapped a cheap decal on it while the paint was still tacky. The chemical smell hung in the air, but I was impatient. When I tried to adjust the vinyl, it ripped off a jagged three-inch chunk of my expensive matte green paint. If you’re looking for bedroom wall stickers that look intentional, know that prep and placement matter more than the design. I’ve spent three years testing vinyl adhesives in my own house, making every mistake possible. Skip the cheap glossy stuff. It looks like wet plastic under artificial light. Here’s what actually works when you want to add character without damaging your drywall.
1. Prioritize Wall Preparation for Flawless Adhesion

Before you peel any backing paper, you have to prep the drywall. Most people skip this. I tried it the wrong way for months before figuring it out. I used to just wipe my hand over the wall and stick the decal on. They always peeled at the edges within a week. You need a clean, dry, smooth surface. I mix 2 tablespoons of mild Dawn dish soap with 4 cups of warm water in a plastic bucket. I take a Zwipes microfiber cloth (I buy the 12-pack at Target for $14.99) and scrub the wall to remove dust and skin oils. Then, you wait. If the wall is freshly painted, you must wait 2 to 4 weeks for the paint to cure. Applying decals too soon traps paint fumes under the vinyl. This causes bubbles and peeling. I learned that the hard way in my guest room last April. The trapped moisture dissolved the adhesive on a $40 set of decals. Take the time to prep. The adhesive needs a pristine surface to grip, or you’re just throwing money away.
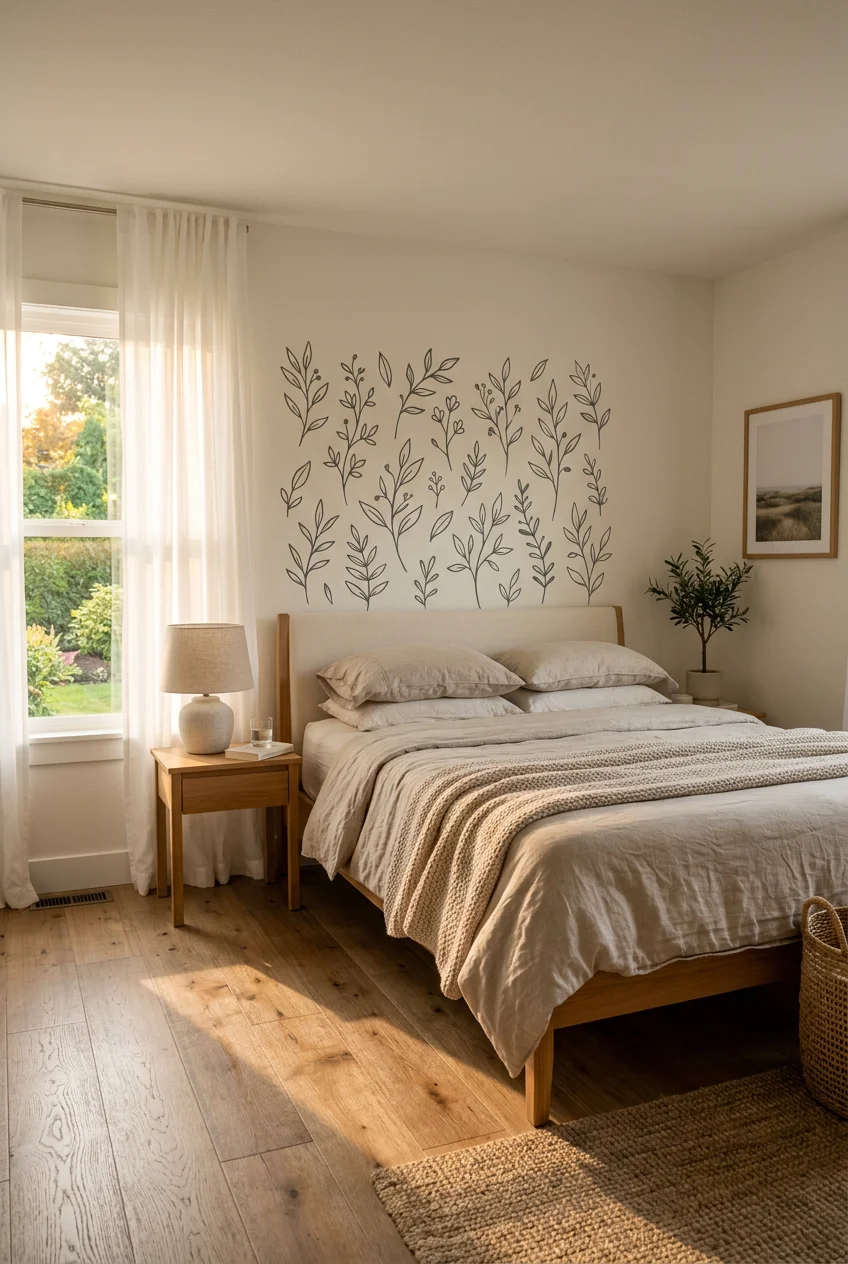
2. Embrace Botanical Motifs for a Serene Vibe

Botanical designs are trending for 2026, bringing a calming, natural feel indoors. I bought the Botanical Foliage Wall Decal set from Urbanwalls for $45 last month. It features watercolor-style leaves that look hand-painted. The matte finish is key. I previously bought a shiny floral set, and the glare from my ceiling light made them look cheap. Like wet plastic. Innovative Stencils also makes a great Plants & Flowers Non-Wall Damaging Wall Decal for $32. They come in 24-inch by 36-inch sheets with muted colors. I placed a few olive green sprigs above my oak nightstand. The matte coating on the Urbanwalls decals means they don’t reflect my bedside lamp into my eyes while reading. When picking bedroom designs, stick to muted greens and soft browns. Bright neon flowers usually clash with standard bedroom lighting and make the space feel chaotic.
3. Use Geometric Patterns for Modern Sophistication

If florals aren’t your style, geometric patterns offer structure. Look for designs with clean lines. StickerBrand sells Minimalist Wall Murals featuring abstract 3D cube shapes for $55. I installed a set of their matte black triangles in my home office last Tuesday. The vinyl is 3 mils thick. This thickness is substantial enough that it doesn’t stretch when you pull it off the backing paper. I tried a thinner geometric brand from Walmart for $12, but the lines stretched out of shape the second I pulled them. Urbanwalls also offers Geometric Patterns Removable Wall Decals for $68. The key is exact spacing. If a square is tilted even a quarter inch, the whole wall looks off. I use a 24-inch Stanley laser level ($19.99) to keep my lines straight. Trust me. The sharp angles contrast well with soft bedroom textiles like a down duvet or a chunky knit throw.

upsimples Floating Shelves for Wall
If you want something that just works, upsimples Floating Shelves for Wall is a safe bet (4 reviews, 4.5 stars).
4. Master the Hinge Method for Large Decals

You can’t just peel a 40-inch sticker and slap it on. It’ll fold over, stick to itself, and end up in the trash. You have to use the hinge method. I secure the top edge of the decal to the wall using 2-inch blue painter’s tape ($4.50 a roll). Once it’s straight, I lift the bottom, cut the backing paper horizontally halfway down, and peel off the top half. I apply that section, smoothing it from the center outwards with a hard plastic squeegee ($3.99). Then, I remove the tape, peel the rest, and smooth the bottom. I used this method last weekend while eating a turkey sandwich from Whole Foods, and it took twelve minutes to install a massive arch decal without a single crease. If you try to do it freehand, static electricity pulls the vinyl to the wall before you’re ready. You might also like: 20 Creative Bedroom Wall Design You’ll Want to Bookmark
5. Avoid Highly Textured Walls

Wall decals adhere best to smooth, non-textured surfaces. If you have orange peel or knockdown texture, standard vinyl won’t stick. The adhesive only touches the high points, leaving 80 percent of the sticker floating. I tried applying a $25 matte black moon decal to my textured hallway last year. The edges curled within three hours, and dust stuck to the exposed adhesive. It looked terrible. If your walls are textured, you have to buy heavy-duty decals. Urbanwalls makes decals for textured surfaces, usually costing around $65. They use a thicker, more aggressive adhesive that fills the gaps in the texture. Even then, test a 2-inch sample piece first. Press it firmly into the grooves using a yellow tennis ball ($2.50 for a can at Kroger) to distribute pressure without scratching the ink. You might also like: 20 Fresh Bedroom Ideas to Transform Your Space
6. Create an Optical Illusion with Strategic Placement

You can use shapes to manipulate how big a room feels. For small bedrooms, geometric wall decals give an illusion of depth. I bought a large Cube Corner Decal for $28 and placed it where the ceiling meets the corner of my 10×10 foot guest room. Because the lines mimic a recessed 3D box, it tricks your eye into thinking the corner is pushed back. You have to align the center point of the decal exactly with the 90-degree drywall corner. I messed this up the first time and placed it half an inch too low. The illusion failed and looked like a crooked drawing. I had to peel it off and buy a second one. When placing these accents, stand at the doorway. That’s the primary viewing angle. If the illusion doesn’t work from the door, adjust the height until the perspective clicks. You might also like: 15 Brilliant Small Bedroom Inspiration That Changed Everything

WOPITUES Wood Floating Shelves Set of 6
If you want something that just works, WOPITUES Wood Floating Shelves Set of 6 is a safe bet (66 reviews, 4.5 stars).
7. Define a Focal Point with a Full-Wall Mural

Full-wall mural decals are trending because they create an immersive environment without the mess of wallpaper. I recently installed the Nimbus Blue Peel and Stick Mural from WallPops behind my bed. It costs $99 and comes in 6 massive pieces, each measuring 108 by 20.5 inches. It turns the wall into a cloudy sky scene. The material is a premium 6-mil vinyl that feels like canvas. I was intimidated by the size. I left the box in my living room for a month before I had the courage to try it. You definitely need two people. My husband held the top corners while I smoothed the panels down. We overlapped each vertical seam by 1/8 of an inch to prevent gaps when the vinyl shrinks in winter. The room felt twice as large, and the matte finish absorbs the harsh sunlight perfectly.
8. Utilize Decals to Frame Furniture

Decals shouldn’t just float in the middle of a blank wall. They need an anchor. Position your graphics to complement your furniture. For a sofa or bench, place the bottom edge of the graphic 6 to 8 inches above the cushion. This prevents people from leaning back and rubbing hair oils on the vinyl edges. For headboards, allow the decal to overlap the structure slightly, or frame it with a 2 to 4 inch margin. I framed my oak headboard with a sweeping eucalyptus vine decal last winter. I originally placed it 12 inches above the bed, and it looked disconnected. Like it was floating away. I had to reposition it so the leaves appeared to grow from behind the wood. Grounding the sticker against a piece of furniture makes it look like a custom architectural feature rather than an afterthought.
9. Don’t Overwhelm the Space

Design experts say to cover no more than 30 to 40 percent of a single wall, unless you’re installing a mural. Less is more. I learned this when I bought three packs of gold starburst decals ($14.99 each) and covered every inch of my bathroom wall. It looked chaotic. Like a teenager’s locker. It made the room feel tiny. I ended up peeling half of them off the next morning. You need negative space to let the design breathe. If you’re using a dense floral pattern, cluster it in one corner and let it fade toward the center of the blank wall. Maintaining balance prevents the room from feeling busy. Pick one accent wall. If you put decals on all four walls, the eye doesn’t know where to focus, and the effect becomes exhausting.

QEEIG Floating Shelves for Wall Bathroom Shelf Bedroom
If you want something that just works, QEEIG Floating Shelves for Wall Bathroom Shelf Bedroom Kitchen Living is a safe bet (45 reviews, 4.5 stars).
10. Consider Price Ranges for Budget-Friendly Updates

You don’t have to spend a hundred dollars to get a good result, but you do need to know what you’re buying. Smaller sets like the RoomMates Brushwork Butterfly Wall Decals cost $17.69 for a pack of 44. I stuck a few around my mirror. They’re printed on clear material, so they work best on white or light gray walls. If you put a clear-edged decal on a dark blue wall, the border turns cloudy. For larger pieces, I found a Botanical Decorative Vinyl Wall Sticker measuring 30 by 105 centimeters on Amazon for $10.49. It’s thin, so handle it gently to avoid tearing. I ordered it on my phone while in the checkout line at Sprouts last week. Larger designs or murals will cost more, ranging from $30 to over $100. The $10 decals are fine for small accents, but for a focal point over a bed, invest in the $50 range for thicker, matte vinyl.
11. Use Heat for Easy Removal and Repositioning

Never grab the corner of a decal and rip it off like a band-aid. You’ll tear the drywall paper and pull off paint. I did this in my old apartment and lost a $200 security deposit. If you need to remove or reposition a sticker, use heat. I take my Conair hairdryer ($29.99), set it to the lowest heat, and hold it 4 inches away for 20 to 30 seconds. The heat softens the adhesive, turning it into a pliable gel. Once warm, I peel the decal back slowly at a 45-degree angle. Pulling straight out will damage the wall. Many high-quality peel-and-stick decals are reusable 2 to 3 times if you remove them carefully with this heat method. Keep the original waxy backing paper in your closet so you have a safe place to store them if you move.
12. Incorporate LED Strip Lights for a Modern Glow

A trend for 2026 involves using LED strip lights to create lighting effects around your wall decals. I bought a 16.4-foot Govee LED strip for $14.99 and used it to outline a mountain decal behind my desk. I hid the strip behind 1-inch wooden trim so you only see the indirect glow, not the bulbs. Backlighting a dark vinyl decal casts dramatic shadows and gives the flat sticker a 3D effect. You can also run a warm white LED strip under a floating shelf above a floral decal. I installed this setup last month while taking a break to eat leftover Costco pizza. The warm 3000K light hits the matte vinyl leaves and makes them look rich and textured. Avoid cool blue lights (5000K or higher) because they wash out the colors and highlight any tiny air bubbles or imperfections.

Amaoot Floating Shelves Set of 3, Home Wood Wall Shelf
Honestly, Amaoot Floating Shelves Set of 3 surprised me — sturdier than it looks in the photos, and over 893 buyers gave it 4.5 stars.
13. Beyond Walls: Personalize Furniture and Appliances

You aren’t limited to drywall. I use leftover vinyl to spruce up plain furniture and storage boxes. I had a boring white IKEA Malm dresser ($199) that looked sterile. I took a $22 sheet of terrazzo-patterned wall vinyl, cut it into 31.5-inch by 8-inch strips, and wrapped the drawer fronts. It completely changed the look for a fraction of the cost of new furniture. The smooth laminate surface of cheap furniture is the perfect base for vinyl adhesive. It sticks better than it does to painted drywall. I also wrapped the sides of a plastic storage bin I keep under my bed. Just make sure you clean the surface with rubbing alcohol (70% isopropyl, $2.50 at the pharmacy) before applying. Any furniture polish left on the wood will neutralize the adhesive, and the vinyl will slide right off.
14. Address Air Bubbles Immediately

Air bubbles are inevitable, especially on larger pieces. Don’t ignore them hoping they’ll flatten out. They won’t. In fact, when the room gets warm during the summer, the air inside the bubble expands and stretches the vinyl permanently. If I see a small bubble during application, I take a sewing needle and poke a tiny hole at the edge of the bubble. Then, I take a credit card or my squeegee and push the trapped air toward the pinhole. The vinyl flattens out, and the hole is invisible to the naked eye. I used to try slicing the bubbles with a utility knife, but that creates a visible slit that gathers dust and peels back. If you have a bubble larger than a quarter, gently peel the vinyl back to that point and re-apply it using firmer pressure with your squeegee.
15. Plan Your Layout with Painter’s Tape

Never guess where a decal should go. Once the adhesive touches the wall, you risk stretching the vinyl if you have to move it. Before committing, I use 1-inch blue painter’s tape ($3.99) to temporarily stick the decals to the wall, backing paper and all. I did this yesterday after a quick grocery run to Trader Joe’s for peanut butter pretzels. I taped up seven floral pieces around my mirror. I stepped back, looked at the arrangement from the bed, and realized the left side was unbalanced. I spent twenty minutes moving the pieces until the visual weight felt right. This planning step is crucial for a professional result. If you just start sticking things on the wall, you’ll almost always end up with an awkward gap or a messy cluster. Take a photo of the taped layout with your phone so you remember where each piece goes when you start peeling.
Applying bedroom wall stickers doesn’t have to end in frustration. I’ve ruined enough paint jobs to know that taking ten minutes to prep the wall and map out the layout saves you hours of regret later. The Urbanwalls botanical sets are my top recommendation because the matte finish handles artificial bedroom lighting perfectly. If you found these tips helpful, pin this article to your bedroom decor board so you have the hinge method and heat removal tricks saved for your next weekend project.

AMADA HOMEFURNISHING Floating Shelves
A dependable everyday pick — AMADA HOMEFURNISHING Floating Shelves pulls in 114 ratings at 4.5 stars. Not flashy, just solid.
Frequently Asked Questions
How long should I wait to apply wall stickers after painting?
You must wait a minimum of 2 to 4 weeks after painting before applying wall decals. This allows the paint to fully cure. Applying them too soon traps paint fumes under the vinyl, causing the adhesive to dissolve and the sticker to bubble.
Do aesthetic wall stickers bedroom decals work on textured walls?
Standard vinyl decals don’t adhere well to textured surfaces like orange peel or knockdown drywall. The adhesive only grips the high points. For textured walls, you need heavy-duty decals specifically formulated with a thicker adhesive, like those from Urbanwalls.
How do I remove wall stickers without damaging the paint?
Never pull a sticker straight off the wall. Use a hairdryer on the lowest setting, holding it 4 inches away for 20 to 30 seconds. This softens the adhesive. Then, slowly peel the vinyl back at a sharp 45-degree angle.
How do you get air bubbles out of wall decals?
Don’t ignore air bubbles or slice them with a knife. Take a sewing needle and poke a tiny hole at the very edge of the bubble. Use a plastic squeegee or a credit card to push the trapped air toward the pinhole until it lays flat.
