What’s Inside
- Anchor with Oversized Statement Pieces
- Prioritize Calm with Soft Abstracts
- Master the Two-Thirds Rule for Proportions
- Hang Art at the Eye-Level Standard
- Use Painter’s Tape for Pre-Visualization
- Introduce Textured and 3D Wall Art
- Add Fabric Wall Hangings for Sound Absorption
- Choose Frames Based on the Art, Not the Room
- Visualize with AI-Powered Design Tools
- Build Looser, Less Perfect Gallery Walls
- Source Sustainable and Eco-Friendly Art
- Curate Minimalist AI-Generated Art
- Invest in UV Protection Glazing
- Layer Leaning Artwork for Flexibility
- Commit to Eccentric Wall Murals
- Frame the Art with Strategic Lighting
- Install Floating Ledges for Rotating Displays
- Ground the Space with Monochromatic Photography
- Repurpose Architectural Salvage as Decor
I’m always noticing how people stare at a blank space above their headboard for six months before panic-buying a tiny, generic canvas that floats awkwardly in the middle of the wall. Nailing your wall art setup requires actual math, not just a quick trip to the decor aisle. A well-planned layout anchors the furniture and sets the mood for the whole room. If you only try one idea from this list, make it #5. Here’s why: mapping out dimensions with tape before buying saves hundreds of dollars in return shipping fees for frames that simply don’t fit. Trust me on this.
Skip this if you’re outfitting a temporary dorm room or dealing with a strict landlord who forbids wall attachments. These methods require committing to layout decisions and making minor wall modifications that aren’t worth the hassle for a three-month stay.
1. Anchor with Oversized Statement Pieces

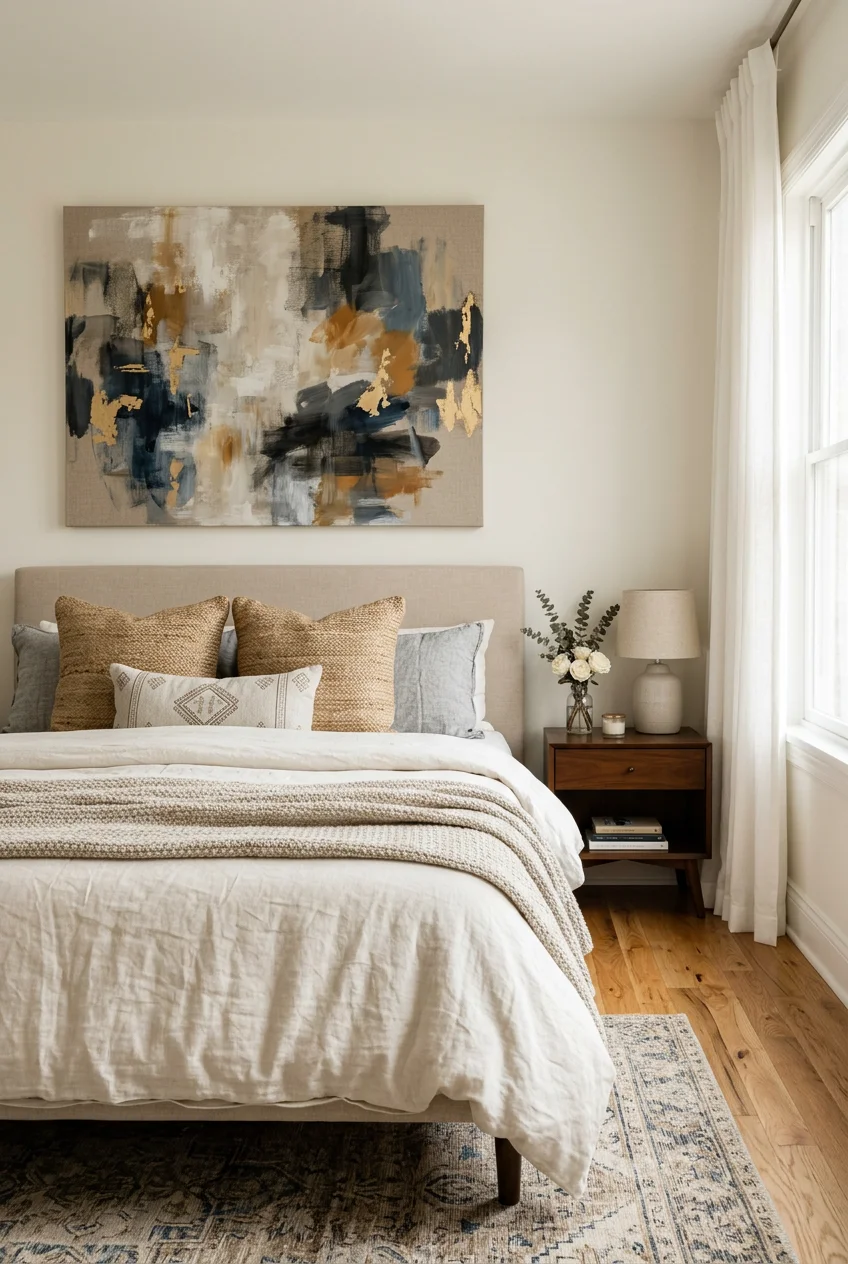
Instead of scattering a dozen small prints that clutter the wall, hang one massive canvas above the bed to create an immediate focal point. I’ve noticed most people hang these way too high and wonder why the room feels off. A single large-scale piece should span 60 to 80 percent of your headboard’s width. For a standard 60-inch queen bed, you’re looking for a 40-inch to 48-inch wide canvas. Finding pieces this large at Target or HomeGoods is hit or miss, so sourcing from specialty print shops is usually necessary. You’ll typically spend in the mid-range to premium bracket for canvases over 40 inches. A 1.5-inch gallery-wrapped depth looks far better than a thin 0.75-inch frame. It’s a clean, sophisticated look that clears out the visual noise.
Best for: Minimalists and large open wall spaces.
The catch: Transporting and maneuvering a 40-inch canvas through narrow apartment stairwells is a massive headache.
2. Prioritize Calm with Soft Abstracts

Bedrooms need visual breathing room. Hard geometric lines and chaotic colors stimulate the brain, which is the exact opposite of what a sleeping space requires. Abstracted nature scenes with smooth transitions and soft gradients are dominating right now. Brands like Itz Art offer pieces featuring layered whites and greys, while Olive et Oriel prints soft coastal and botanical designs on 230gsm fine art paper using archival inks. Soft sage greens and muted terracotta tones lower the heart rate, making them ideal for where you sleep. The prices for these high-quality paper prints generally fall in the budget to mid-range category. Framing them in light oak adds to the serene vibe without pulling focus.
The catch: Soft abstracts can easily look like generic hotel art if you don’t choose a piece with visible texture or distinct brushstrokes.
3. Master the Two-Thirds Rule for Proportions

A common mistake is hanging art that’s way too small for the furniture below it. A tiny 8×10 frame floating above a massive six-drawer dresser looks ridiculous. Let’s break down the math. Designers follow a strict rule: wall art should measure about two-thirds to three-quarters the width of the furniture it anchors. If your dresser is 60 inches wide, the artwork or the total width of your grouping needs to be between 40 and 45 inches. If you’re grouping three frames to hit that 40-inch total, factor in the two inches of blank space between each frame. This rule forces the eye to view the furniture and the art as one cohesive unit rather than disconnected floating objects.
Best for: Beginners struggling with scale and proportion.
The catch: Finding a single frame that hits that exact mathematical sweet spot often requires expensive custom framing.

Acovy 30in Long Floating Shelves for Wall Set of 2
A dependable everyday pick — Acovy 30in Long Floating Shelves for Wall Set of 2 pulls in 8 ratings at 4.5 stars. Not flashy, just solid.
4. Hang Art at the Eye-Level Standard

Stop hanging art right below the ceiling line. For open walls without furniture underneath, center the artwork exactly 57 to 60 inches from the floor. This reflects standard human eye level and is the exact measurement galleries use. Measure from the floor to the dead center of the art, not the top wire. This keeps everything unified. When hanging a piece above a headboard, the rules shift slightly. Position the bottom edge of the frame exactly 6 to 10 inches above the headboard. This tight spacing ensures a visual connection between the bed and the art.
The catch: If your bedroom has dramatic vaulted ceilings, hanging art at 57 inches can leave an uncomfortable amount of negative space above the frame.
5. Use Painter’s Tape for Pre-Visualization

Before pulling out the hammer, grab a roll of standard blue painter’s tape from Walmart or Costco. Outline the exact dimensions of your intended artwork on the wall. Leave the tape up for a full 24 hours. Walk past it, look at it from the bed, and check it in different lighting. Use the delicate surface tape—the purple kind—if your walls were painted recently. This dead-simple step prevents the brutal realization that a piece is too small only after you’ve already drilled a hole in the drywall. It’s the most reliable way to test scale without committing.
The catch: If you leave the tape on the wall for more than a few days, especially in a humid climate, it can peel off cheap, builder-grade flat paint when you remove it.
6. Introduce Textured and 3D Wall Art

Flat, glossy prints look cheap under harsh bedroom lighting. Moving into the next few years, heavy textures and 3D elements are replacing standard posters. Pieces with thick, visible impasto brushstrokes, tonal layering, or organic shapes made from plaster add tactile warmth. Brands like Acousart specialize in these dimensional pieces, making the walls feel handcrafted and deliberate. Positioning a lamp near the plaster art highlights the ridges and valleys of the material. You can expect to pay mid-range prices for small plaster pieces, but large-scale textured art gets expensive quickly. The shadows cast by the 3D elements change throughout the day, giving the room a dynamic feel.
The catch: Heavily textured plaster and 3D canvases are absolute dust magnets and require meticulous cleaning with a soft brush every week. You might also like: 17 Cozy Teen Bedroom You Need to See

BAMEOS Floating Shelves with RGB LED
A dependable everyday pick — BAMEOS Floating Shelves with RGB LED pulls in 161 ratings at 4.5 stars. Not flashy, just solid.
7. Add Fabric Wall Hangings for Sound Absorption

Large-scale fabric panels and textile murals offer a warmer, softer alternative to rigid glass frames. Hanging a heavy cotton or wool textile piece with a contemporary bronze pole fixing (easily found on Amazon for under $30) treats the fabric like legitimate art. Avoid pushpins at all costs; they stretch the fabric and look incredibly cheap. Beyond the visual softness, heavy textiles physically absorb sound. They reduce the harsh echoing in minimalist bedrooms with hard floors, making the space quieter for sleeping. It’s a functional choice that softens the hard angles of standard bedroom furniture. You might also like: 20 Gorgeous Bedroom Decor On You’ll Love
Best for: Rooms with hardwood floors and minimal rugs. You might also like: 15 Simple Bedroom Decor for Every Budget
The catch: Fabric absorbs cooking smells and dust, meaning you’ll need to take the piece down a few times a year for proper vacuuming or dry cleaning.
8. Choose Frames Based on the Art, Not the Room

People constantly buy black frames because they have a black nightstand, ignoring what the actual painting needs. You’re framing the art, not the room. Choose a frame material that pulls out the subtle undertones within the print itself. Natural oak or light maple timber frames highlight the warmth in coastal or neutral pieces. Darker stained woods like walnut ground deeper, moodier color palettes. An oversized four-inch white mat makes a cheap print look like a high-end gallery acquisition. For canvas pieces, a floater frame provides a premium finish. You can pick up decent floater frames at Michaels, but they require some DIY assembly.
The catch: Matching the frame to the art means your gallery wall might feature four different wood tones, which requires careful balancing so it doesn’t look chaotic.
9. Visualize with AI-Powered Design Tools

You can’t just guess how a massive print will look against your specific wall color. AI-powered design apps like Ideal House or ArchiVinci remove the guesswork. You snap a photo of your bedroom, upload it, and the software generates realistic previews of different wall art layouts. Take the photo during the day with the curtains open for the most accurate digital rendering. You can test out an oversized canvas versus a gallery wall without moving a single piece of furniture. These tools are usually free for basic features. It’s a highly efficient way to test out bold, dark art in a small space.
The catch: The AI rarely gets the lighting and shadows exactly right, so the colors of the art in the app won’t perfectly match how it looks in your room’s natural light.

Fixwal Floating Shelves for Wall
If you want something that just works, Fixwal Floating Shelves for Wall is a safe bet (472 reviews, 4.5 stars).
10. Build Looser, Less Perfect Gallery Walls

The rigid, perfectly symmetrical grid gallery walls are out. The current aesthetic favors looser, more personal arrangements that look collected over time rather than bought in a single box from IKEA. To keep it from looking messy, you still need strict spacing rules. Maintain a consistent gap of exactly 2 to 3 inches between every single frame. Mix thin black metal frames with chunky vintage wood to keep the arrangement from looking like a catalog page. Start with your largest, heaviest frame slightly off-center, and build the smaller pieces outward. This creates a balanced but organic shape.
Best for: People with a large collection of mixed-media art.
The catch: Achieving the effortlessly random look actually requires hours of planning, measuring, and cutting out paper templates to tape to the wall.
11. Source Sustainable and Eco-Friendly Art

Decorating shouldn’t mean filling landfills with cheap plastic frames and toxic inks. Sustainable art production is entirely accessible now. Companies like Opposite Wall print their posters on FSC-certified, recycled paper and ship using post-consumer recycled packaging. Many sustainable brands also use biodegradable cellophane sleeves, which is a nice bonus. Their prices are incredibly reasonable, usually sitting in the budget-friendly tier. Itz Art uses water-based latex inks for their canvases, which are odorless and non-toxic, making them perfect for a space where you spend eight hours breathing deeply every night.
The catch: Eco-friendly, water-based inks sometimes lack the hyper-saturated, neon vibrancy of traditional chemical inks, leaning more toward muted, natural tones.
12. Curate Minimalist AI-Generated Art

AI-generated art allows for hyper-specific styling. If you want a Scandinavian or Japandi aesthetic, you can generate minimalist line art featuring black strokes on a soft cream background. Printing these files on heavy, matte archival paper rather than glossy photo paper avoids a cheap poster look. Printing these designs at a large scale, like 24×36 inches, and framing them in slim natural wood creates a high-end look for the cost of a digital download and a local print shop fee. It allows you to dictate the exact color palette to match your bedding perfectly.
The catch: Because it’s generated by an algorithm, the art lacks a human backstory or authentic emotional intent, which bothers some art purists.

Floating Shelves 3 inch Thick for Wall Set of 2
A dependable everyday pick — Floating Shelves 3 inch Thick for Wall Set of 2 pulls in 72 ratings at 4.5 stars. Not flashy, just solid.
13. Invest in UV Protection Glazing

Sunlight destroys paper. If your bedroom has large south-facing windows, the afternoon sun will bleach the rich colors out of your prints within a year. Reds and yellows are the first pigments to fade under UV light, turning vibrant prints into washed-out blue messes. Standard glass won’t offer any protection. When framing anything valuable or sentimental, upgrading to UV-resistant glazing is mandatory. You can request UV-filtering acrylic at custom frame shops or buy upgraded glass cut to size at hardware stores. It preserves the vibrancy and prevents the paper from yellowing and turning brittle.
The catch: Museum-quality UV glass is significantly more expensive than standard glass and often has a highly reflective surface that catches glare from bedroom lamps.
14. Layer Leaning Artwork for Flexibility

You don’t actually have to hang everything. Layering leaning artwork on top of a long dresser or leaning a massive floor mirror alongside a large framed canvas creates an intentional, relaxed vibe. Start with a large piece in the back, leaning securely against the wall, and overlap a smaller, contrasting frame in front of it. Even if it’s leaning, use a small piece of museum putty under the frame to keep it from sliding off the dresser. Mix up the frame textures. It gives the room an artist-studio feel and allows you to swap pieces out in seconds without patching drywall.
Best for: Renters who face steep fines for drilling holes.
The catch: Leaning art takes up valuable surface area on your dresser, leaving less room for jewelry boxes, lamps, or everyday essentials.
15. Commit to Eccentric Wall Murals

Peel-and-stick wall murals are replacing traditional repeat-pattern wallpaper. Instead of a small framed print, an entire accent wall becomes the art. Modern art-inspired murals with bold, large-scale motifs create an immersive environment. Wipe the wall down with a damp microfiber cloth to remove dust before applying the adhesive backing. You apply these to a single statement wall behind the headboard to anchor the room without overwhelming it. Brands offer these in durable vinyl that can be wiped clean. Expect to pay mid-range to premium prices depending on the square footage of your wall.
The catch: Installing a large-scale mural requires two people, immense patience, and perfectly smooth walls; any texture or bumps underneath will show through the vinyl.

AMADA HOMEFURNISHING Floating Shelves
AMADA HOMEFURNISHING Floating Shelves has been one of the most consistently praised picks in this category. 117 reviewers averaged 4.5/5.
16. Frame the Art with Strategic Lighting

Art looks dead in the dark. Flanking a large piece of art with two wall sconces, or installing a brass picture light directly above it, completely changes how the piece reads in the room. Use a 2700K or 3000K LED bulb; anything cooler will make the art look like it’s under a hospital fluorescent light. It highlights the texture of the canvas and adds a secondary layer of ambient lighting. You can find plug-in picture lights or battery-operated LED sconces on Amazon or at CB2, ranging from budget-friendly to premium prices, bypassing the need for hardwiring.
The catch: Battery-operated LED picture lights require frequent recharging, and the light output is noticeably weaker than a traditional hardwired fixture.
17. Install Floating Ledges for Rotating Displays

If you get bored easily and like to switch up your decor seasonally, install a sleek floating picture ledge above the bed. A slim metal or wood ledge allows you to prop up multiple frames, small plants, and objects without committing to a permanent layout. Overlap the frames slightly on the ledge to create depth, rather than lining them up like soldiers. You can buy these ledges at IKEA or Target for under $40. It’s an easy weekend project that yields a high visual return.
Best for: Indecisive decorators who want to change artwork frequently.
The catch: Floating ledges have strict weight limits. If you overload a cheap MDF ledge with heavy glass frames, it will rip straight out of the drywall.
18. Ground the Space with Monochromatic Photography

Black and white photography brings a level of sophistication that colorful abstracts sometimes miss. A large-scale, high-contrast architectural or landscape photograph adds depth and moodiness to a bright, airy bedroom. Abstract architectural shots work better than busy street photography for maintaining a calm environment. Companies like Minted offer limited-edition monochromatic prints curated from independent artists. Framed in a stark black metal frame with an oversized white mat, these pieces look incredibly crisp and intentional.
The catch: Too much high-contrast black and white photography can make a bedroom feel cold and clinical rather than cozy and inviting.
19. Repurpose Architectural Salvage as Decor

Art doesn’t have to be a print on paper. Hanging a piece of architectural salvage—like an intricately carved wooden panel, a vintage wrought-iron gate, or a distressed window frame—adds instant character and history to a sterile, new-build bedroom. Scrub salvaged pieces with a stiff brush and seal them with a clear matte polyurethane to prevent old lead paint from flaking onto your floor. You can source these unique items from local flea markets, antique stores, or architectural salvage yards. Prices vary wildly from dirt cheap to luxury depending on the age and condition.
The catch: Salvaged wood and metal are incredibly heavy. You absolutely must use heavy-duty toggle bolts and locate the wall studs, or it will crash down onto your bed.
How we chose these ideas: These wall art strategies were evaluated based on renter-friendliness, overall cost, installation effort, and their direct visual impact on a bedroom’s atmosphere. The focus was heavily weighted toward methods that maximize scale and proportion while minimizing unnecessary wall damage.
Your bedroom walls shouldn’t look like an afterthought or a random collection of impulse buys. Whether you decide to invest in a massive textured canvas or just finally hang your existing frames at the correct height, deliberate choices make all the difference. I’d highly recommend starting with the painter’s tape trick before you buy anything. Learned that the hard way. Pin this guide to your bedroom decor board so you have the exact measurements and spacing rules handy when you’re ready to start hanging.
Frequently Asked Questions
How high should I hang my aesthetic wall art bedroom pieces?
Center the artwork exactly 57 to 60 inches from the floor for open walls. If hanging above a headboard or dresser, position the bottom edge of the frame 6 to 10 inches above the furniture to maintain a visual connection.
What size art should go above a queen bed?
Artwork should span 60 to 80 percent of your headboard’s width. For a standard 60-inch queen bed, choose a single canvas or a gallery grouping that measures between 40 and 48 inches wide to keep the proportions balanced.
Can I hang fabric as wall art?
Yes, heavy textiles and fabric panels absorb sound and add physical warmth to a room. Hang them using a contemporary bronze pole fixing rather than pushpins to ensure the fabric looks intentional and sophisticated rather than like a dorm room.
How do I protect bedroom wall art from fading?
If your bedroom gets direct sunlight, upgrade your frames to include UV-resistant glazing. Standard glass or cheap acrylic offers zero protection, and the afternoon sun will quickly bleach the rich colors out of your prints, especially the reds and yellows.
