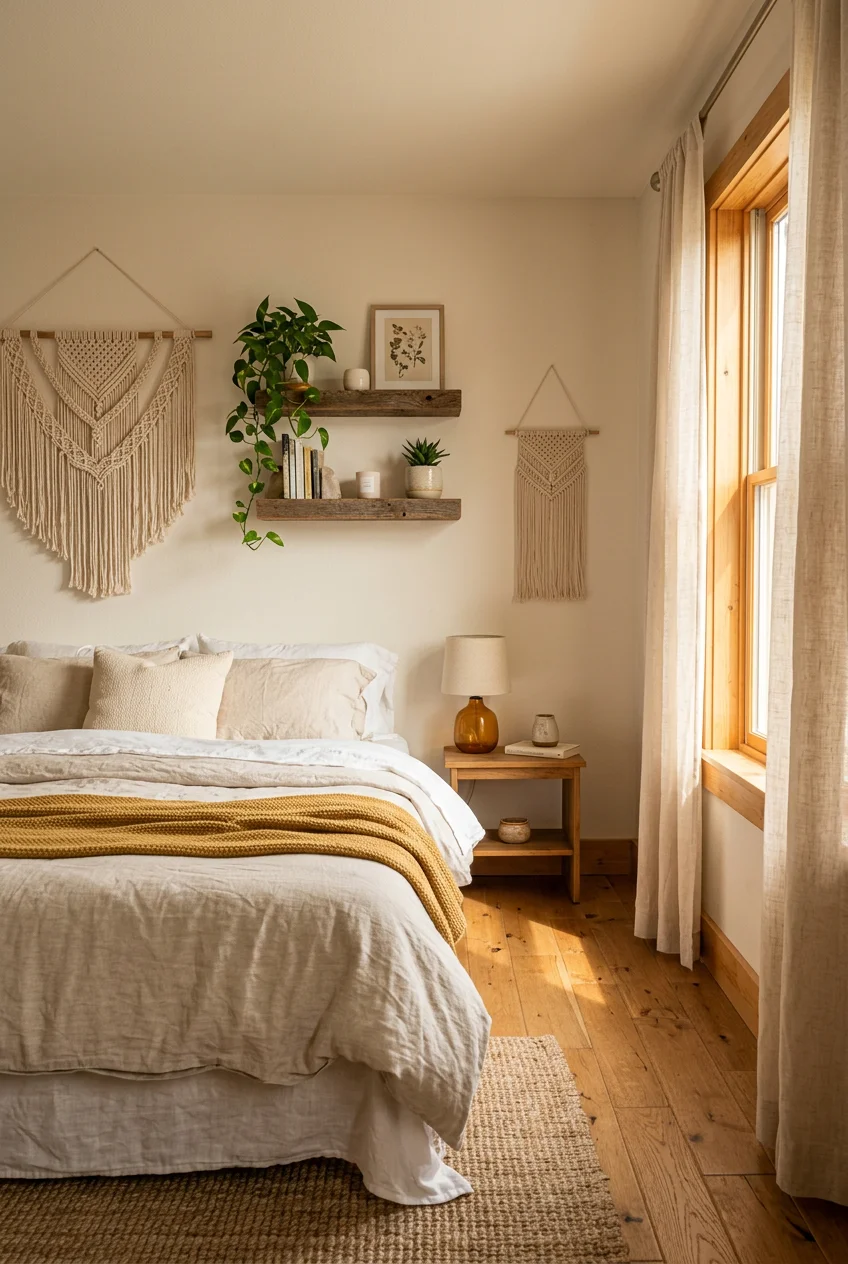
What’s Inside
- Earthy Paint Palettes Are My Favorite DIY Bedroom Decor Ideas
- Create a Statement Headboard Accent Wall
- DIY an Upholstered End-of-Bed Bench for Under $125
- Install Peel and Stick Wallpaper for a Bold Accent
- Craft a Custom Wood Slat Headboard for Under $100
- Incorporate Layered Lighting with Rechargeable Fixtures
- Go Oversized with Artwork for Visual Impact
- DIY Floating Shelves to Maximize Space and Display Decor
- Add Tactile Textures with Hand-Knotted Macramé
- Soundproof Your Bedroom on a Budget
- Embrace “Color-Drenching” for a Cohesive Retreat
- Personalize with Illustrated Statement Rugs
- Curved and Sculptural Bed Frames (DIY or Hack)
- Add Metallic Accents in Organic Modern Style
- Avoid the Small Furniture Trap in Small Rooms
- Clever DIY Bedroom Decor Ideas for Closet Doors
- Sew Your Own Linen Blackout Curtains
- Build a Custom Radiator Cover or Window Seat
- Propagate Plants in Glass Vases for Free Greenery
Last Tuesday at Target, I stared at a $149 generic polyester throw pillow and realized I needed better DIY bedroom decor ideas. My own bedroom used to look like a chaotic college dorm because I refused to pay retail prices for basic comfort. I slept under a flimsy quilt for three years because I couldn’t commit to a duvet cover. If you want a functional space, we’ve got to talk about real materials. I’ve wasted hundreds of dollars on flimsy decor that fell apart within a month. Let’s skip the cheap plastic junk. Here’s exactly how I built a room I actually want to sleep in, using real wood, specific paint colors, and exact measurements.
1. Earthy Paint Palettes Are My Favorite DIY Bedroom Decor Ideas

I spent 2021 sleeping in a room painted a stark, sterile gray. It felt like waking up in a hospital cafeteria. A massive mistake. For 2026, the shift is toward “cocooning” spaces that feel grounded. I repainted my walls with Sherwin-Williams Sea Salt (SW 6204), which costs about $75 a gallon. It’s a spa-like blue-green that supposedly activates your parasympathetic nervous system in eight minutes. My heart rate definitely drops when I walk in. You can also use Benjamin Moore Quiet Moments (1563) for a warmer sea glass vibe, or grab Valspar Warm Eucalyptus at Lowe’s for $45 a gallon. Skip the cool grays entirely. They reflect blue light from your screens and make the room feel icy. Choose creamy taupes or soft caramels if you want neutrals. Apply two coats using a 3/8-inch nap roller. The earthy, damp smell of fresh paint curing is worth the effort when you wake up to walls that look like soft clay.
2. Create a Statement Headboard Accent Wall

I tried a mustard yellow accent wall in 2019 and it gave me a headache when I tried to read in bed. The current approach is methodical. Paint the wall directly behind your bed two to four shades darker than the other three walls. It creates a heavy, grounding enclosure effect without visually distracting you when you’re lying down. I paired my Sea Salt walls with Sherwin-Williams Naval (SW 6244) on the headboard wall. A quart of Naval costs $28 and covers a standard 10×8 wall if you use primer first. The deep navy absorbs the light from my bedside lamps, creating a shadowy, quiet corner. Use green FrogTape ($8.98 at Home Depot, not the cheap blue stuff that bleeds—learned that the hard way) to get a razor-sharp line in the corners. The contrast makes your bed look permanently anchored to the floor.
3. DIY an Upholstered End-of-Bed Bench for Under $125

You can build a rock-solid upholstered end-of-bed bench for under $125. I built one last month after tripping over my husband’s discarded jeans for a year. For a standard queen-sized bed, get a piece of 1/4-inch plywood cut to exactly 18 by 69 3/4 inches at Home Depot. They do the cuts for free. Buy a 3-inch high-density foam cushion ($35 at Joann Fabrics), wrap it in quilt batting ($12), and pull a heavy fabric tightly over the top with a staple gun. I used a thick navy crushed velvet that cost $22 a yard. Blogger Jennifer Meyering built a nearly identical bench for less than $125, and the results look custom. The trick is pulling the fabric taut enough so the foam compresses slightly at the edges. It gives you a firm, comfortable spot to tie your shoes.

Bedsure GentleSoft White Throw Blanket for Couch
A dependable everyday pick — Bedsure GentleSoft White Throw Blanket for Couch – Mothers Gifts Day B pulls in 224 ratings at 4.5 stars. Not flashy, just solid.
4. Install Peel and Stick Wallpaper for a Bold Accent

I spent three hours scraping traditional wallpaper paste off my guest room walls with a putty knife and swore I’d never touch the stuff again. Peel and stick wallpaper is the only way I’ll do patterns now. Brands like Love vs. Design let you customize colors, but Amazon has fantastic options ranging from $10 to $20 per roll. Look for sketched botanicals or metallic line work. The adhesive backing is forgiving. If you apply it crooked, you just peel it back and adjust. A massive trend right now is the “Wallpaper Box,” where you wrap the entire room, ceiling included, in a single pattern. I tried this in a small water closet first. It feels incredibly theatrical and cozy. Just make sure you wipe your walls down with a damp microfiber cloth before applying. Dust is the enemy of peel and stick adhesive. If the wall is dirty, it won’t stick.
5. Craft a Custom Wood Slat Headboard for Under $100

A custom wood slat headboard looks architectural and costs less than $100. DIYer Nicole Ellsworth built a stunning floor-to-ceiling slatted headboard for about $85 in raw materials. I replicated this using a 1/2-inch plywood backing board and standard pine 1×2 furring strips from Lowe’s ($1.98 each). You secure the vertical slats to the plywood using wood glue and 1-inch brad nails, spacing them exactly 3/4 of an inch apart. Use a scrap piece of wood as a spacer so you aren’t measuring every single gap. I stained mine with Minwax Early American ($11.48 for a half-pint). The rough, splintery texture of the pine absorbs the stain unevenly, giving it a rich, organic look. Just sand the edges of your slats first. I skipped sanding on my first attempt and snagged my favorite silk pillowcase on a splinter. No exaggeration.
6. Incorporate Layered Lighting with Rechargeable Fixtures

A single flush-mount ceiling light casts harsh, unflattering shadows. You need layered lighting: ambient, task, and accent. I used to trip over extension cords trying to get enough lamps into my space. The smartest fix I’ve found recently is using rechargeable lighting. Brands like Pooky make gorgeous portable bedside lamps and wall sconces that don’t require any hardwiring. You just mount the sconce bracket to the wall with two screws and pop in a magnetic, rechargeable LED bulb (around $25 on Amazon). It eliminates visual cord clutter completely. I have two rechargeable brass sconces mounted 30 inches above my mattress. They hold a charge for about 40 hours of use. When they die, I plug the bulbs into a USB-C cable on my nightstand. It gives you a serene, high-end hotel atmosphere without paying an electrician $150 an hour to run new wires. You might also like: 20 Brilliant DIY Bedroom Wall Decor for Every Budget

50×70 Inch Rust Throw Blanket – Soft & Fluffy Fleece
Honestly, 50×70 Inch Rust Throw Blanket – Soft & Fluffy Fleece surprised me — sturdier than it looks in the photos, and over 11 buyers gave it 4.5 stars.
7. Go Oversized with Artwork for Visual Impact

I arranged nine small frames above my headboard last year, and they constantly rattled every time I shifted in my sleep. For a cleaner look, go oversized. Hang one massive horizontal canvas print that spans approximately two-thirds the width of your bed. For a queen bed (60 inches wide), you’re looking for an art piece around 40 inches wide. You can DIY this by purchasing a massive blank canvas from Michaels ($35 on sale) and creating a plaster relief. Mix standard joint compound ($7 at Walmart) with water, and use a notched trowel to scrape thick, textured arches across the canvas. Once it dries, it looks like a heavy, expensive piece of modern art. Large-scale artwork visually links the top of the bed to the ceiling, forcing the eye upward and making standard 8-foot ceilings feel significantly taller. You might also like: 18 Aesthetic Posters For Bedroom That Actually Work
8. DIY Floating Shelves to Maximize Space and Display Decor

Floating shelves offer clean lines and keep your floor clear. Don’t buy the hollow, lightweight floating shelves from Target. I put three heavy hardcover books on one, and it ripped right out of the drywall, leaving a massive hole. You need to build a sturdy wooden floating shelf system from scratch. Use solid wood like pine, poplar, or ash. The secret is building a hidden ladder support structure out of 2x4s. Cut your support arms to 14 inches long and space them about 12 inches apart along a main horizontal 2×4 ledger board. Secure everything directly into your wall studs using heavy-duty 2.5-inch wood screws. Then, build a hollow wood box out of 1/2-inch plywood to slide directly over the 2×4 ladder. Once secured with brad nails underneath, this shelf won’t budge. It costs about $40 in lumber per shelf and looks incredibly custom. You might also like: 20 Fresh Bedroom Ideas to Transform Your Space
9. Add Tactile Textures with Hand-Knotted Macramé

You need tactile textures to break up smooth surfaces. Macramé is making a massive comeback, but it’s evolving past those dusty, fringed wall hangings from 2015. The new look focuses on oversized knots and multi-tone fibers. Instead of hanging it on the wall, I bought a thick, hand-knotted macramé bed runner for $65 on Etsy. I drape it horizontally across the foot of my bed over a solid white linen duvet. The heavy, braided cotton rope adds instant artisanal texture. If you want to make one yourself, buy a spool of 5mm single-strand cotton cord ($18 on Amazon) and learn the basic square knot. It takes about ten hours of repetitive tying, but the result is a heavy, weighted textile. Just don’t let your cat near it. My tabby chewed through three tassels before I sprayed the ends with bitter apple spray ($6.99 at PetSmart).

Tenmiro Led Lights for Bedroom 100ft (2 Rolls of 50ft)
A dependable everyday pick — Tenmiro Led Lights for Bedroom 100ft (2 Rolls of 50ft) Music Sync Colo pulls in 35 ratings at 4.5 stars. Not flashy, just solid.
10. Soundproof Your Bedroom on a Budget

Ignoring noise pollution is a massive mistake. I lived in an apartment near a busy intersection, and the constant hum of traffic ruined my sleep for months. You can significantly reduce noise for under $1000. Start by sealing the air gaps around your windows. Sound travels through air. Use a tube of acoustic sealant ($15 on Amazon) to fill any cracks between the window frame and the drywall. Next, hang heavy soundproof curtains (dense, multi-layer sets run under $100 at Target). They won’t block a siren, but they muffle high-frequency street noise beautifully. If you share a thin wall with a noisy roommate, you need mass. Mass-loaded vinyl (MLV) costs about $2 to $8 per square foot. You can staple it directly to the drywall and cover it with acoustic foam panels. It drastically cuts down on vocal transmission through the walls.
11. Embrace “Color-Drenching” for a Cohesive Retreat

The smartest design trick I’ve learned recently is “color-drenching.” This means painting your walls, baseboards, window trim, and even the ceiling in the exact same rich hue. Designer Zoë Feldman recommends using a deep blue-gray or a smoky olive green. I color-drenched my guest bedroom in Benjamin Moore’s Dark Olive. I was terrified it would look like a cave, but painting the trim and ceiling the same color actually blurred the hard boundaries of the room. Your eye doesn’t stop at the ceiling line, so the space feels expansive and incredibly cozy. Use an eggshell finish for the walls and a satin finish for the trim in the same color. It requires about three gallons of paint (around $180 total), but it completely upgrades cheap builder-grade trim into something that looks architectural.
12. Personalize with Illustrated Statement Rugs

Illustrated statement rugs are taking over right now. We’re talking rugs that feature large-scale brush-stroke art, minimal line-drawn faces, or bold abstract shapes. I bought an 8×10 abstract rug from Ruggable for $399. It has a cream base with thick, sweeping charcoal and rust arches. Because the base color is light, the bold pattern doesn’t overpower my 12×12 bedroom. You want to anchor the room by sliding the rug about two-thirds of the way under your bed, leaving a soft landing pad for your feet. Ruggable’s plush covers are sink-in soft, which matters when you’re stepping out of bed barefoot on a Tuesday morning. Don’t buy a 5×7 rug for a queen bed. I made that mistake in my first apartment. It looked like a tiny bath mat floating uselessly in the center of the room.

Mkono Macrame Hanging Shelves Boho Wall Decor Set of 2
Mkono Macrame Hanging Shelves Boho Wall Decor Set of 2 Rustic Wood Flo has been one of the most consistently praised picks in this category. 2 reviewers averaged 4.5/5.
13. Curved and Sculptural Bed Frames (DIY or Hack)

Curved and sculptural bed frames are dominating the market because they offer a softer, more forgiving aesthetic. Buying a curved bouclé bed frame will easily set you back $1,200. You can hack this look for a fraction of the cost. I couldn’t build a curved wooden frame from scratch, so I built a padded, arched wall panel to sit behind my basic metal platform frame. I traced a massive arch onto a 4×8 sheet of 1/2-inch plywood, cut it out with a jigsaw ($39 at Ryobi), and covered it in 2-inch foam and a soft rust-colored linen. Staple the fabric tightly around the curved edge. It acts as a massive, custom headboard that also provides excellent sound dampening against the wall. The soft curves break up the rigid, boxy feeling of a standard square bedroom effortlessly.
14. Add Metallic Accents in Organic Modern Style

You need metallic accents to break up rough textures. You don’t have to buy expensive solid brass hardware. DIYer Nicole Ellsworth proved this by spray-painting basic IKEA wall sconces. I bought two IKEA NYMÅNE wall lamps for $24.99 each. Out of the box, they’re a very flat, matte white. I taped off the electrical cords and hit them with two coats of Rust-Oleum Universal Metallic Spray Paint in Pure Gold ($8.98 at Home Depot). The key is doing incredibly light, sweeping coats from a foot away. I rushed my first lamp, sprayed too close, and the paint dripped down the side like golden tears. I had to sand it down and start over. When done correctly, the metallic finish catches the natural light from the window beautifully.
15. Avoid the Small Furniture Trap in Small Rooms

Designers know that shrinking your furniture is a trap. You need to make bolder, larger decisions. I swapped my tiny table lamp for an oversized, 28-inch tall ceramic lamp from HomeGoods ($49). The scale instantly made the room feel grander. Then, I tackled the window. I had one small, sad window in the center of the wall. I installed a 120-inch curtain rod from Walmart ($22) right at the ceiling line and ran it wall-to-wall. I hung four panels of heavy velvet curtains, covering the entire wall. Even though the window is small, the wall-to-wall drapery visually stretches the architecture. It creates the illusion of a massive, luxurious window hiding behind the fabric.

Yieach Bedside Shelf for Dorm Bed,Rv
A dependable everyday pick — Yieach Bedside Shelf for Dorm Bed pulls in 94 ratings at 4.5 stars. Not flashy, just solid.
16. Clever DIY Bedroom Decor Ideas for Closet Doors

Replacing basic closet doors with solid wood doors costs upwards of $200 each. Instead, I used one of my favorite DIY bedroom decor ideas: adding custom trim to the existing doors. I bought a bundle of 1-inch pine base cap moulding from Lowe’s for about $30. Using a miter box and a hand saw, I cut the trim into picture-frame squares and attached them directly to the flat closet doors using a heavy-duty construction adhesive (Liquid Nails, $4.98) and a few brad nails. Once you caulk the seams and paint the entire door a rich color, it looks exactly like a high-end, custom-paneled door. I did this in my master bedroom last spring. The only negative was that I didn’t clamp the trim tight enough on the first door, and the glue expanded, leaving a visible gap I had to fill with wood putty.
17. Sew Your Own Linen Blackout Curtains

I got a quote from a local shop for two linen blackout panels, and they wanted $850. I politely declined and decided to make my own. I went to a local fabric outlet and bought 6 yards of a beautiful, heavy oatmeal linen for $15 a yard. Then, I bought 6 yards of Roc-lon blackout lining material for $8 a yard at Joann Fabrics. If you have a basic sewing machine, this is a straightforward weekend project. You essentially sew a giant rectangle, attaching the blackout lining to the back of the linen. I used drapery hooks and clip rings to hang them from a heavy iron rod. The blackout lining adds incredible weight and stiffness to the linen, making it drape like a heavy, expensive custom curtain. The total cost was around $150. Just ensure your sewing machine has a heavy-duty needle (size 90/14). I broke three standard needles trying to punch through the thick layers.
18. Build a Custom Radiator Cover or Window Seat

I stared at the chipped, peeling paint on my bedroom radiator for two winters before I finally built a cover for it. Using 3/4-inch MDF (Medium Density Fiberboard), which costs about $45 for a 4×8 sheet at Home Depot, I built a simple box frame to slide over the unit. For the front panel, I used a decorative aluminum sheet with a cloverleaf punch pattern ($32 at Lowe’s) so the heat could still escape into the room. I painted the whole thing with a high-heat enamel paint. I topped the cover with a thick piece of stained pine, creating a custom window seat and display shelf. It completely hid the eyesore. One warning: never use standard latex wall paint on a radiator cover. I did that on a small test piece, and the heat caused the paint to bubble and smell like burning plastic. Trust me on this.
19. Propagate Plants in Glass Vases for Free Greenery

I refuse to pay for expensive nursery plants when you can create a jungle for free. I buy a basic $6 Golden Pothos from Trader Joe’s and immediately chop it into five or six cuttings. Make sure you snip right below a root node. I place these cuttings in assorted clear glass jars (old jam jars, thrifted bud vases, or cheap $2 glass bottles from Goodwill) filled with tap water. Line them up on a sunny bedroom windowsill. Within three weeks, they grow thick, white water roots. It looks like a bright, living apothecary display. Once the roots are two inches long, you can plant them in soil or just leave them in the water indefinitely. I have a massive glass jug on my dresser with a pothos vine that’s been growing in water for two years. Just remember to change the water every two weeks.
Your bedroom shouldn’t feel like an afterthought. I spent years sleeping in rooms that stressed me out before I realized that a few sheets of plywood, some strategic paint, and elbow grease could change my environment. You don’t need a massive budget; you just need to stop buying cheap, temporary fixes and start building things that last. I’m constantly tweaking my space, but these projects have given me a foundation I actually want to wake up in. If you’re ready to tackle your own space, save this post and pin your favorite ideas for your next weekend project.
Frequently Asked Questions
What are the cheapest diy bedroom decor ideas?
Painting your walls or adding custom trim to basic closet doors gives the highest visual return on investment. You can also propagate houseplants in thrifted glass jars for entirely free greenery.
How can I make a small bedroom look expensive on a budget?
Use the color-drenching technique by painting your walls, trim, and ceiling the same rich color. Hang heavy velvet curtains wall-to-wall and ceiling-to-floor to visually stretch the architecture of the room.
What materials do I need for a DIY wood slat headboard?
You need a 1/2-inch plywood backing board, standard pine 1×2 furring strips, wood glue, 1-inch brad nails, and a wood stain. You can build a custom floor-to-ceiling headboard for under $100.
Does peel and stick wallpaper damage bedroom drywall?
It won’t damage your drywall if applied correctly. The main mistake people make is applying it to dirty or dusty walls. Always wipe your walls down with a damp microfiber cloth before installation.
