What’s Inside
- Embrace 3D Textured Art with Joint Compound (Best for: beginners)
- Curate a Dynamic Gallery Wall with Precise Spacing
- Hang DIY Bedroom Wall Decor at the “Museum Standard” Eye Level
- Install Peel-and-Stick Wallpaper for a Low-Commitment Accent Wall (Best for: renters)
- Create a DIY Fabric Wall Hanging from Affordable Materials
- Design a Painted Color-Blocked Accent Wall
- Incorporate Floating Shelves with Curated “Clutter” (Best for: tight budgets)
- Frame Pressed Flowers in Floating Glass for a Modern Botanical Look
- Utilize Removable Wall Decals for Flexible Design
- Create DIY Decorative Acoustic Panels (Best for: noisy apartments)
- Transform a Shower Curtain into Oversized Canvas Art
- Avoid the “Sprinkle Effect” When Planning DIY Bedroom Wall Decor
- Use Washi Tape for Geometric Patterns (Best for: kids’ rooms)
- Consider a DIY Mural for a Personalized Statement
- Hang Art with Double Fixings to Prevent Tilting
- Upcycle a Heavy Thrifted Mirror for Cheap Impact
- Install Faux Picture Molding for Architectural Detail (Best for: small dark rooms)
Most people treat their bedroom walls like an afterthought. They just slap up a single mass-produced print and call it a day. But settling for a sterile space is the biggest mistake you can make when planning your DIY bedroom wall decor. The walls are the largest surface area in your room. If they look flat, the whole room feels flat. I’m tired of seeing the same generic canvas prints hung way too high on a blank wall. Let’s fix that with actual texture, correct spacing, and materials that look expensive but aren’t. If you only try one idea from this list, make it #1. Here’s why: textured joint compound art looks like a gallery piece but costs less than takeout. It completely changes the acoustic feel of a stark room. Trust me on this.
Skip this if you’re looking for instant, zero-effort gratification. These projects require measuring tapes, drying times, and a willingness to get paint on your hands. If you just want to click a button and be done, this isn’t the guide for you.
1. Embrace 3D Textured Art with Joint Compound (Best for: beginners)

A top trend for the upcoming year is tactile, three-dimensional wall art. You can create your own by spreading a tub of DAP Wallboard Joint Compound (typically $15-$25 for a 4.5-gallon tub at stores like Home Depot) onto a large blank wood panel. Use a notched trowel or a plastic hair comb to sculpt waves or organic lines into the wet paste. The compound goes on like thick frosting and dries into a hard, chalky matte finish. Paint it with a flat interior paint like Behr Premium Plus Interior Matte in ‘Alabaster’ for a high-end, architectural feel. Most people buy flat art and wonder why their room lacks depth. This catches the morning light and casts actual shadows across your wall. The catch: this stuff is heavy. You need a rigid backing like MDF, not a flimsy stretched canvas that’ll warp under the weight.
2. Curate a Dynamic Gallery Wall with Precise Spacing

For a polished gallery wall, expert interior designers recommend consistent spacing. Aim for exactly 2 to 3 inches between frames to maintain visual harmony. Don’t let it look cluttered. A common mistake is haphazard placement. People just start hammering nails and hope for the best. I learned that the hard way. Instead, lay out your arrangement on the floor first. Cut out kraft paper to the exact size of your frames and stick them to the wall with painter’s tape to visualize the layout. The visual breathing room is just as important as the art. The catch: measuring exactly 2.5 inches between twelve different frames will test your patience. Cut a scrap piece of wood to your exact gap dimension and use it as a spacer block between every frame to guarantee perfection.
3. Hang DIY Bedroom Wall Decor at the “Museum Standard” Eye Level

To ensure comfortable viewing, the center of your artwork or gallery wall arrangement should be approximately 57 to 60 inches from the floor. This ’57-inch rule’ is a standard used by professional galleries and designers. Most people hang these way too high and wonder why the room feels disconnected. When art sits too close to the ceiling, it makes the furniture below it look tiny. Measure 57 inches up from the floor, mark it with a pencil, and that spot should be the exact center of your picture. The room will instantly feel more grounded. The catch: if you have extremely low ceilings or very tall furniture directly underneath the art, 57 inches might visually crowd your space. Always account for a minimum of 6 to 8 inches of clearance above the back of a headboard to prevent heads from bumping the frames.

AMADA HOMEFURNISHING Floating Shelves
If you want something that just works, AMADA HOMEFURNISHING Floating Shelves is a safe bet (116 reviews, 4.5 stars).
4. Install Peel-and-Stick Wallpaper for a Low-Commitment Accent Wall (Best for: renters)

Peel-and-stick wallpaper remains a massive trend, offering diverse designs and easy removal. Brands like Love vs. Design offer over 200 customizable colors, while Chasing Paper specializes in modern, artist-designed patterns. Expect to budget $50-$150+ per roll, depending on the brand and the complexity. Applying it feels like putting a giant screen protector on your phone. You have to peel the backing slowly and smooth out the air bubbles with a felt-edged squeegee. It completely alters the mood of a bedroom without the harsh fumes of traditional paint. The catch: your walls must be perfectly smooth. Any orange peel texture, heavy knockdown, or even a stray speck of dried paint will show right through the vinyl. It’ll cause the adhesive to fail and peel at the corners. Don’t try to apply this alone. You need one person holding the roll straight at the ceiling line while the other works the squeegee downward.
5. Create a DIY Fabric Wall Hanging from Affordable Materials

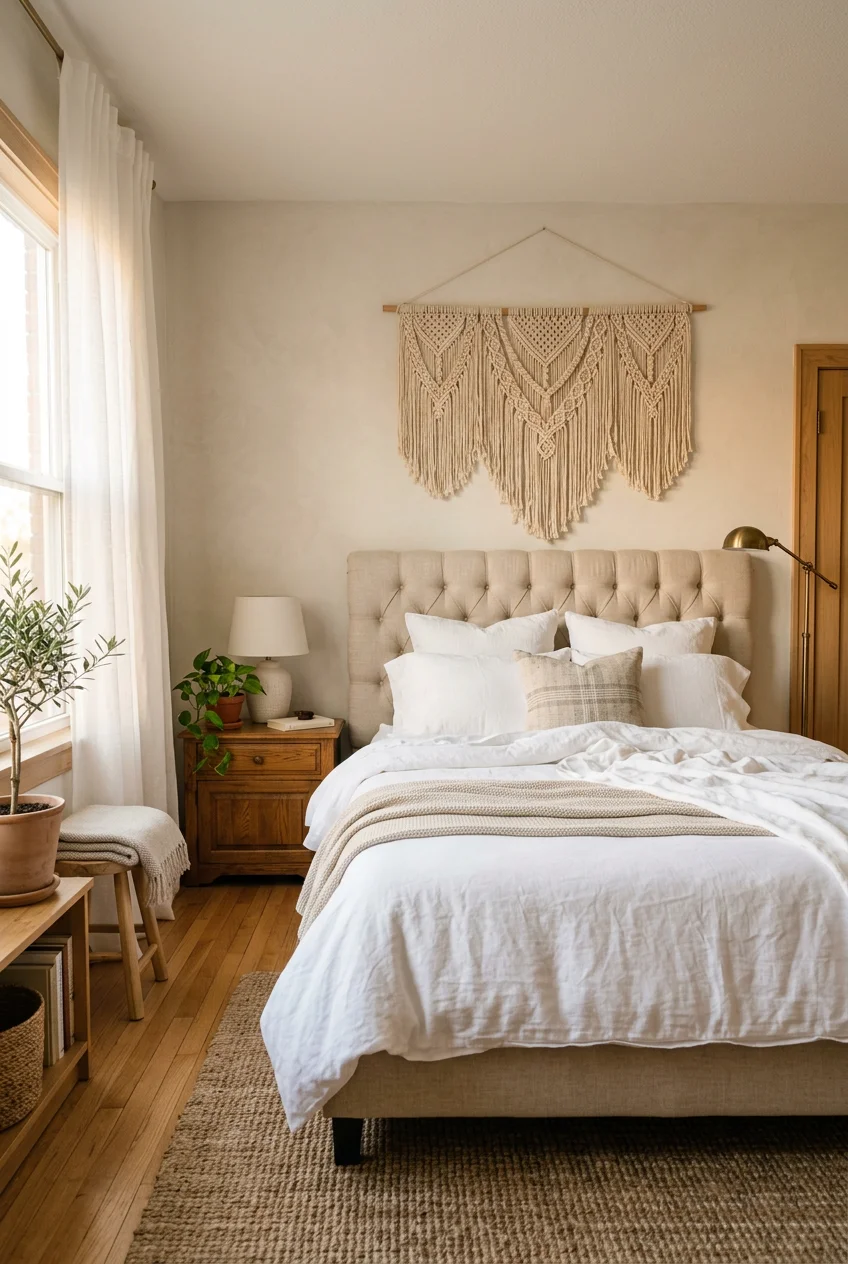
Achieve a boho-chic or heavily textured look by crafting a massive fabric wall hanging. Use inexpensive materials like an unwaxed canvas drop cloth, which you can find at hardware stores like Lowe’s for around $15-$30 for a large 9×12 size. Cut the heavy, stiff fabric to your desired size, hem the raw edges with hot glue, and attach it to a thick wooden dowel for hanging. This adds visual warmth and actual acoustic softness to a room full of hard surfaces. The thick canvas absorbs sound, making your bedroom feel quieter. The catch: canvas drop cloths come with deep, stubborn creases from the factory packaging. You can’t just hang it straight out of the plastic bag. It requires serious steam ironing and sometimes a run through the washing machine to soften the rigid fibers first. You might also like: 17 Bedroom Ideas on a Budget That Transform Your Space
6. Design a Painted Color-Blocked Accent Wall

Move beyond a basic single accent color by trying color-blocking. Paint the bottom half of your wall one color and the top half another. You absolutely need FrogTape Multi-Surface Painter’s Tape to create a crisp, clean dividing line. Cheap masking tape will fail you here. Popular combinations include deep sage green on the bottom and a warm cream on top. The sharp horizontal line grounds the room and creates a visual horizon. This makes low ceilings look slightly taller. The catch: heavily textured walls make tape bleed almost inevitable. Even with the expensive tape, paint will find its way into the tiny grooves. You’ll spend extra time touching up the dividing line with a tiny artist brush. To prevent bleed completely, paint over the tape edge with your base wall color first to seal the gap. You might also like: 20 Gorgeous Bedroom Decor On You’ll Love

ANROYE 2 Tier Macrame Boho Wall Hanging Shelf
Honestly, ANROYE 2 Tier Macrame Boho Wall Hanging Shelf surprised me — sturdier than it looks in the photos, and over 351 buyers gave it 4.5 stars.
7. Incorporate Floating Shelves with Curated “Clutter” (Best for: tight budgets)

Instead of a single large art piece, install floating shelves like the IKEA LACK wall shelf and style them with a dense mix of objects. This curated maximalism approach allows you to display vintage brass finds, small trailing plants, and stacked books all in one place. Vary the height of the objects to keep the eye moving. You can even grab small glass bottles from the Trader Joe’s beverage aisle, clean them out, and use them as propagation stations for pothos cuttings. It turns your wall into a rotating display rather than a static piece of art. The catch: floating shelves require drilling deep into wall studs or using heavy-duty drywall anchors. They leave substantial, ugly holes when removed. Also, shelves collect dust like crazy. If you hate moving a dozen tiny objects to wipe down the surface every week, this open-storage look will quickly become a chore.
8. Frame Pressed Flowers in Floating Glass for a Modern Botanical Look

Elevate the classic pressed flower trend by displaying botanicals between two sheets of glass with a thin metal border. This creates a floating effect that allows your wall color to show through, making the plant appear suspended. Grab a cheap mixed bouquet from the Whole Foods floral section, lay the petals flat between heavy books lined with parchment paper, and wait two weeks. This DIY project brings nature indoors with a sleek, modern aesthetic. It feels incredibly calming in a bedroom setting. The delicate textures contrast beautifully against a solid painted wall. The catch: direct sunlight will bleach your pressed flowers into a sad, crispy brown within a few months. You have to hang these frames on shaded walls that never get hit by harsh afternoon rays. To keep the flowers from slipping down inside the glass frame, use a tiny dab of clear craft glue on the back of the thickest part of the stem. You might also like: 15 Bedroom Dresser Decor That Actually Work
9. Utilize Removable Wall Decals for Flexible Design

For quick and damage-free updates, opt for large removable wall decals. Brands like Chasing Paper or various options found on Amazon offer a wide variety of designs, from subtle watercolor dots to bold floral graphics. These can be applied and removed without ripping off your drywall paper. They typically last three to five years under normal indoor conditions. Decals give you the visual impact of a hand-painted mural without requiring an ounce of artistic talent. They work beautifully behind a headboard to create a faux architectural arch. The catch: large decals are notoriously finicky to apply without trapping massive air bubbles. You need a plastic squeegee and patience to work the air from the center out to the edges. Always wipe the wall down with a damp cloth and let it dry completely before applying. Even a thin layer of invisible household dust will ruin the adhesive backing and cause the edges to curl.

Macrame Wall Hanging Shelf
A dependable everyday pick — Macrame Wall Hanging Shelf – Boho Shelves Bedroom Decor | Macrame Wall pulls in 276 ratings at 4.5 stars. Not flashy, just solid.
10. Create DIY Decorative Acoustic Panels (Best for: noisy apartments)

A surprising tip is to make your own acoustic panels that double as modern art. Use 1.5-inch deep blank art canvases and sound-absorbing foam. You can use 1.5-inch thick eggcrate foam. Cut the foam to fit snugly inside the back of the canvas frame. Then, wrap the entire canvas in an acoustical fabric that matches your room. Use a heavy-duty staple gun to secure the fabric tightly. These panels add a soft texture to your walls and actually absorb sound waves, reducing annoying echoes in a room with hardwood floors. The catch: wrapping thick fabric neatly around the square corners of a canvas without creating bulky, ugly folds takes serious practice. You have to pull and fold it exactly like wrapping a tight present. If you use a fabric that is too thin, the wooden stretcher bars will show right through.
11. Transform a Shower Curtain into Oversized Canvas Art

For a massive, budget-friendly art piece, use a printed shower curtain as your canvas. Large-scale art is shockingly expensive. Instead, buy a visually appealing fabric shower curtain and a bundle of cheap pine furring strips from the lumber aisle. Build a simple rectangular frame, stretch the curtain tightly over it, and staple it to the back. You get a substantial, five-foot piece of art for significantly less than a traditional large canvas. The catch: most affordable shower curtains are made of polyester blends, which can look slightly shiny or synthetic under harsh overhead lighting compared to the matte finish of real cotton canvas. You also have to carefully iron out every single fold line before stapling, because once it’s stretched tight on the frame, those creases are permanent. Staple the centers of each side first, then work to the corners.
12. Avoid the “Sprinkle Effect” When Planning DIY Bedroom Wall Decor

A common mistake is scattering tiny decor items across a massive wall without a cohesive plan. I call this the sprinkle effect. People hang a small mirror here, a tiny shelf there, and a single photo in the corner. It makes the room look chaotic. Instead, identify a main focal wall and concentrate your decor efforts entirely there. Draw an imaginary rectangle on this wall and arrange your pieces tightly within those invisible borders to create a unified display. Leaving the surrounding wall space completely bare makes the decorated section look more intentional. The catch: committing to a single, dense focal point means leaving other walls completely naked, which feels unnatural to people who are used to filling every blank space. You have to fight the urge to spread your decor out. If you spread your budget across four walls, everything looks cheap. Put your entire budget into one stunning focal arrangement above the bed.

Fixwal Floating Shelves for Wall
If you want something that just works, Fixwal Floating Shelves for Wall is a safe bet (459 reviews, 4.5 stars).
13. Use Washi Tape for Geometric Patterns (Best for: kids’ rooms)

For a super affordable and renter-friendly option, create geometric patterns directly on your drywall using Washi tape. Budget around $3-$10 per roll for this colorful paper tape. You can map out large triangles, abstract mountains, or a faux headboard silhouette. It’s incredibly easy to apply, and you can rip it by hand. If you mess up a line, you just peel it off and try again without damaging the underlying paint. The matte paper texture of the tape looks surprisingly sophisticated from a distance, almost like a custom painted detail. The catch: Washi tape adhesive is notoriously weak by design. While that makes it safe for your paint, it also means the ends will inevitably start curling up after a few months, especially in a humid environment. To help it stick longer, wipe the wall down with a tiny bit of rubbing alcohol on a microfiber cloth before applying the tape to remove invisible skin oils.
14. Consider a DIY Mural for a Personalized Statement

A hand-painted mural can transform a blank space into a completely unique work of art. You don’t need to be a professional artist to pull this off. Simple geometric shapes, large color-blocked arches, or abstract squiggles work beautifully. Buy quality paints like Liquitex Heavy Body Acrylics and project your design onto the wall using a cheap mini projector. Trace the outline lightly with a pencil, then fill it in with a brush. The thick texture of heavy body acrylics covers wall imperfections much better than runny craft paint, giving a rich, opaque finish. The catch: you absolutely must prime the specific area of the wall first, or the acrylic paints will soak into the porous drywall unevenly and look patchy. Standard wall paint has primer mixed in, but artist acrylics don’t. Skipping the primer means you’ll have to do four coats of expensive acrylic just to get solid coverage.
15. Hang Art with Double Fixings to Prevent Tilting

Expert art handlers recommend using double fixings on either side of an artwork, rather than a single central wire hung on one nail. This means putting two D-rings on the back of the frame and sinking two separate screws into the wall. This prevents the piece from tilting forward or swinging out of level when someone brushes against it. There’s nothing more annoying than a gallery wall where every frame is slightly crooked. Double fixings ensure a consistently straight display that never requires adjusting and keeps the frame flush against the drywall. The catch: hanging a frame with two fixed points requires precise leveling and measuring. If one nail is even a millimeter higher than the other, the whole frame sits crooked forever. Stick a piece of painter’s tape across the back of the frame, mark the two D-ring spots with a pen, and transfer that tape directly to the wall to guide your nails.

Mkono Macrame Hanging Shelves Boho Wall Decor Set of 2
Mkono Macrame Hanging Shelves Boho Wall Decor Set of 2 Rustic Wood Flo punches above its price — 21 buyers rated it 4.5 stars. I would buy it again.
16. Upcycle a Heavy Thrifted Mirror for Cheap Impact

A massive floor mirror leaning against the wall instantly doubles the visual size of a cramped bedroom and bounces morning light into dark corners. Instead of buying a flimsy, distortion-heavy cheap mirror from Target or Walmart, hunt for a large, heavy mirror at a local thrift store or estate sale. You can usually find ornate, solid wood frames for under $60. Take it home, clean the glass with a vinegar solution, and sand down the frame. The thick, older glass reflects light much better than modern alternatives. No exaggeration. The catch: vintage mirrors are incredibly heavy. If you decide to hang it rather than lean it, you can’t use standard picture wire. You must use heavy-duty metal French cleats secured directly into the wooden wall studs, or the sheer weight of the glass will rip the screws straight out of the drywall. If you lean it, you still need to anchor the top edge to the wall with a strap.
17. Install Faux Picture Molding for Architectural Detail (Best for: small dark rooms)

Adding faux picture molding or wainscoting is the ultimate way to make a basic drywall box feel like a historic home. You can buy pre-primed pine or PVC trim from stores like Home Depot or Lowe’s for just a few dollars per eight-foot stick. Measure out large rectangular boxes on your walls, cut the trim, and attach it using a brad nailer and construction adhesive. Once it’s caulked and painted the exact same color as the wall, it looks like custom millwork. The shadows cast by the raised trim add incredible depth and character to the room without requiring a single piece of framed art. The catch: cutting the 45-degree angles for the corners requires a miter box and saw. If your cuts aren’t perfectly precise, the corners won’t meet cleanly. Also, most bedroom walls aren’t perfectly flat. When you nail straight trim to a bowed wall, you’ll have gaps behind the wood requiring heavy caulking.
How we chose these ideas: we looked for projects that balance real cost, effort, and visual impact. The focus was strictly on materials you can easily source locally and techniques that don’t require a contractor’s license, keeping renter-friendliness and budget constraints in mind.
Skip the cheap mass-produced prints entirely and invest your weekend in the textured joint compound or the custom molding. The results look incredibly high-end. Save this list, pin your favorite ideas, and start measuring your walls. It took me years to figure out that less is more.
Frequently Asked Questions
What is the cheapest way to decorate a large bedroom wall?
The most budget-friendly method for massive impact is stretching a printed fabric shower curtain over a simple wooden frame. It mimics the look of oversized canvas art for a fraction of the cost, filling large empty spaces effortlessly.
How high should I hang my DIY bedroom wall decor?
Follow the gallery standard ’57-inch rule.’ The exact center of your artwork or gallery wall arrangement should sit 57 to 60 inches from the floor. This keeps the art at a natural eye level and prevents the room from feeling disjointed.
Is peel-and-stick wallpaper safe for renters?
Yes, high-quality peel-and-stick wallpaper is designed for easy removal without damaging paint. However, it only works well on perfectly smooth walls. If your walls have orange peel or knockdown texture, the adhesive will eventually fail and peel.
How do I make my own textured 3D wall art?
Spread standard joint compound onto a rigid wood panel using a notched trowel or comb to create waves and patterns. Once completely dry, paint it with a matte interior paint like ‘Alabaster’ for a high-end, architectural finish.
