What’s Inside
- Start Your Wall Decor Bedroom DIY With Peel-And-Stick Wallpaper
- Master The Gallery Wall With Precise Spacing
- Paint An Accent Using 2026 Warm Hues
- Install Floating Shelves Into Wall Studs
- Add Indirect LED Strip Lighting Under The Bed
- Install Acoustic Wall Panels For Texture
- Curate A Varied Mirror Wall For Depth
- Avoid The Cluttered Accessory Mistake
- Frame Pressed Botanicals In Simple Frames
- Stretch Fabric Panels For A Custom Look
- Hang Heavy Decor With A French Cleat
- Apply Removable Wall Decals For Renters
- Backlight Your Art For A High-End Finish
- Build A DIY Upholstered Headboard Wall
- Stop Overcommitting To A Single Design Trend
- Upcycle Thrift Store Canvas Art
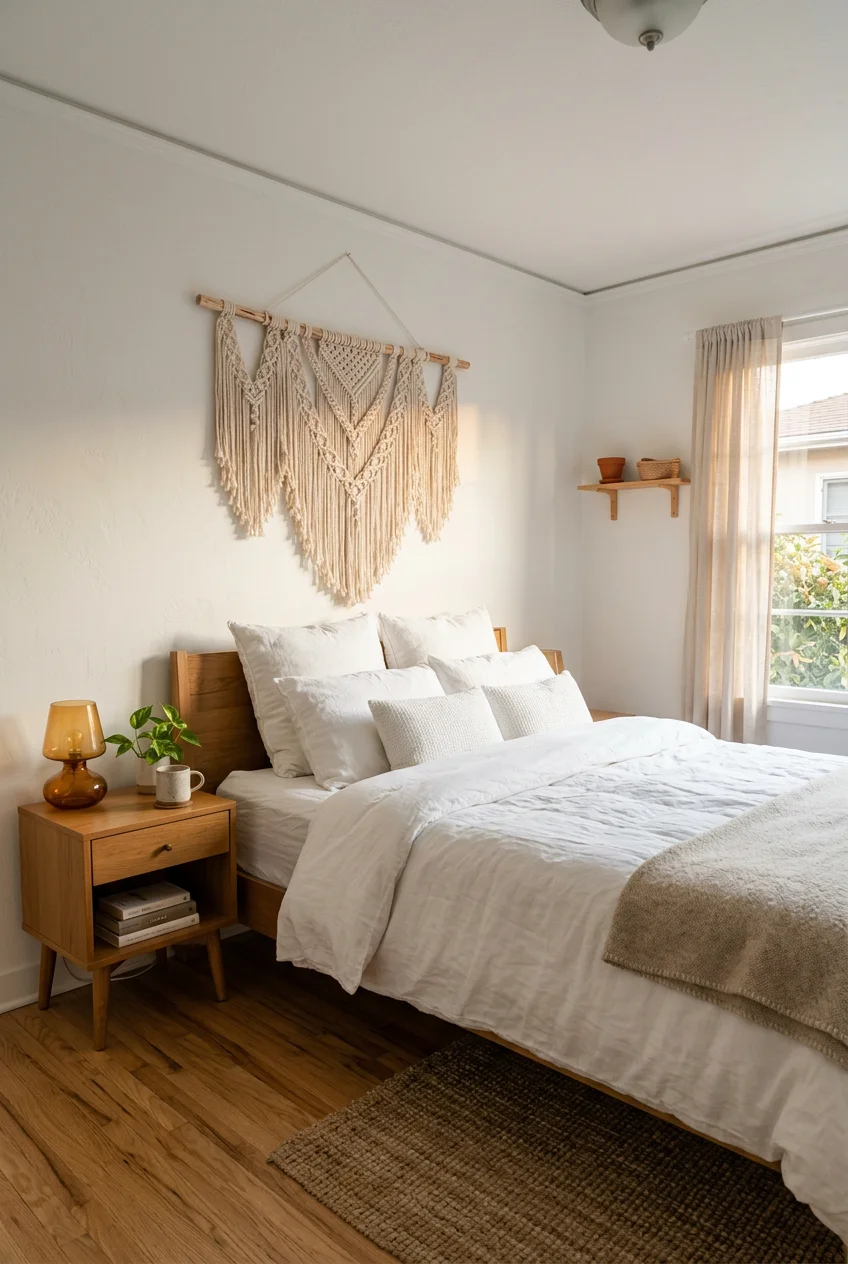
- Mount Simple Woven Wall Hangings
- Paint A Color Block Arch Behind Your Nightstand
- Start Your Wall Decor Bedroom DIY With A Plan
Last Tuesday, I stood in my guest room staring at a pile of shattered glass. I tried mounting a heavy vintage mirror with cheap adhesive strips instead of proper hardware, and it ripped a massive chunk of drywall down with it. That disaster forced me to rethink my entire approach to wall decor bedroom diy. You don’t need a massive budget to make a room feel finished. You just need the right tools, exact measurements, and a bit of patience. Here are 19 specific ways to fix blank walls without making the same expensive mistakes I did.
1. Start Your Wall Decor Bedroom DIY With Peel-And-Stick Wallpaper

I used to think removable wallpaper looked cheap until I ordered physical samples. For a quick accent wall, peel-and-stick is highly effective. Brands like Love vs. Design offer over 2000 patterns and 200 color options. You can preview designs in real-time online, which saves you from ordering the wrong shade of blue. If you’re on a stricter budget, Bungalow Rose from Wayfair costs between $0.50 and $2.00 per square foot. The Bungalow Rose material feels noticeably thinner in your hands. I learned this the hard way last month when my fingernail accidentally punctured a sheet during installation. You must smooth it down with a felt-edged squeegee, never a hard plastic one. It takes exactly two rolls of the 24-inch by 10-foot size to cover a standard area behind a queen bed. The thick vinyl feels slightly rubbery and hides minor wall texture, which helps if your walls feature that annoying orange peel finish. I bought my smoothing tool at Home Depot for $6.98. It makes the installation process much less frustrating.
2. Master The Gallery Wall With Precise Spacing

Most people ruin gallery walls before they even pick up a hammer. They eyeball the spacing, and it ends up looking like a cluttered mess. I did this in my own bedroom three years ago and patched twenty different nail holes. To do this correctly, you must lay your arrangement on the floor first. Maintain exactly 3 to 4 inches of empty wall space between each frame. If you go wider, the pieces look disconnected. Another common error involves hanging the art way too high. The center of your gallery wall needs to sit at eye level, which is approximately 59 inches from the floor. I buy the $12.00 Project 62 black metal frames from Target for this project. They feature a slim profile that doesn’t distract from the art itself. Use a tape measure and mark your spots with a pencil. Don’t guess. Precision makes a cheap collection of prints look like a curated art installation.
3. Paint An Accent Using 2026 Warm Hues

Cool grays make a bedroom feel like a sterile waiting room. The current shift toward warm, nature-inspired colors feels much better for a sleeping space. I recently tested Valspar’s Warm Eucalyptus in a client’s room. It’s an earthy gray-green that costs $45 per gallon at Lowe’s. If you want something moodier, Glidden’s Warm Mahogany is a rich red-brown that works well behind a wooden headboard. A gallon usually runs between $30 and $60 depending on the finish you choose. Always buy the eggshell finish for walls. Flat paint shows every single oily fingerprint, and semi-gloss reflects too much light from your lamps. I spent three hours scrubbing flat paint last summer because my dog rubbed against it. Use a standard 9-inch roller with a 3/8-inch nap for smooth drywall. It takes exactly two coats to get full coverage with these deeper colors. Don’t skip the painter’s tape. I buy the green FrogTape for $8.48 a roll because the cheap blue stuff always bleeds.

QEEIG Floating Shelves for Wall Bathroom Shelf Bedroom
QEEIG Floating Shelves for Wall Bathroom Shelf Bedroom Kitchen Living punches above its price — 46 buyers rated it 4.5 stars. I would buy it again.
4. Install Floating Shelves Into Wall Studs

Floating shelves look great until they rip out of the wall and drop your books on the floor. I rely on the IKEA LACK series. A 43-inch shelf costs $24.99 and features a clean, bracket-free design. However, the hardware they include isn’t enough. You must secure floating shelves into at least one wall stud, though two is much safer. I use a Zircon stud finder I bought at Walmart for $19.97. Drywall anchors will fail if you put anything heavier than a small picture frame on the shelf. I buy a box of 2-inch threaded wood screws for $6.50 at the hardware store. Drive them directly into the wood framing. I keep my potted plants and heavy ceramic vases on these shelves. Because they attach properly to the studs, I don’t worry about them falling on my head while I sleep. The LACK shelves feel lightweight due to a hollow core, but the mounting bracket is solid steel.
5. Add Indirect LED Strip Lighting Under The Bed

Harsh overhead lights ruin the mood in a bedroom. I prefer indirect lighting. You can install LED strips to create a soft glow that makes the bed look like it’s floating. I use Govee LED strips, which cost about $35 for a 16.4-foot roll on Amazon. Philips Hue is another option, though it’s pricier at around $80. Stick the light strip exactly 2 to 4 inches under the edge of your bed frame, facing the floor. If you stick them facing outward, the individual LED bulbs will blind you when you walk by. Opt for a warm white setting between 2700K and 3000K. The bright blue-white settings cast a harsh glare that looks like a hospital corridor. The adhesive on the back of these strips is notoriously weak. I learned this when my strip fell off after two days. Now, I use small 3M Command light clips spaced every 12 inches to hold the strip permanently in place. A pack of 45 clips costs $9.98 at Target.
6. Install Acoustic Wall Panels For Texture

Bare walls bounce sound around, making a room feel cold and echoey. Acoustic panels fix this while adding a modern 3D texture. Brands like Maeven Art and Inhabit Living manufacture panels from recycled PET felt. They range from $50 to $200 per panel depending on the dimensions. I bought a set of four hexagonal panels from Inhabit Living for $120. They measure 1/2-inch thick and completely stopped the annoying echo in my master bedroom. You mount them using heavy-duty double-sided tape. The recycled PET felt feels dense and slightly rough against your fingers, much like a heavy winter wool coat. It absorbs high-frequency sounds perfectly. Don’t cover the entire wall. A cluster of five or six panels above a dresser acts as a geometric art piece. I tried cutting one panel to fit around an outlet using a utility knife, and the blade slipped, leaving a jagged edge. You need a brand-new, extremely sharp blade to cut PET felt cleanly.

Macrame Wall Hanging Shelf
Macrame Wall Hanging Shelf – Boho Shelves Bedroom Decor | Macrame Wall has been one of the most consistently praised picks in this category. 276 reviewers averaged 4.5/5.
7. Curate A Varied Mirror Wall For Depth

A single small mirror doesn’t do much for a dark room. Grouping multiple mirrors together reflects light and makes a cramped space feel twice as large. You need to mix different shapes to make it work. I combine round, arched, and rectangular mirrors with simple brass or matte black frames. I found a great 24-inch round mirror at TJ Maxx for $39.99 and paired it with two tall, arched mirrors from World Market that cost $79.99 each. The trick is making sure the mirrors reflect something you actually want to look at. If you hang them opposite a messy closet, you just double your visual clutter. Hang them opposite a window to bounce natural sunlight around the room. The frames should be thin, no more than 1 inch wide, so they don’t look heavy. I wipe them down weekly with a 50/50 mix of white vinegar and water in a spray bottle. Commercial glass cleaners leave a blue film that builds up over time. You might also like: 18 Teen Girls Bedroom Ideas You Need to See
8. Avoid The Cluttered Accessory Mistake

It’s tempting to try every craft project you see online. I made this mistake in 2021. I hung a macrame piece, painted an arch, installed three floating shelves, and mounted a neon sign all on one wall. It looked chaotic. A bedroom is supposed to be restful. You should choose exactly one or two impactful DIY projects per room. If you do a bold peel-and-stick wallpaper, keep the art minimal. If you build a massive gallery wall, paint the surrounding walls a quiet, solid color. I took down the neon sign and the macrame, leaving just the painted arch and a single $249 IKEA MALM dresser. The room instantly felt larger and more intentional. When you cram too many small items onto a wall, your eye doesn’t know where to rest. It just reads as a messy pile of stuff. Stick to larger, bolder statements. A single 36-by-48-inch canvas is always better than fifteen tiny 4-by-6-inch frames scattered randomly. You might also like: 20 Farmhouse Bedroom Decor You Need to See
9. Frame Pressed Botanicals In Simple Frames

You don’t need to spend hundreds of dollars on custom art prints. I collect fern fronds and eucalyptus leaves from my neighborhood. I press them inside a heavy textbook lined with parchment paper for three weeks until they are completely flat and dry. Then, I mount them on heavy 140-pound watercolor paper using tiny dabs of acid-free glue. I frame these in IKEA RIBBA frames, which cost $5.99 for the 8×10 size. The stark white matting makes the dried green leaves stand out sharply. You must use acid-free materials, or the leaves will turn a nasty brown color within six months. I lost my first batch of pressed ferns because I used cheap printer paper as the backing. The acid in the paper destroyed the plants. This project costs under $15 total for a set of three frames. Hang them in a vertical line between your closet and the bedroom door to fill an awkward, narrow wall space. You might also like: 15 Brilliant Bedroom Light Fixtures You Haven’t Thought Of

Fixwal Floating Shelves for Wall
A dependable everyday pick — Fixwal Floating Shelves for Wall pulls in 459 ratings at 4.5 stars. Not flashy, just solid.
10. Stretch Fabric Panels For A Custom Look

Wallpaper is expensive, but fabric is cheap. You can frame large pieces of interesting textiles to get a massive pop of color and texture. I visit the clearance bins at Hobby Lobby or Walmart to find fabric remnants. You can often buy a 2-yard piece of heavy linen or printed cotton for under $10. I stretch the fabric tightly over a blank 24-by-36-inch canvas and staple it to the wooden frame using a heavy-duty Arrow staple gun that cost me $19.99. It takes about 50 staples to get the tension right so the fabric doesn’t sag in the middle. The thick woven cotton feels substantial and adds a soft, warm element to the room that a flat paper print simply lacks. I made a pair of these using a mudcloth-inspired print. One negative is that fabric collects dust. I sweep my vacuum’s upholstery brush over the panels once a month to keep them looking clean.
11. Hang Heavy Decor With A French Cleat

Standard picture wire is useless for oversized mirrors or massive wooden art pieces. I tried hanging a 60-pound reclaimed wood headboard piece with heavy-duty D-rings, and it sagged away from the wall immediately. You need a French cleat system. This involves two interlocking metal or wood pieces. You screw one piece into the wall studs and attach the other to your decor. A standard 30-inch aluminum French cleat costs $18.98 at Home Depot and can hold up to 300 pounds safely. The interlocking angle pulls the item flush against the wall so it doesn’t tilt forward. You must use a 24-inch bubble level when installing the wall side of the cleat. If it’s off by even a millimeter, your giant mirror will sit crooked, and you can’t adjust it without drilling new holes. I use a magnetic level that sticks right to the aluminum cleat while I drive the screws in. It makes the job a one-person task.
12. Apply Removable Wall Decals For Renters

If you rent your apartment, you probably can’t paint. High-quality removable wall decals are the best alternative. I use brands like Chasing Paper and Spoonflower. They make non-toxic, repositionable vinyl decals that don’t rip the paint off when you move out. A pack of 50 half-moon shapes from Spoonflower costs about $29. You can arrange them in a grid pattern to mimic the look of expensive wallpaper. The decal vinyl has a smooth, chalky matte finish that doesn’t cast annoying glares under your overhead lights. I applied a set of dark green botanical decals in my sister’s rental last spring. The hardest part is keeping the spacing consistent. I cut a 6-inch square out of cardboard and used it as a spacer block between each decal. Don’t stretch the decals while pulling them off the backing paper. If you stretch the vinyl, the edges will curl up and peel off the wall after a few weeks.

upsimples 6 Pack Wooden Floating Shelves
A dependable everyday pick — upsimples 6 Pack Wooden Floating Shelves pulls in 47 ratings at 4.5 stars. Not flashy, just solid.
13. Backlight Your Art For A High-End Finish

You can make a cheap canvas look like a gallery piece by adding light behind it. I attach thin, battery-operated LED strips to the back edge of my wooden art frames. This creates a halo effect against the wall, adding deep shadows and dimension. I buy the 3-foot Daybetter LED strips for $9.99 on Amazon. They run on three AA batteries, so you don’t have ugly black cords hanging down your wall. Tape the battery pack flat against the bottom back edge of the canvas using heavy-duty Gorilla tape, which costs $6.48 a roll. You must ensure the light bulbs are completely hidden from direct view. If you can see the actual plastic LED strip from the side of the room, it ruins the illusion. I stick the strip exactly 1 inch inward from the outer edge of the frame. I turn these on at night instead of my bedside lamps. The soft, glowing light is perfect for reading.
14. Build A DIY Upholstered Headboard Wall

A standard headboard is boring. Building an upholstered wall that spans the entire width of your bedroom creates a massive focal point. I built one using 1/2-inch plywood panels cut to 24 inches wide by 48 inches tall. I glued a 2-inch thick layer of high-density upholstery foam to the wood, wrapped it in batting, and covered it in a dark navy velvet. The velvet cost $14 a yard at Joann Fabrics. The foam is the expensive part, running about $45 per sheet. You mount these panels side-by-side directly to the wall using the French cleats I mentioned earlier. The deep velvet absorbs light and sound, making the room feel incredibly luxurious. The main drawback is the staple gun work. My hands cramped for two days after shooting 400 staples into plywood. You must pull the fabric extremely tight across the corners, or you end up with messy, wrinkled edges that look terrible in the daylight.
15. Stop Overcommitting To A Single Design Trend

I see people ruin their bedrooms by buying everything from one specific trend. If you cover your walls in shiplap, hang barn doors, and use only galvanized metal signs, your room looks like a themed restaurant. Interior designers warn against overcommitting to one look because it ages terribly. You need to blend complementary styles. I pair traditional oil paintings with sleek, modern black metal sconces. I mix a rustic woven basket with a clean $22.99 acrylic floating shelf from Amazon. This tension makes the room interesting. When I tried doing a 100-percent mid-century modern room, it felt like a museum exhibit. I hated living in it. I broke up the rigid wooden furniture by hanging a large, abstract canvas with soft, messy brushstrokes. Buy pieces over time that actually resonate with you, rather than buying a matching set from a catalog. A collected room always looks more expensive than a matched room.

Mkono Macrame Hanging Shelves Boho Wall Decor Set of 2
Honestly, Mkono Macrame Hanging Shelves Boho Wall Decor Set of 2 Rustic Wood Flo surprised me — sturdier than it looks in the photos, and over 21 buyers gave it 4.5 stars.
16. Upcycle Thrift Store Canvas Art

Large canvases are ridiculously expensive at retail stores. A 36-by-48-inch blank canvas at Michaels costs around $60, even with a coupon. I refuse to pay that. Instead, I go to Goodwill and buy ugly, mass-produced art prints in large sizes for $8 to $15. I take them home and paint over the existing picture with two coats of Liquitex white acrylic gesso. The gesso costs $16.49 for a 16-ounce tub on Amazon. It provides a thick, chalky surface that covers the old image completely. Once it dries, I use leftover wall paint and a cheap 3-inch bristle brush to create heavy, textured abstract shapes. I mix baking soda into the paint to give it a gritty, plaster-like texture. Use a ratio of 1/2 cup baking soda to 1 cup of paint. It dries rock hard and looks like expensive plaster art. The frame is already built, and the canvas is stretched tight. It’s the cheapest way to get massive art.
17. Mount Simple Woven Wall Hangings

Hard frames and glass mirrors can make a room feel cold. Adding a woven wall hanging introduces soft yarn and organic shapes. I buy 4-millimeter single-strand cotton macrame cord from Amazon for $14.99 a spool. Instead of a wooden dowel, I use a 3/4-inch thick copper pipe from Home Depot as the base. A 2-foot piece of copper pipe costs $8.50. The shiny metal contrasts beautifully with the soft, cream-colored cotton. I cut 20 strands of cord, each 6 feet long, and attach them using a basic lark’s head knot. You don’t need to know complex weaving patterns. Just let the thick cords hang down, and trim the bottom into a sharp V-shape using heavy fabric shears. I tried using regular kitchen scissors once, and it chewed the cord into a frayed, messy disaster. Hang the copper pipe on two simple brass nails. It adds instant warmth to a blank corner without requiring power tools.
18. Paint A Color Block Arch Behind Your Nightstand

You don’t need to paint an entire wall to make an impact. Painting a solid arch directly behind your nightstand anchors the furniture and adds a pop of color. I use an 8-ounce Behr paint sample from Home Depot, which costs exactly $5.98. That tiny jar is more than enough for a 3-foot wide arch. To get a perfect curve, I tie a piece of string to a pencil. I tape the other end of the string to the wall, pull it tight, and draw a perfect half-circle. Use a small 1-inch angled brush to cut in the edges slowly. I tried rushing this step on my first attempt and ended up with a wobbly, lopsided circle that drove me crazy. I sanded it down and started over. Fill in the center with a 4-inch mini foam roller. The foam roller leaves a perfectly smooth finish without brush marks. It takes less than an hour and frames your bedside lamps beautifully.
19. Start Your Wall Decor Bedroom DIY With A Plan

The biggest mistake you can make with any wall decor bedroom diy is starting without a visual plan. You buy a mirror, hammer a nail, and hope it works. It rarely does. I map out every single piece of decor using blue painter’s tape directly on the wall. I buy the 1.41-inch wide ScotchBlue tape for $5.49 at Target. I cut strips to the exact dimensions of my frames, shelves, and mirrors, and stick them to the drywall. I leave the tape up for two full days. This lets me see how the arrangement looks in morning sunlight and dark evening shadows. Last year, I taped out a gallery wall and realized the layout blocked the swing of my closet door. The tape saved me from drilling ten useless holes. Plan your spacing, check your stud locations with a reliable scanner, and buy proper hardware. Your bedroom walls are a blank slate, so treat them with a bit of methodical respect.
Fixing your bedroom walls doesn’t require hiring a contractor or spending thousands on designer art. You just need a tape measure, a level, and a clear idea of what you want. I learned most of these lessons by patching holes and scraping off bad adhesive. Skip the cheap plastic anchors and invest in real hardware. Your decor will stay on the wall where it belongs. Pin this list of ideas for your next weekend project, and tackle one wall at a time.
Frequently Asked Questions
How high should I hang my wall decor bedroom diy projects?
The center of your artwork or gallery wall should sit exactly at eye level. For most spaces, this means measuring 59 inches (or 1.5 meters) from the floor to the center of your arrangement.
What is the best way to hang heavy bedroom mirrors?
Skip standard picture wire and drywall anchors. Use a 30-inch aluminum French cleat secured directly into at least two wall studs. This interlocking system can safely hold up to 300 pounds without sagging.
How can I add wall decor to a rental bedroom?
Opt for high-quality removable wallpaper or repositionable vinyl wall decals from brands like Spoonflower. You can also use heavy-duty tension rods to hang large fabric panels without drilling a single hole in the drywall.
What are the trending wall paint colors for 2026?
Cool grays are out. The trend is shifting toward warm, nature-inspired hues. Earthy gray-greens like Valspar’s Warm Eucalyptus and rich, moody red-browns like Glidden’s Warm Mahogany are highly recommended for a cozy bedroom atmosphere.
